
Table of Contents
- 1. What Makes Chemical Drum Blow Molding Different
- 2. Chemical Drum Types and Volume Ranges
- 3. Material Selection: HMWHDPE and Beyond
- 4. Barrier Structure for Aggressive Chemicals
- 5. Why an Accumulator Head Is Mandatory Above 30 Liters
- 6. Parison Wall Thickness Control
- 7. Apollo ABLD Series 20L to 1500L
- 8. Apollo ABLB Series 200ML to 20L
- 9. Mold Design for Chemical Drums
- 10. Cooling and Cycle Time
- 11. UN Certification and Testing
- 12. Requirement to Model Selection Guide
- 13. Downstream Equipment for a Chemical Drum Line
- 14. Common Defects and Fixes
- 15. Production Economics of Chemical Drum Molding
- 16. Service and Support
- 17. Frequently Asked Questions
- 18. Conclusion
Choosing the best EBM machine for chemical drum production is not a question of finding the largest available clamping force or the highest advertised output. It is a question of working backwards from the packaging specification. A chemical drum has to survive a drop from height onto a concrete floor at minus eighteen degrees Celsius while full of liquid, resist stress cracking from surfactants and solvents for years of storage, hold a stack of loaded drums for twenty-eight days without deforming, and in many cases pass a formal United Nations dangerous goods packaging approval before a single unit can legally leave the plant. Every one of those requirements traces back to a specific machine capability: accumulator head volume, parison programming resolution, clamping rigidity, pinch-off geometry, cooling capacity, and shot weight repeatability. Get the machine wrong and no amount of process tuning will recover the certification.
Apollo, a Wanplas factory located in Zhangjiagang near Shanghai, has built automatic extrusion blow molding machines for more than twenty years. The factory operates roughly 8,000 square meters of production space, builds ten machine series covering over eighty models, and has more than 4,000 machines running in over 90 countries. A significant share of that installed base is dedicated to industrial and chemical packaging, from five-liter jerry cans for agrochemical concentrates to 1,000-liter intermediate bulk container inner bottles. This guide walks through the process and material logic of chemical drum blow molding first, then maps that logic onto the Apollo ABLD and ABLB machine ranges so that a buyer can specify a line with confidence rather than guesswork.
What Makes Chemical Drum Blow Molding Different
Chemical drum blow molding differs from ordinary daily-chemical bottle production in four fundamental ways: wall thickness, material class, die head architecture, and the certification testing the finished container must survive. Each difference eliminates a whole category of machine that would otherwise look attractive on a specification sheet.
Difference one: wall thickness is an order of magnitude higher
A one-liter shampoo bottle typically carries a wall of 0.5 to 0.9 millimeters and weighs 30 to 45 grams. A 200-liter L-ring drum carries a nominal wall of 2.8 to 4.5 millimeters in the body and considerably more at the pinch-off and the rolling hoops, and weighs between 8.5 and 11 kilograms. That is roughly a 250-fold increase in shot weight and a five-fold increase in wall thickness. Thick walls change everything downstream: the melt must be delivered fast enough that the outer skin does not freeze before the mold closes, the cooling time scales with the square of wall thickness rather than linearly, and the internal stresses locked into a thick section are far more likely to express themselves as warpage or delayed cracking.
The square-law relationship between wall thickness and cooling time is the single most important economic fact in heavy-wall blow molding. Doubling the wall from 2 millimeters to 4 millimeters does not double the cooling time; it roughly quadruples it. A machine builder who does not size the chilled water circuit, the mold cooling channels, and optionally the internal cooling system for that reality will deliver a machine whose theoretical cycle rate can never be achieved in production.
Difference two: the material is high molecular weight HDPE, not bottle-grade resin
Standard blow molding HDPE for household bottles runs a melt flow rate around 0.7 to 1.2 grams per ten minutes measured at 190 degrees Celsius with a 2.16 kilogram load. Chemical drum resin is high molecular weight HDPE, commonly abbreviated HMWHDPE, and typically sits between 0.2 and 0.4 grams per ten minutes on the same test. That is a melt three to five times stiffer. A stiffer melt resists sag, which is exactly what a large parison needs, but it also demands far more torque from the screw, higher head pressure, larger die gaps, and careful temperature profiling to avoid shear heating and thermal degradation. A machine designed around bottle-grade resin will simply not process HMWHDPE at commercial rates.
Difference three: an accumulator head is not optional
Continuous extrusion works because the parison is short and the drop time is measured in a fraction of a second relative to the mass being handled. Once the parison exceeds roughly one to one and a half kilograms, gravity acts on the hanging melt long enough that the top of the parison thins dramatically while the bottom balloons. This is parison sag, and it is not a defect that can be programmed out with wall thickness control alone, because the sag rate itself depends on how long the parison has been hanging. The accumulator head solves the problem by storing a full shot of melt in a heated reservoir and then pushing it out through the die in a rapid stroke, typically between 0.8 and 4 seconds depending on shot size. The parison exists as a free-hanging body for the shortest possible time.
Difference four: certification testing is destructive and unforgiving
A cosmetic bottle that fails a squeeze test is a quality complaint. A chemical drum that fails a drop test is a regulatory failure that halts shipment of an entire packaging design. The United Nations recommendations on the transport of dangerous goods, implemented through national and regional regulation, require design-type testing that includes a drop test conducted after conditioning the filled container to minus eighteen degrees Celsius or below, a stacking test at a calculated load for twenty-four hours or twenty-eight days depending on the method, a leakproofness test at defined internal air pressure, and for liquids a hydraulic internal pressure test. The container must pass every one of them, and the design type approval is tied to a specific resin, a specific weight, and a specific manufacturing process. Change the machine and the approval may need to be repeated.
Taken together, these four differences define the specification envelope. The machine must handle stiff melt at high throughput, deliver it through an accumulator head with programmable wall distribution, close and hold a mold that is generating substantial internal blow pressure across a large projected area, and cool a thick wall fast enough to make the economics work. That is a different machine class from a bottle line, and the price of getting it wrong is measured in failed certification runs rather than in cosmetic rejects.
Chemical Drum Types and Volume Ranges
Industrial chemical packaging covers a wide spread of container formats, and each format imposes its own combination of volume, wall thickness, weight, and material grade. Understanding where a target product sits in this landscape is the first concrete step in machine selection, because the shot weight determines the accumulator capacity and the accumulator capacity determines the machine frame.
The table below summarizes the main blow molded chemical container families produced on extrusion blow molding equipment, with the typical wall thickness, part weight, and resin grade for each. Figures are representative of common industry practice and will vary with brand specification, stacking height, and the specific dangerous goods class being packed.
| Container type | Volume range | Typical wall thickness | Typical part weight | Typical material | Typical contents |
|---|---|---|---|---|---|
| Small chemical bottle | 200 ML to 5 L | 0.8 to 1.6 mm | 30 to 260 g | HDPE, blow grade, MFR 0.6 to 1.0 | Reagents, cleaners, additives |
| Jerry can, rectangular | 5 to 30 L | 1.6 to 2.6 mm | 280 g to 1.4 kg | HMWHDPE, MFR 0.3 to 0.5 | Agrochemicals, solvents, lubricants |
| Open-top drum | 60 to 220 L | 2.6 to 4.2 mm | 3.2 to 10.5 kg | HMWHDPE, MFR 0.2 to 0.35 | Powders, pastes, viscous chemicals |
| L-ring tight-head drum | 120 to 250 L | 2.8 to 4.5 mm | 7.5 to 11.5 kg | HMWHDPE, MFR 0.2 to 0.3 | Liquid dangerous goods, acids, bases |
| IBC inner container | 640 to 1250 L | 1.8 to 3.0 mm | 14 to 22 kg | HMWHDPE, MFR 0.2 to 0.3 | Bulk liquids inside a steel cage |
| Chemical storage tank | 300 to 1500 L | 4.0 to 9.0 mm | 18 to 55 kg | HMWHDPE, MFR 0.15 to 0.25 | Static storage, dosing tanks |
Reading the table as a machine specification
The part weight column is the most directly actionable number. An accumulator head must be able to store and deliver the full part weight plus the flash allowance in a single stroke. Flash on a heavy-wall drum is not trivial: the top and bottom pinch-off, the handle web, and the neck cut-off together typically add between 18 and 35 percent to the finished part weight, and on complex geometries such as a twin-handle jerry can the figure can exceed 40 percent. A 10-kilogram L-ring drum therefore needs a shot of roughly 12 to 13.5 kilograms, and the accumulator head must be sized accordingly with margin.
Converting shot weight into accumulator volume uses the melt density of polyethylene at process temperature, which is approximately 0.76 kilograms per liter at 190 to 210 degrees Celsius rather than the 0.95 kilograms per liter of the solid resin. A 13-kilogram shot therefore occupies roughly 17 liters of accumulator volume. Adding a working reserve so the accumulator never runs to the bottom of its stroke, a practical head selection for that product would be in the 20-liter class or above. This is why a 200-liter drum program and a 20-liter jerry can program can genuinely be run on the same machine frame, while a 1,000-liter IBC inner container cannot.
Volume versus surface area versus cooling load
A second, less obvious relationship governs cycle time. Doubling container volume increases surface area by only about 1.6 times, but if wall thickness also increases the cooling load rises faster than the surface available to remove it. That is the technical reason large drums have relatively long cycles even on very powerful machines, and it is the reason internal cooling becomes economically compelling above roughly 60 liters. Section ten covers the numbers in detail.
Material Selection: HMWHDPE and Beyond
High molecular weight high density polyethylene is the default material for chemical drums because it combines the melt strength needed to hang a large parison with the environmental stress crack resistance needed to hold aggressive contents for years. Selecting the right grade is a balancing act between processability, stiffness, and crack resistance, and the balance point shifts with container size and contents.
Molecular weight distribution and why bimodal grades dominate
A polyethylene grade with a narrow molecular weight distribution processes smoothly but lacks melt strength, so the parison sags. A grade with a very broad distribution has excellent melt strength but poor surface quality and higher extrusion pressure. Modern drum resins are bimodal: they are polymerized in two reactor stages so that the material contains a distinct low molecular weight fraction, which carries the flow and gives good processability, and a distinct high molecular weight fraction, which carries the long chains that provide melt strength and stress crack resistance. This bimodal architecture is what allows a resin to sit at 0.2 grams per ten minutes on the melt flow test yet still extrude cleanly through a 200-millimeter die at production rates.
For the machine buyer, the practical consequence is that the extruder must be specified for the high viscosity end of the range. Screw designs for HMWHDPE use a lower compression ratio than general purpose screws, typically between 2.2:1 and 2.8:1, with a barrier flight section and a mixing element in the metering zone to homogenize temperature without generating excessive shear. Barrel length is usually 20:1 to 24:1 on continuous machines and can be as low as 18:1 to 20:1 on very large accumulator machines where residence time control matters more than mixing length. The barrel and screw should be bimetallic or nitrided with adequate hardness, because high melt pressure combined with any pigment or filler content accelerates wear.
Key property targets for chemical drum resin
| Property | Typical target for chemical drum grade | Test reference | Why it matters |
|---|---|---|---|
| Melt flow rate | 0.2 to 0.4 g/10min, 190 degrees C, 2.16 kg | ISO 1133 | Controls melt strength and sag resistance |
| High load melt index | 5 to 12 g/10min, 190 degrees C, 21.6 kg | ISO 1133 | Indicates shear thinning and extrudability |
| Density | 0.945 to 0.955 g/cm3 | ISO 1183 | Balances stiffness against crack resistance |
| Environmental stress crack resistance | greater than 1000 hours, F50, 10 percent surfactant | ASTM D1693 or full notch creep test | Prevents delayed cracking in service |
| Tensile yield strength | 23 to 28 MPa | ISO 527 | Resistance to stacking deformation |
| Flexural modulus | 1000 to 1350 MPa | ISO 178 | Panel stiffness, resistance to bulging |
| Notched impact, low temperature | no brittle failure at minus 18 degrees C | ISO 179 Charpy | Cold drop test survival |
| Carbon black or UV package | 2 to 2.5 percent carbon black for outdoor grades | ISO 18553 dispersion | Outdoor storage life |
The stiffness versus crack resistance trade-off
Density and environmental stress crack resistance pull in opposite directions. Raising density increases crystallinity, which raises modulus and yield strength, so the drum resists stacking deformation better and can be made with a thinner wall. But higher crystallinity also concentrates stress at the boundaries between crystalline lamellae, which is precisely where a surfactant or solvent initiates a crack. A resin at 0.960 grams per cubic centimeter will pass a stacking test more comfortably and fail a stress crack test earlier than a resin at 0.948 grams per cubic centimeter.
The industry has settled on the 0.945 to 0.955 range for chemical packaging because it retains enough tie molecules in the amorphous phase to resist crack propagation while delivering acceptable panel stiffness. Where a customer insists on both maximum stiffness and maximum crack resistance, the practical answer is geometry rather than chemistry: add rolling hoops, deepen the base recess, and increase the wall in the panel center rather than pushing resin density upward.
Where polypropylene and other resins fit
Polypropylene appears in chemical packaging where the contents are hot filled, where the container must resist a specific solvent that attacks polyethylene, or where higher rigidity per unit weight is required. Blow molding grade polypropylene with high melt strength is processable on the same machine class provided the screw and temperature profile are adjusted, but its lower impact strength at low temperature makes the minus eighteen degree drop test far more difficult to pass. Where polypropylene is used, the drop test conditioning temperature and the container design must be validated together.
Polyamide, polycarbonate, and other engineering resins are occasionally blow molded for specialty chemical vessels and for automotive fluid reservoirs. Apollo machines process PE, PP, PVC, PA, PC, ABS, PS, EVA, TPU and PETG, so a plant that starts with polyethylene drums and later diversifies into technical containers does not necessarily need a different machine platform, only a different screw, head, and temperature recipe.
Regrind and its limits in a certified drum
Flash from pinch-off and neck cut-off is a large fraction of throughput in heavy-wall molding, and returning it to the process is essential to the economics. However, a container carrying a UN design type approval for dangerous goods must be manufactured from a defined material composition, and the regulation limits the use of recycled material for such packagings. The standard practice is to use in-house production scrap, from the same resin and the same production process, at a controlled and declared percentage. Typical practice runs between 15 and 35 percent in-house regrind for the body layer, with the exact figure fixed in the approved design type documentation. Post-consumer recycled material is generally excluded from dangerous goods packaging unless a specific reconditioned or remanufactured approval route is followed.
From a machine standpoint, running regrind means specifying a grinder sized for wet or thick flash, a dosing unit that blends virgin and regrind gravimetrically rather than volumetrically, and a screw that tolerates the wider bulk density variation that ground flash introduces. Gravimetric blending is strongly preferred for certified drum production because part weight consistency is part of the approval.
Barrier Structure for Aggressive Chemicals
Polyethylene is chemically inert toward acids, bases, salts, alcohols, and most water-based formulations, but it is permeable to non-polar organic molecules. Aromatic hydrocarbons, chlorinated solvents, many agrochemical carrier solvents, and fuel components dissolve into the polyethylene matrix, diffuse through the wall, and evaporate from the outside. The result is content loss, panel paneling as the container develops vacuum, odor complaints, and in regulated markets a failure to meet permeation limits. Three technical routes exist to solve this, and they differ enormously in cost and capability.
Route one: monolayer with heavy wall
The simplest approach is to accept a low level of permeation and compensate by increasing wall thickness and using the highest density resin the crack resistance budget allows. Permeation rate is inversely proportional to wall thickness, so doubling the wall halves the loss rate. This works for mildly aggressive contents, for short storage periods, and for products where the economic value of the lost content is small. It fails for regulated solvent packaging and for any product where a permeation limit is written into the specification.
Route two: surface fluorination
Fluorination treats the polyethylene surface with elemental fluorine diluted in nitrogen, converting the outermost molecular layers into a fluorinated skin with dramatically lower solubility for non-polar molecules. Two variants exist. In-mold fluorination introduces the fluorine and nitrogen mixture as the blowing gas, so the inner surface is treated during the blow step itself with no separate operation. Off-line fluorination places finished containers in a batch chamber and treats all surfaces. In-mold treatment integrates directly into the blow molding cycle and adds no handling, which is why it is the preferred route for high volume jerry can and drum production. It requires a dedicated gas handling system, a scrubber, and specific safety engineering, and the machine must be prepared for it at the design stage rather than retrofitted casually.
Route three: coextruded EVOH barrier layer
The highest barrier performance comes from a coextruded structure with an ethylene vinyl alcohol copolymer layer buried in the wall. EVOH is an outstanding barrier to hydrocarbons and to oxygen, but it is moisture sensitive and does not bond to polyethylene, so it must be sandwiched between adhesive tie layers and protected by polyethylene skins on both sides. The classic architecture is six layers: outer polyethylene, tie, EVOH, tie, regrind, inner polyethylene. The regrind layer is what makes the structure economically viable, because the flash from a coextruded drum contains all six materials and can only be returned into a dedicated regrind layer.
A six-layer coextrusion head is a significant investment and a significant increase in process complexity. It requires multiple extruders with independent throughput control, a layer distribution system that holds the EVOH layer at a consistent 2 to 4 percent of wall thickness across the whole container including the corners and the pinch-off, and much tighter melt temperature control because EVOH degrades at the temperatures polyethylene tolerates comfortably.
| Barrier route | Relative barrier level | Equipment cost level | Process complexity | Suitable contents | Limitations |
|---|---|---|---|---|---|
| Monolayer HMWHDPE | Baseline | Low | Low | Acids, alkalis, salts, water-based formulations, detergents | Unacceptable loss with aromatics and chlorinated solvents |
| Monolayer plus heavy wall | Slightly improved | Low | Low | Mildly aggressive contents, short storage | Higher resin consumption, longer cooling |
| In-mold surface fluorination | High | Medium | Medium | Fuels, aromatic solvents, agrochemical concentrates, xylene carriers | Fluorine gas handling and scrubbing required, inner surface only |
| Off-line batch fluorination | High | Medium | Medium | Same as in-mold, plus small batch or mixed production | Extra handling step, batch logistics, longer lead time |
| Coextruded EVOH, six layer | Very high | Premium | High | Aggressive aromatic and chlorinated solvents, long-term storage, odor-critical products | Flash must go to a dedicated regrind layer, tight temperature window for EVOH |
| Coextruded polyamide barrier | High | High | High | Hydrocarbon fuels, applications with high humidity exposure | Lower oxygen barrier than EVOH, higher processing temperature |
Choosing between fluorination and coextrusion
The decision usually comes down to three questions. First, how aggressive are the contents and how long is the required shelf life? Fluorination handles most agrochemical and fuel applications well; coextruded EVOH is reserved for the hardest cases and for products where odor transfer into a warehouse is unacceptable. Second, how many different products will run on the line? Fluorination is a process setting, while coextrusion is a physical head configuration, so a plant with many short runs and mixed contents often finds fluorination more flexible. Third, what is the regrind strategy? A monolayer fluorinated drum produces flash that returns cleanly into the same material stream, while coextruded flash is a mixed material that only fits the dedicated regrind layer, which caps the regrind percentage the structure can absorb.
Apollo configures both routes. The in-mold fluorination package integrates the gas mixing, dosing, and evacuation sequence into the blow cycle on ABLD and ABLB machines, and the multi-layer head option supports coextruded structures where the application demands the highest barrier level available from a polyethylene container.
Why an Accumulator Head Is Mandatory Above 30 Liters
The accumulator head is the defining component of a chemical drum blow molding machine. Above roughly 30 liters of container volume, no continuous extrusion die head can produce a commercially acceptable part, and understanding exactly why prevents a costly specification mistake.
The physics of parison sag
A parison hanging from a die is a viscoelastic tube under its own weight. The melt at the top carries the weight of everything below it and therefore experiences the highest tensile stress, so it draws down and thins. The melt at the bottom carries almost no load and retains its extruded dimensions, and because the tube is also swelling as it leaves the die, the lower section can actually be thicker than the die gap. The result is a parison whose wall varies continuously along its length in a way that gets worse the longer it hangs.
Sag is proportional to the mass hanging below any given point and inversely proportional to the melt viscosity. For a small bottle parison weighing 60 grams and hanging for 1.2 seconds, the effect is measurable but easily compensated by the wall thickness program. For a 12-kilogram parison, if it were extruded continuously at a realistic throughput of 400 kilograms per hour, the extrusion time alone would be about 108 seconds. Over nearly two minutes of hanging, the top of the parison would thin to a fraction of its intended wall and the bottom would tear off under its own weight long before the mold could close. This is not a tuning problem; it is a physical impossibility.
How the accumulator solves it
An accumulator head decouples melt production from parison formation. The extruder runs continuously at its optimum throughput and fills a heated accumulator chamber. When the chamber holds a full shot, a hydraulically driven plunger pushes the entire charge out through the die in a single rapid stroke. A 12-kilogram shot that would take 108 seconds to extrude continuously is delivered in 2 to 3.5 seconds. Sag still occurs during those seconds, but it is now a small, repeatable, and programmable effect rather than a catastrophic one.
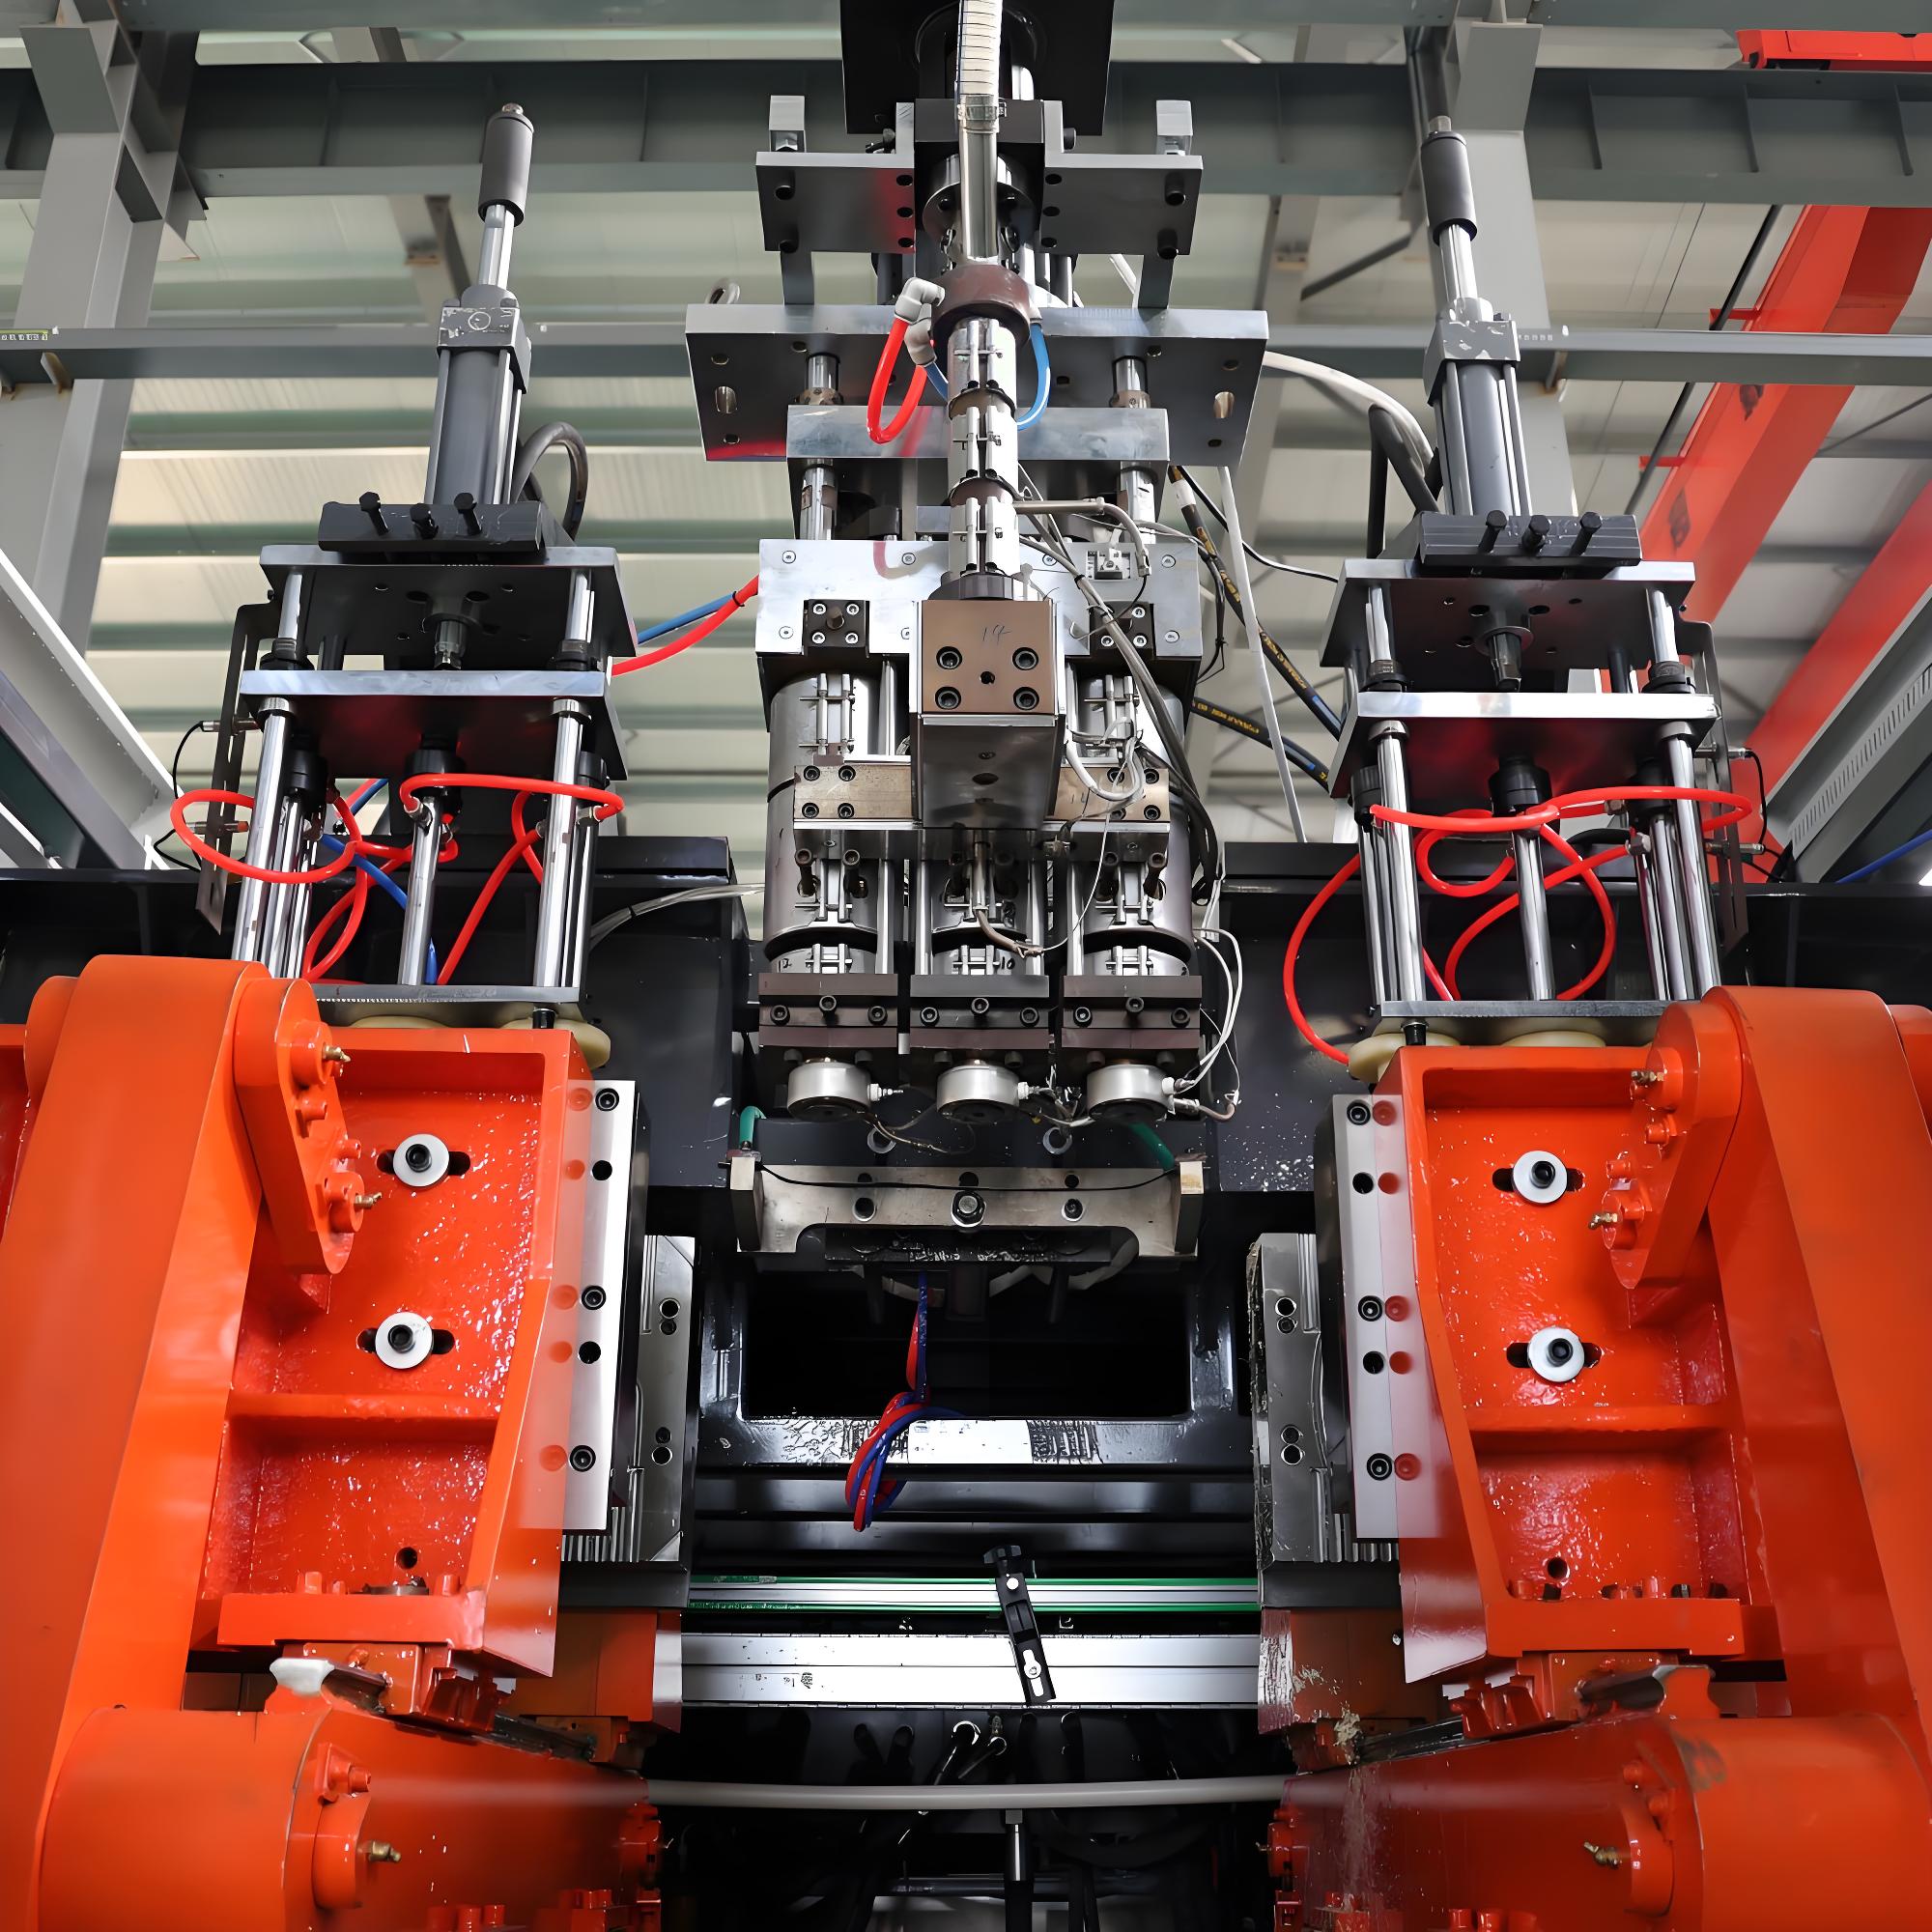
There are two main accumulator architectures. The ram accumulator, sometimes called a plunger accumulator, stores the melt in a chamber offset from or annular to the die and pushes it out with a plunger. The first-in-first-out annular accumulator stores melt in an annular chamber around the mandrel so that the material entering first also exits first, which minimizes residence time variation. First-in-first-out design matters for heat-sensitive materials and for coextruded structures where a stagnant zone would degrade the EVOH layer, and it produces a more uniform melt temperature across the parison wall.
| Criterion | Continuous extrusion head | Accumulator head |
|---|---|---|
| Practical shot weight ceiling | up to about 1.2 to 1.5 kg | 2 kg to more than 60 kg |
| Practical container volume | 200 ML to about 30 L | 20 L to 1500 L |
| Parison formation time | equal to extrusion time, seconds to minutes | 0.8 to 4 s regardless of shot size |
| Sag sensitivity | high and increases with shot weight | low and repeatable |
| Melt residence time uniformity | excellent, no storage | good with first-in-first-out design, moderate with simple ram design |
| Number of cavities practical | up to 8 or more for small parts | typically 1 to 4 |
| Typical die head heating power | low to medium | high, distributed across accumulator body and die |
| Hydraulic demand | clamping and blow pin only | clamping, blow pin, plus high-force accumulator stroke |
| Best suited to | bottles, small jerry cans, high cavitation output | drums, tanks, IBC inner containers, technical parts |
Sizing the accumulator chamber
Accumulator sizing follows a straightforward chain of calculations. Start with the finished part weight. Add the flash allowance, typically 18 to 35 percent for drums with pinch-off at both ends and a formed neck. Convert the resulting shot weight to volume at melt density, approximately 0.76 kilograms per liter for polyethylene at 200 degrees Celsius. Then add a working reserve of 15 to 25 percent so the plunger never bottoms out and so the head can accommodate a heavier future product without replacement.
Worked example for a 200-liter L-ring drum: finished weight 9.5 kilograms, flash allowance 25 percent gives a shot of 11.9 kilograms, melt volume 15.7 liters, plus a 25 percent reserve gives 19.6 liters. A 20-liter accumulator head is the correct selection. The same head, running a 20-liter jerry can at 1.1 kilograms finished weight, is enormously oversized in volume terms but the shot is still delivered accurately provided the plunger position control has adequate resolution, which is why a machine with a well-controlled 20-liter head genuinely covers the 20-to-200-liter range.
Accumulator stroke time and its effect on quality
Faster is not always better. A very fast stroke shears the melt as it passes the die gap, which produces melt fracture, a rough matte surface sometimes described as sharkskin, and in extreme cases visible flow lines. A slow stroke gives a smooth surface but allows more sag and lengthens the cycle. The practical window for a large drum is 2 to 3.5 seconds, tuned so the parison reaches full length just as the mold arrives in position. On multi-layer heads the window narrows because layer distribution is shear sensitive.
Parison Wall Thickness Control
Parison programming is the single most powerful tool available for meeting a drop test specification without adding weight to the whole container. A properly programmed wall puts material where the container will be stressed and removes it from areas that are structurally idle.
Axial wall distribution control
Axial wall distribution control, commonly abbreviated AWDS or referred to simply as parison programming, varies the die gap continuously as the parison is extruded. A servo-driven or hydraulically driven mandrel moves axially inside a conical die, opening or closing the annular gap. The control system divides the parison length into a number of programmable points, and the operator sets a gap value at each point. During the shot, the controller interpolates between points and drives the mandrel accordingly.
Resolution matters. A 20-point programmer is adequate for a simple cylindrical bottle. A 100-point programmer is the practical minimum for a chemical drum, because the container has multiple distinct zones along its height: the neck, the top dome and pinch-off, the upper L-ring, the panel, the lower rolling hoop, the base radius, and the bottom pinch-off. A 200-point programmer gives smoother transitions and allows fine correction of local thin spots discovered during drop testing. On complex geometry such as a stackable jerry can with an integrated handle, the extra resolution directly reduces the number of trial iterations needed to reach approval.
Radial wall distribution control
Axial control changes the gap uniformly around the whole circumference. It cannot correct a container that is thin on one side and thick on another, which is exactly what happens with a non-round container such as a rectangular jerry can or a drum with an off-center neck. Radial wall distribution control, also called partial wall thickness control or PWDS, solves this by deforming the die ring locally. A set of actuators, typically four, six, or eight around the die circumference, flexes a specially designed elastic die ring so the gap becomes larger in some sectors and smaller in others, and this radial profile can itself be varied along the parison length.
For a rectangular jerry can the benefit is immediate. Without radial control, the corners of the container draw more than the flat panels, so the corners come out thin and the panel centers come out thick. The corners are where the drop test energy concentrates. With radial control, extra material is placed in the sectors that will form the corners, and the panel centers are relieved, which typically allows a 6 to 12 percent weight reduction at equal or better drop performance.
Zone strategy for a chemical drum
| Container zone | Wall target relative to nominal | Reason | Control method |
|---|---|---|---|
| Neck and threaded finish | 120 to 150 percent | Torque retention, closure sealing, leakproofness test | Axial points 1 to 8 |
| Top dome and shoulder | 110 to 130 percent | Stacking load path, drop on top edge | Axial plus radial |
| Upper pinch-off weld | 130 to 170 percent local | Weld line is the weakest point in a drop test | Axial spike plus mold land geometry |
| L-ring or rolling hoop | 130 to 160 percent | Handling ring takes full loaded weight during clamping and rolling | Axial spike, tuned narrow |
| Panel and side wall | 100 percent, nominal | Reference zone for stacking stiffness | Axial baseline |
| Corners on rectangular cans | 115 to 140 percent | Highest draw ratio and highest drop impact concentration | Radial sectors |
| Base radius | 125 to 155 percent | Bottom drop test impact zone | Axial spike |
| Bottom pinch-off | 140 to 180 percent local | Most common single point of drop test failure | Axial spike plus pinch land design |
| Handle web | 105 to 125 percent | Handle pull strength, weld quality across the web | Radial sectors plus axial |
Closed-loop weight control
Parison programming sets the shape of the wall distribution; closed-loop weight control keeps the absolute level from drifting. A checkweigher placed after deflashing measures each part or a sampled subset, compares the result with the target, and feeds a correction back to the parison programmer as a global offset. Over a long production run this compensates for resin lot variation, ambient temperature drift, screw wear, and regrind ratio fluctuation. For a certified drum, the approved design type carries a nominal mass with a permitted tolerance, so automatic weight control is not a convenience but a compliance tool. Practical control bands of plus or minus 1.5 percent on a 10-kilogram drum are achievable with a well-tuned loop.
Apollo ABLD Series 20L to 1500L
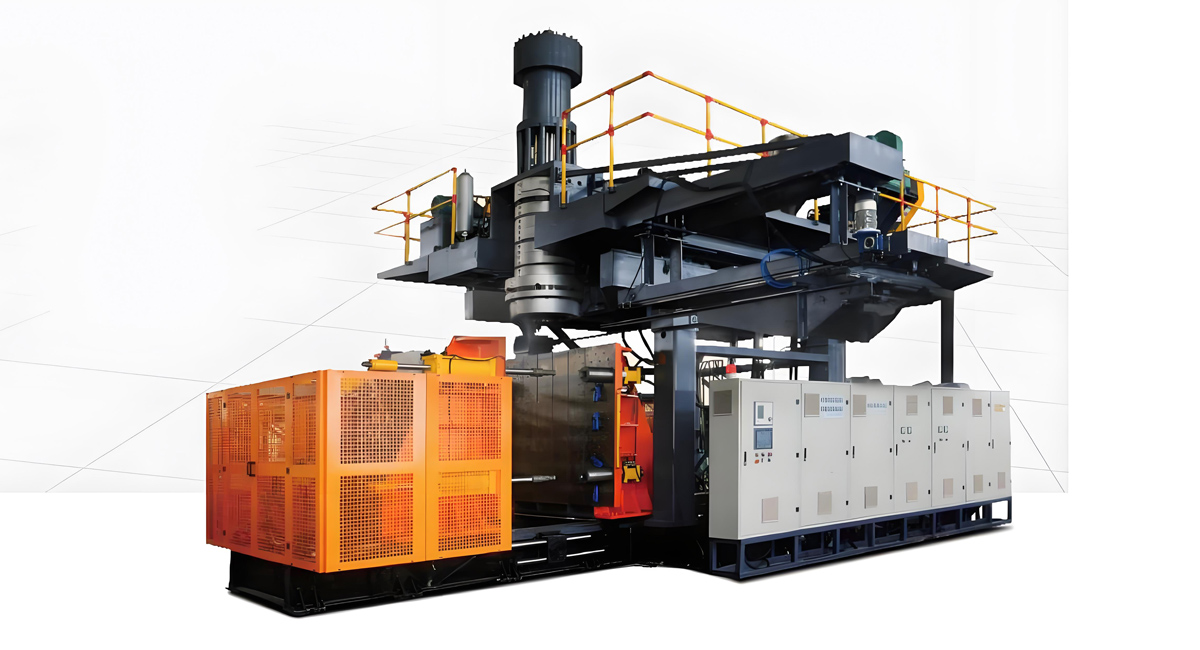
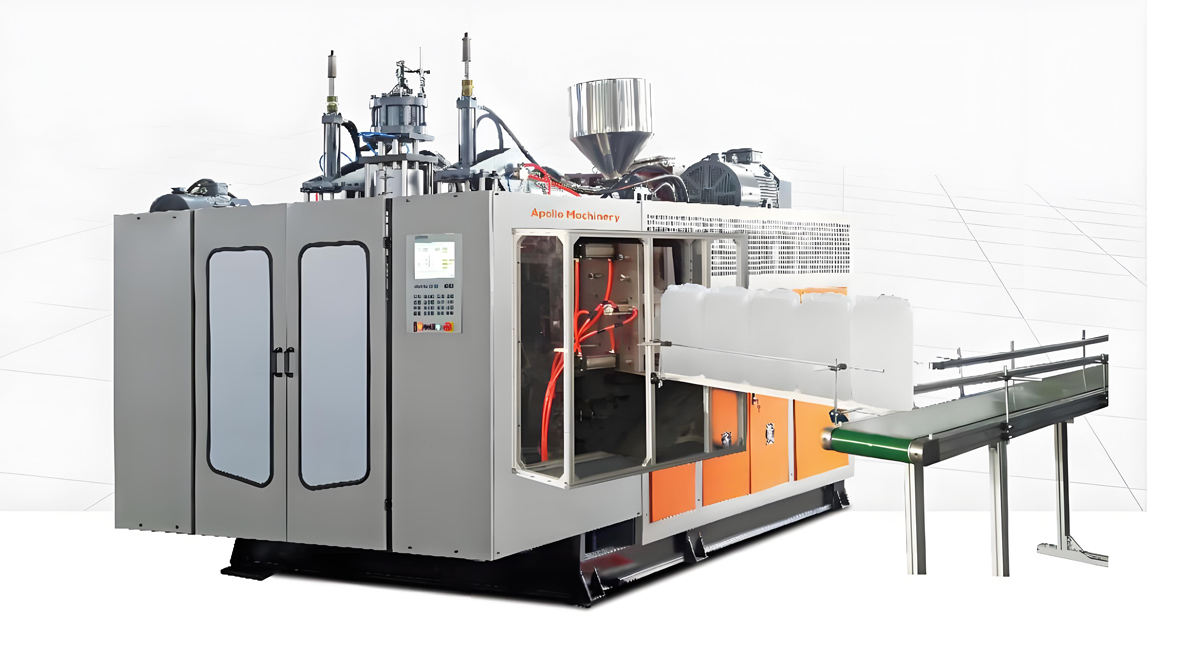
The ABLD series is the Apollo machine range built specifically for large-volume hollow products, and it is the correct starting point for any chemical drum program above 20 liters. All ABLD models are built around a hydraulically driven accumulator head, a heavy-duty clamping unit, and an extruder sized for high molecular weight resin at high head pressure. The series comprises three machine sizes covering the full span from 20-liter jerry cans through 200-liter L-ring drums to 1,500-liter storage tanks.
The design philosophy of the series is continuous duty. A chemical drum plant typically runs three shifts, and a heavy-wall cycle means the clamp, the accumulator plunger, and the hydraulic pack all operate under sustained high load rather than the light intermittent duty of a bottle line. Guide columns, platen thickness, tie bar section, hydraulic cooling capacity, and pump sizing on the ABLD are specified with that duty cycle in mind.
| Specification | ABLD 120 | ABLD 150 | ABLD 200 |
|---|---|---|---|
| Container volume range | 20 to 200 L | 100 to 500 L | 200 to 1500 L |
| Accumulator head capacity | 20 L | 40 L | 80 L |
| Clamping force | 220 kN | 400 kN | 600 kN |
| Screw diameter | 120 mm | 150 mm | 200 mm |
| Screw L/D ratio | 20:1 | 20:1 | 18:1 |
| Maximum shot weight | about 15 kg | about 30 kg | about 60 kg |
| Installed power | about 90 kW | about 160 kW | about 280 kW |
| Machine weight | about 16 t | about 26 t | about 42 t |
| Platen guide system | Reinforced, 2 guide columns | Reinforced, 2 guide columns | Heavy, 4 guide columns |
| Wall thickness control | 100 or 200 point axial, radial optional | 100 or 200 point axial, radial optional | 200 point axial, radial optional |
| Typical cycle, reference product | about 60 to 90 cycles per hour for 20 L | about 25 to 40 cycles per hour for 200 L | about 8 to 15 cycles per hour for 1000 L |
ABLD 120: the chemical drum workhorse
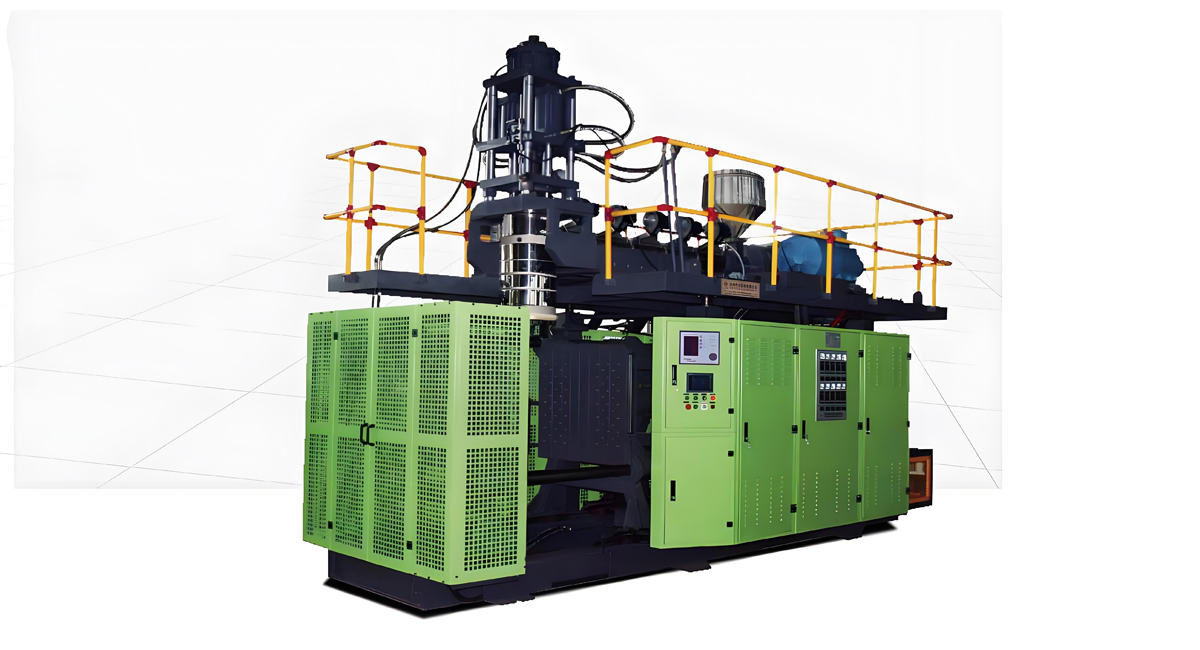
The ABLD 120 is the machine most chemical packaging plants actually need. Its 20-liter accumulator head and 220 kN clamp cover the entire commercial band from 20-liter jerry cans through 60-liter open-top drums to 200-liter L-ring drums, which is where the overwhelming majority of dangerous goods packaging volume sits. The 120-millimeter screw at 20:1 provides the torque and residence time to plasticize HMWHDPE at 0.2 melt flow rate without excessive shear heating, and the head pressure capability supports the small die gaps needed for controlled wall distribution.
ABLD 150: intermediate bulk containers and large drums
The ABLD 150 steps up to a 40-liter accumulator and 400 kN clamp, which brings 1,000-liter IBC inner containers into range along with large-diameter chemical drums and dosing tanks. The 150-millimeter screw sustains the higher throughput required to fill a 40-liter accumulator within a reasonable cycle. Plants producing IBC bottles usually specify this size because the IBC inner container, despite its large volume, has a relatively thin 2 to 3 millimeter wall and therefore a shot weight in the 16 to 22 kilogram range that fits comfortably within the 40-liter head.
ABLD 200: bulk tanks and the largest vessels
The ABLD 200 with its 80-liter head, 600 kN clamp, and four-column platen guidance addresses the heaviest products: 1,000 to 1,500-liter chemical storage tanks, thick-walled process vessels, and large technical parts. At 60 kilograms maximum shot weight the machine works at the upper limit of what extrusion blow molding can economically produce, and cycle times move into the four-to-seven-minute range. Four-column guidance is essential at this size because platen deflection across a large projected area would otherwise open the pinch-off land and produce a weak weld.
Common technical features across the series
All ABLD machines share the same control architecture, with a PLC-based system, a touch screen human machine interface, recipe management so a product changeover recalls the complete parameter set, and data logging for traceability. Temperature control is zoned across the barrel, the adapter, the accumulator body, and the die head, with independent closed loops on each zone, because a temperature gradient across a large accumulator translates directly into a wall thickness gradient around the parison. Hydraulic systems use proportional valves for the accumulator stroke and clamp movement so that acceleration and deceleration profiles can be shaped, which reduces mechanical shock and improves the repeatability of the parison drop.
Apollo ABLB Series 200ML to 20L
Not every chemical container is a drum. A large share of the chemical and agrochemical packaging market sits below 20 liters, in small solvent bottles, one-liter reagent packs, five-liter concentrate containers, and 10 to 20-liter rectangular jerry cans. For that band the ABLB series is the correct machine, and it operates on continuous extrusion with multi-cavity molds, which delivers far higher unit output than an accumulator machine could.
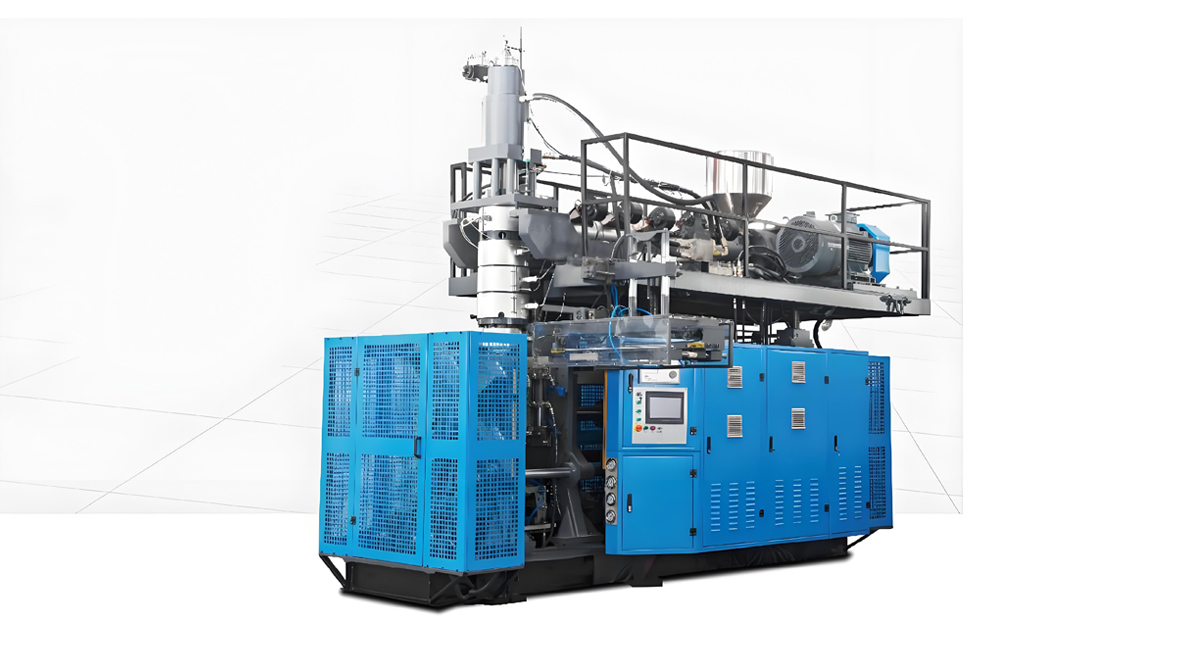
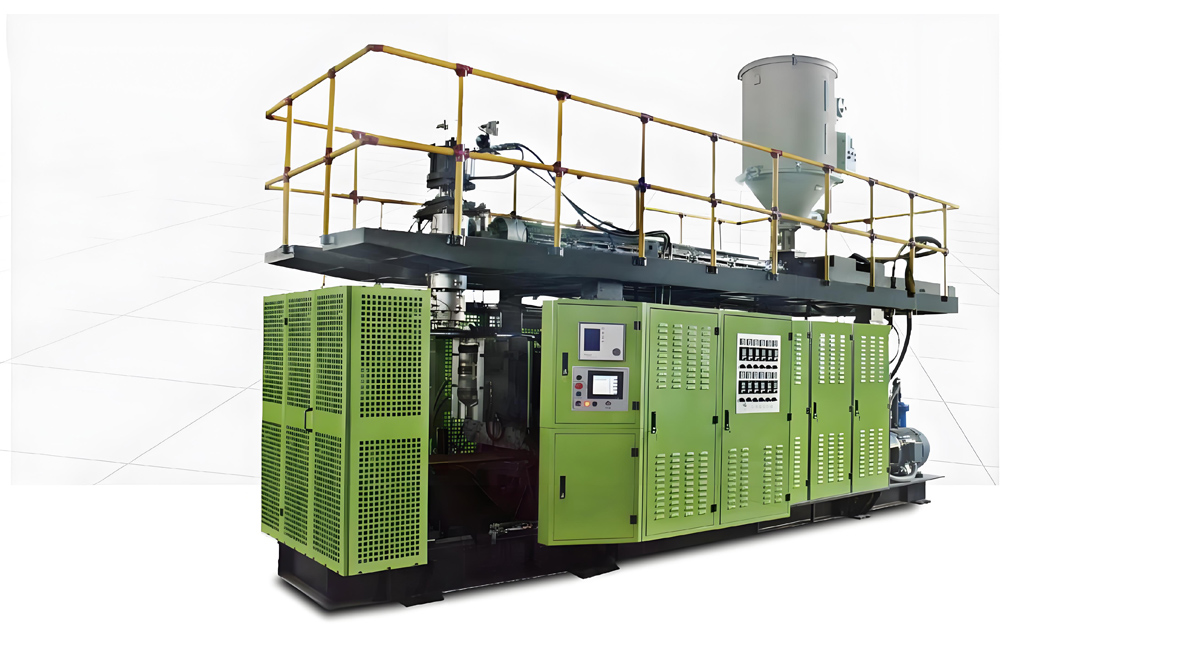
The ABLB series comprises eight machine types covering containers from 200 milliliters to 20 liters. Machines in this series can be configured single-station or double-station, with two, four, six, or more cavities depending on container size, and with the same class of parison programming used on the larger machines. For chemical packaging the important configuration options are a heavier-duty screw suited to higher molecular weight resin, in-mold fluorination readiness, and a die head with enough programming resolution to place material in the handle and corner zones of a jerry can.
| Specification | ABLB 55 | ABLB 65 | ABLB 75 | ABLB 90 |
|---|---|---|---|---|
| Container volume range | 200 ML to 1 L | 500 ML to 5 L | 1 to 10 L | 5 to 20 L |
| Clamping force | 60 kN | 85 kN | 110 kN | 160 kN |
| Screw diameter | 55 mm | 65 mm | 75 mm | 90 mm |
| Screw L/D ratio | 24:1 | 24:1 | 24:1 | 22:1 |
| Dry cycle time | about 2.4 s | about 2.8 s | about 3.2 s | about 4.0 s |
| Stations | single or double | single or double | single or double | single or double |
| Typical cavities, chemical containers | 4 to 8 | 2 to 6 | 2 to 4 | 1 to 2 |
| Installed power | about 26 kW | about 34 kW | about 45 kW | about 62 kW |
| Wall thickness control | 100 point axial | 100 point axial | 100 point axial, radial optional | 100 or 200 point axial, radial optional |
Where the ABLB and ABLD ranges overlap
The 10 to 20-liter band can be produced on either an ABLB 90 running continuous extrusion or an ABLD 120 running an accumulator head, and the correct choice depends entirely on volume and wall thickness. If the product is a 20-liter jerry can at 900 grams with a standard wall and the plant needs high annual output, the ABLB 90 with a double-station configuration produces more containers per hour at lower energy per part. If the same nominal 20-liter can must carry a 2.6-millimeter wall for a demanding UN packing group and weighs 1.4 kilograms, the parison approaches the sag limit of continuous extrusion and the ABLD 120 becomes the safer specification. The dividing line in practice sits around 1.2 kilograms of shot weight.
Application industries for the Apollo range
Apollo machines serve eight main application sectors: food and beverage, daily chemical products, the chemical industry, building materials, medical and pharmaceutical, automobile production, transportation, and cultural and sports goods. Within the chemical industry sector specifically, the installed base covers agrochemical concentrate jerry cans with fluorinated inner surfaces, lubricant and engine oil containers from one to twenty liters, industrial detergent and surfactant drums, acid and alkali storage containers for water treatment plants, L-ring drums for solvent distribution, IBC inner bottles for bulk chemical logistics, and dosing tanks for on-site chemical handling. In building materials the same machine class produces adhesive and admixture containers; in transportation it produces fuel cans and fluid reservoirs.
Mold Design for Chemical Drums
A chemical drum mold is a different engineering object from a bottle mold. It handles far more heat, it must generate a structurally sound weld at the pinch-off, and it operates under high clamping load for extended cycles. Mold design decisions determine whether the container passes its drop test as much as machine settings do.
Mold material selection
Two material families dominate. Aluminum alloy in the 7075 class offers thermal conductivity roughly four to five times that of tool steel, which shortens cooling time substantially on heavy-wall parts, and it is far easier to machine, which reduces mold lead time and cost. Its limitation is surface hardness: aluminum wears at the pinch-off land and at any sliding interface, and it can deform under repeated high clamp force if the mold is not adequately backed.
P20 pre-hardened tool steel offers durability and precise pinch-off geometry retention over very long production runs, at the cost of longer cooling and higher mold weight. The common industry solution is a hybrid: an aluminum mold body for cooling performance with hardened steel inserts at the pinch-off lands, the neck area, and any moving elements. For chemical drum production, where the pinch-off weld is the critical quality feature and where the mold may run continuously for years, steel inserts at the pinch-off are strongly recommended regardless of the body material.
| Mold construction | Relative cooling performance | Relative durability | Relative cost | Best application |
|---|---|---|---|---|
| 7075 aluminum, full body | Very high | Medium | Low to Medium | Short to medium runs, prototype and trial molds, thick wall parts |
| 7075 aluminum with steel pinch inserts | High | High | Medium | Standard choice for chemical drums and jerry cans |
| P20 steel, full body | Medium | Very high | High | Very long runs, complex slides, high-precision necks |
| Beryllium-free copper alloy inserts | Very high, localized | Medium | High | Cooling hot spots such as handle webs and thick radii |
Cooling channel layout
Cooling is the dominant term in heavy-wall cycle time, so channel layout deserves real engineering attention rather than a default drilling pattern. The guiding principles are consistent: channel diameter typically 10 to 14 millimeters for drum molds, channel centerline distance from the cavity surface between one and one and a half times the channel diameter, and channel pitch between two and three times the diameter. Closer spacing gives faster and more uniform cooling but weakens the mold structure and increases machining cost.
Flow must be turbulent to transfer heat effectively. Laminar flow in a cooling channel transfers only a fraction of the heat that turbulent flow does, so the circuit must be designed for a Reynolds number above roughly 4,000 at the design flow rate, and long serial circuits must be split into parallel loops so that the water temperature rise from inlet to outlet stays within two to three degrees Celsius. A circuit that heats up by eight degrees along its length produces a container that cools unevenly and warps.
Special attention goes to the pinch-off area and to any thick radius. These zones hold the most material and cool last, and if they are not actively cooled the operator is forced to extend the whole cycle to accommodate one local hot spot. Dedicated cooling loops close to the pinch-off inserts, and conductive inserts under thick radii, pay for themselves quickly.
Pinch-off geometry: the most critical detail
The pinch-off is where the two halves of the parison are squeezed together and welded as the mold closes. In a drop test, this weld is almost always the first thing to fail. Three geometric parameters control weld quality.
The pinch land is the narrow flat that actually compresses the melt. A land that is too wide cools the melt before it can knit, producing a cold weld with a visible line and low strength. A land that is too narrow cuts through the melt and leaves a thin, weak joint. Practical land width scales with wall thickness: roughly 0.6 to 1.2 millimeters for a 2-millimeter wall, and 1.2 to 2.2 millimeters for a 4-millimeter wall.
The relief angle behind the land determines how the displaced material flows into the flash pocket. A typical included angle between 15 and 30 degrees allows the excess melt to escape cleanly while keeping enough back pressure at the land to force the two melt surfaces together. Too steep and the flash tears; too shallow and the weld is starved.
The flash pocket depth must accommodate the displaced volume without the mold halves bottoming out on the flash rather than on the parting line. If the pocket is undersized, the effective clamping force is consumed by compressing flash instead of holding the pinch land closed, and the weld degrades progressively as the mold heats up during a run.
Venting
Air trapped between the parison and the cavity wall prevents the melt from replicating the mold surface, producing a matte, mottled, or dimpled appearance and, more seriously, a local reduction in wall contact that slows cooling. Drum molds are vented through sintered porous inserts in flat panel areas, through fine slots at the parting line typically 0.02 to 0.05 millimeters deep, through vent pins at the deepest points of embossed logos and lettering, and through the base area where the last air is displaced. Because a drum has large flat panels, sintered venting inserts in the panel centers are usually necessary; slot venting alone at the parting line cannot evacuate the center of a large flat face.
Forming the L-ring and rolling hoops
The L-ring on a tight-head drum and the rolling hoops on the body are not decorative. The L-ring is the interface for automated drum handling equipment and takes the entire loaded weight of the drum when it is lifted by a parrot-beak clamp. The rolling hoops carry the drum when it is tilted and rolled, and they stiffen the panel against bulging under stacking load.
Forming them well requires a combination of three measures. First, an axial wall thickness spike so extra material arrives at the ring position. Second, generous radii in the mold so the melt can flow into the ring section without excessive local thinning, since a sharp internal corner will always draw thin. Third, adequate cooling in the ring section because it is a thick zone that would otherwise dominate the cycle. Where the design permits, a slightly asymmetric ring profile with a larger radius on the draw side improves material distribution measurably.
Cooling and Cycle Time
Cooling is where heavy-wall blow molding economics are won or lost. In a 200-liter drum cycle, cooling typically accounts for 65 to 80 percent of the total cycle time, so a 30 percent reduction in cooling time translates almost directly into a 20 to 25 percent increase in plant output from the same machine and the same floor space.
Why cooling scales with the square of wall thickness
Heat conduction out of a plastic wall follows a diffusion relationship in which the time required to reach a given core temperature is proportional to the square of the wall thickness divided by the thermal diffusivity of the material. Polyethylene has a thermal diffusivity around 0.15 to 0.22 square millimeters per second at process conditions, which is very low compared with metals. The practical consequence is stark: a 1-millimeter bottle wall reaches ejection temperature in a few seconds, a 2-millimeter wall takes roughly four times as long, and a 4-millimeter drum wall takes roughly sixteen times as long. No amount of colder mold water changes the exponent; it only changes the coefficient.
External cooling: what mold water can and cannot do
External cooling removes heat only through the outer surface, because the inside of the container is filled with the air used to blow it, and stagnant air is an excellent insulator. Mold water temperature for chemical drum production is typically held between 8 and 12 degrees Celsius. Going colder is possible but rapidly runs into condensation on mold surfaces and on the machine frame, which causes surface defects and corrosion, and the marginal cycle gain shrinks because the limiting resistance is conduction through the plastic, not convection at the mold face.
The chiller must be sized for the real heat load. A useful rule of thumb is that each kilogram of polyethylene processed per hour requires approximately 0.6 to 0.8 kilowatts of chiller capacity to remove the enthalpy difference between melt temperature and ejection temperature, plus an allowance for hydraulic oil cooling. A line running 400 kilograms per hour therefore needs roughly 240 to 320 kilowatts of process cooling for the mold circuit alone. Undersizing the chiller is one of the most common causes of a new line failing to reach its quoted output.
Internal cooling: the biggest single cycle improvement available
Internal cooling replaces the stagnant blow air inside the container with a continuous flow of cold, dry, conditioned air. Cold air enters through the blow pin, sweeps the inside surface, and exhausts through a second port. Because the inner surface now participates in heat removal, the effective cooling path is halved: instead of conducting the full wall thickness outward to the mold, heat travels from the mid-plane outward in one direction and inward in the other.
The measured benefit on heavy-wall containers is a cycle reduction between 25 and 40 percent, with the larger figures on the thickest walls where the square-law penalty is worst. The system requires a compressed air dryer capable of a low dew point, typically minus 30 to minus 40 degrees Celsius, because moisture condensing inside the container would compromise the product and could corrode the blow pin. It also requires a heat exchanger or vortex arrangement to bring the air down to the working temperature, additional blow pin porting, and an exhaust circuit that maintains blow pressure while allowing flow.
Internal cooling is generally not economic below about 30 liters, becomes attractive between 30 and 60 liters, and is close to mandatory above 100 liters for any plant competing on cost. A secondary benefit is reduced post-mold shrinkage and warpage, because the container leaves the mold with a more uniform temperature through the wall rather than with a hot core that continues to shrink after ejection.
| Container | Nominal wall | Part weight | Cycle, external cooling only | Cycle, with internal cooling | Typical machine |
|---|---|---|---|---|---|
| 5 L jerry can | 1.6 mm | 280 g | about 22 s | about 18 s | ABLB 75 |
| 20 L jerry can | 2.2 mm | 950 g | about 48 s | about 36 s | ABLB 90 or ABLD 120 |
| 60 L open-top drum | 3.0 mm | 3.6 kg | about 105 s | about 72 s | ABLD 120 |
| 120 L L-ring drum | 3.4 mm | 6.4 kg | about 135 s | about 92 s | ABLD 120 |
| 200 L L-ring drum | 3.8 mm | 9.5 kg | about 165 s | about 110 s | ABLD 120 or ABLD 150 |
| 1000 L IBC inner container | 2.4 mm | 17.5 kg | about 195 s | about 135 s | ABLD 150 |
| 1500 L storage tank | 6.5 mm | 48 kg | about 420 s | about 280 s | ABLD 200 |
The figures above are indicative for HMWHDPE at 8 to 12 degree mold water with a well-designed cooling circuit. Actual cycles depend on mold quality, resin grade, ambient conditions, and the ejection temperature the downstream handling can tolerate. They are presented so a buyer can sanity-check an output calculation before committing to a capacity promise.
Ejection temperature and post-mold handling
A container can be ejected before it is fully cooled provided the outer skin is rigid enough to hold shape and the handling equipment does not distort it. Practical ejection at a surface temperature around 55 to 65 degrees Celsius is common, with the core still considerably hotter. The trade-off is post-mold shrinkage and possible panel distortion during conveying. For a certified drum whose dimensions are part of the approval, ejecting too early is a false economy, and a cooling fixture or a controlled cooling conveyor is a better solution than pushing the mold cycle.
UN Certification and Testing
A plastic drum intended for dangerous goods must carry a UN design type approval. The approval is granted against a specific design: a defined resin, a defined nominal weight, a defined geometry, and a defined manufacturing process. The manufacturer produces sample containers, an accredited laboratory performs the prescribed tests, and the approval certificate authorizes a UN marking on the container. Understanding which test stresses which part of the process is what allows a molder to design a container that passes the first time.
The drop test
The drop test is the most demanding requirement and the most common cause of failure. Containers are filled to the specified degree, conditioned to minus eighteen degrees Celsius or lower for polyethylene packagings, and dropped onto a rigid, non-resilient, flat, horizontal surface. Drop height depends on packing group: the highest drop height applies to packing group I, an intermediate height to packing group II, and the lowest to packing group III, with the exact heights also depending on the relative density of the contents. Multiple orientations are required, and for a drum the critical orientations are a flat drop on the base, a drop on the chime or the most vulnerable point of the top, and a diagonal drop onto the base chime.
Cold conditioning is what makes the test hard. Polyethylene becomes progressively less ductile as temperature falls, and a weld line that behaves ductilely at room temperature can fracture in a brittle manner at minus eighteen degrees. This is why pinch-off weld quality dominates drop test outcomes and why the process parameters that govern weld quality, namely melt temperature at the pinch land, mold closing speed, and pinch land geometry, receive so much attention.
The stacking test
The stacking test verifies that a drum at the bottom of a warehouse stack does not collapse. The applied load is calculated from the total mass of identical packages that could be stacked to a height of three meters, applied to the top of the test container. The test may be performed either by placing the calculated load for twenty-four hours, or by using a dynamic compression testing machine, and for plastic packagings a twenty-eight-day test at ambient temperature not below forty degrees Celsius is specified to account for creep. Polyethylene creeps, so a container that passes a short-duration load test can still deform over weeks.
Stacking performance is a stiffness problem, which makes it a geometry and wall distribution problem. The load path runs from the top chime, down the panel, into the base. Rolling hoops act as circumferential stiffeners that prevent the panel from buckling outward. A panel wall that is thin because material migrated into the base during blowing will bulge, and bulging is the failure mode that most often shows up at day fourteen of a twenty-eight-day test.
Leakproofness and hydraulic pressure tests
The leakproofness test applies internal air pressure while the container is submerged or otherwise monitored, and requires that no leakage occurs. Pressure levels depend on packing group, with the most stringent level applying to packing group I. The hydraulic internal pressure test applies a higher liquid pressure for a defined duration, typically five or thirty minutes depending on the method used, and again the level depends on packing group and on the vapor pressure of the intended contents. Both tests interrogate the closure interface, the neck finish geometry, and any pinhole or thin spot in the weld.
| Test | What it stresses | Dominant failure mode | Process control point | Machine capability required |
|---|---|---|---|---|
| Drop test at minus 18 degrees C | Pinch-off weld, base radius, corners | Brittle crack along the bottom weld | Melt temperature at pinch land, mold close speed, local wall spike | Accumulator head with fast stroke, 100 to 200 point parison programming, proportional clamp control |
| Stacking test, 24 h or 28 days | Panel stiffness, chime, base | Panel bulge and progressive creep | Panel wall consistency, rolling hoop definition | Stable shot weight, closed-loop weight control, radial wall control on non-round shapes |
| Leakproofness test | Closure interface, weld integrity | Pinhole at pinch-off, thread deformation | Neck calibration, blow pressure and timing | Precise neck calibration blow pin, repeatable blow pressure profile |
| Hydraulic internal pressure test | Whole wall, weld, neck | Weld separation, panel yield | Minimum wall in the thinnest zone | Parison programming resolution, wall thickness verification |
| Chemical compatibility and permeation | Material and barrier layer | Weight loss, stress cracking, paneling | Resin grade, barrier route, layer thickness | In-mold fluorination package or multi-layer coextrusion head |
| Vibration test | Closure, chime, handle | Loosening, fatigue crack at handle web | Handle web weld quality | Radial wall control at the web, controlled pinch geometry |
Production control after approval
The design type approval is only the beginning. The manufacturer must operate a quality assurance program that ensures every production drum conforms to the approved design type. In practice this means documented control of resin grade and supplier, controlled and recorded regrind percentage, continuous part weight monitoring with defined action limits, periodic wall thickness measurement at defined points using ultrasonic gauges or cut-section measurement, routine leak testing, and periodic re-testing of production samples. A machine that records its own parameters and part weights makes this documentation burden far lighter, which is a real and often overlooked reason to specify data logging on a drum line.
Requirement to Model Selection Guide
The table below maps concrete production requirements onto the Apollo machine range. It combines container volume, target daily output, and barrier requirement into a recommended model and configuration. Daily output assumes a three-shift operation at roughly 20 productive hours per day with realistic changeover and maintenance allowance.
| Container | Target daily output | Barrier requirement | Recommended model | Recommended configuration |
|---|---|---|---|---|
| 5 L jerry can | up to 8,000 pcs | None, water-based contents | ABLB 75 | Double station, 2 cavity, 100 point axial control |
| 5 L jerry can | up to 8,000 pcs | Solvent barrier needed | ABLB 75 | Double station, 2 cavity, in-mold fluorination package |
| 20 L jerry can, standard wall | up to 3,500 pcs | None | ABLB 90 | Double station, 1 or 2 cavity, radial wall control for corners |
| 20 L jerry can, UN packing group II | up to 1,600 pcs | Fluorination | ABLD 120 | Accumulator head, 200 point axial plus radial, fluorination, internal cooling |
| 60 L open-top drum | up to 1,000 pcs | None to fluorination | ABLD 120 | 20 L head, internal cooling, deflashing station, leak tester |
| 120 L L-ring drum | up to 780 pcs | Fluorination | ABLD 120 | 20 L head, internal cooling, in-line weighing, take-out robot |
| 200 L L-ring drum | up to 650 pcs | Fluorination | ABLD 120 | 20 L head at full capacity, internal cooling mandatory, closed-loop weight control |
| 200 L L-ring drum | up to 650 pcs | Coextruded EVOH | ABLD 150 | Six-layer coextrusion head, dedicated regrind extruder, internal cooling |
| 200 L drum, high volume | above 900 pcs | Any | Two ABLD 120 lines | Parallel lines give redundancy and mold flexibility versus one larger machine |
| 1000 L IBC inner container | up to 500 pcs | None to fluorination | ABLD 150 | 40 L head, internal cooling, 200 point axial control, heavy take-out |
| 1000 L IBC inner container | up to 500 pcs | Coextruded EVOH | ABLD 150 | Six-layer head, tight melt temperature control, dedicated regrind layer |
| 1000 to 1500 L storage tank | up to 250 pcs | None | ABLD 200 | 80 L head, 4 column platen guidance, internal cooling, heavy handling |
| Mixed 5 to 200 L program | variable | Mixed | ABLD 120 plus ABLB 75 | One accumulator line for drums, one continuous line for small containers |
How to use this table in a real project
Start with the largest and heaviest container in the planned program, because that determines the machine frame. Then check whether the smallest container in the program is efficient on the same machine; if the smallest product would run at a small fraction of the accumulator capacity and represents a large share of volume, a second smaller machine is usually more economic than forcing everything through one large frame. Finally, decide the barrier route before ordering the head, because converting a monolayer head to coextrusion after delivery is not a simple retrofit.
Downstream Equipment for a Chemical Drum Line
A chemical drum blow molding machine is only the center of a production cell. The downstream equipment determines whether the plant achieves the machine’s theoretical output with consistent, certifiable quality, and on heavy parts the handling equipment is often the practical bottleneck rather than the mold.
Take-out robot and part handling
A 10-kilogram drum leaving the mold at 60 degrees Celsius cannot be handled manually at production rates, and a soft, hot container is easy to deform. A servo take-out robot grips the part, usually by the neck and the flash tail, lifts it clear of the clamp area, and places it on a conveyor or directly into a deflashing fixture. On large parts a two-axis or three-axis unit with vacuum or mechanical gripping is standard, and the gripper must be designed to avoid contacting the panel surfaces that are still soft.
Robot cycle time must be shorter than the mold open interval or it lengthens the cycle. On ABLD machines the take-out sequence is coordinated with clamp movement in the machine control so the robot begins its approach as the mold opens rather than after it has fully opened.
Deflashing
Deflashing removes the top and bottom pinch tails, the handle web slug, and the neck cut-off. Three approaches are used. Manual deflashing with a knife is only viable at very low volumes and produces inconsistent edges. Semi-automatic punch fixtures use a pneumatic or hydraulic press with a shaped punch that shears the flash off in one stroke, which is the standard for medium volume drum production. Fully automatic in-line deflashing integrates the punch into the take-out path so the part leaves the cell already trimmed.
Deflashing while the part is still warm gives a cleaner break and lower punch force, but too warm and the flash tears rather than shears, leaving a ragged edge. The practical window is a part surface temperature around 45 to 60 degrees Celsius. Recovered flash goes directly to a grinder positioned close to the cell to avoid handling and contamination, and the ground material is conveyed back to the gravimetric blender.
In-line weighing
A checkweigher in the part path serves two purposes. It rejects any container outside the approved weight tolerance, which is a certification requirement, and it feeds the closed-loop weight control described earlier. For a certified drum the weigher should be capable of resolving at least 0.2 percent of nominal mass and should log every reading with a timestamp and a machine identifier for traceability.
Leak testing
Every container intended for liquid contents should be leak tested, and for dangerous goods packaging one hundred percent leak testing is the norm rather than a sample. The common method is pressure decay: the container is sealed at the neck, pressurized with air to a defined test pressure, allowed to stabilize, and then monitored for pressure drop over a fixed interval. The test pressure and duration are set so that a defect capable of causing a field leak is detected reliably without false rejects from thermal effects.
Two practical details matter. First, the container must be thermally stable before testing, because a part that is still cooling will show a pressure drop from gas contraction that looks like a leak. A dwell conveyor between deflashing and leak testing solves this. Second, the seal fixture must grip the neck without deforming it, otherwise the test itself creates the defect it is looking for.
Surface treatment and decoration
Polyethylene has low surface energy and will not accept printing ink or adhesive labels reliably without treatment. Flame treatment or corona treatment raises the surface energy to the 38 to 44 dyne per centimeter range required for good ink adhesion. Flame treatment is the more common choice for three-dimensional containers because it follows contours more easily than a corona electrode array. Treatment should be applied shortly before printing or labeling, because the effect decays over days.
Screen printing and pad printing are used for direct decoration; in-mold labeling is possible but less common on heavy drums than on bottles. For dangerous goods the UN marking itself is usually embossed into the mold so it cannot be removed, and the batch and date coding is applied by an inkjet or laser coder in line.
Post-mold cooling and palletizing
Containers ejected warm continue to shrink. Stacking them immediately can lock in distortion. A cooling conveyor or a controlled dwell area allows the part to equalize before palletizing. For large drums, nesting fixtures and automated palletizing reduce labor and prevent handling damage to the L-ring, which is a functional surface and must not be scuffed or deformed.
Common Defects and Fixes
The defect catalog for heavy-wall chemical containers is short but each item has multiple possible causes. The table below organizes the most frequent problems by symptom, likely cause, and corrective action, ordered roughly by how often they appear in a new drum program.
| Defect | Likely cause | Corrective action |
|---|---|---|
| Wall thickness deviation along height | Parison sag during a long accumulator stroke; parison program not matched to the actual draw ratio; die or mandrel temperature gradient | Shorten stroke time, re-profile the axial program with more points in the transition zones, equalize die head zone temperatures, verify mandrel centering |
| Wall thickness deviation around circumference | Die and mandrel not concentric; uneven head heating; non-round container drawing unevenly | Re-center the die using a static parison check, correct heater zone imbalance, add radial wall control for non-round shapes |
| Pinch-off weld failure in drop test | Melt too cold at the pinch land; pinch land too wide; insufficient local wall; mold closing too slowly; flash pocket too shallow | Raise die zone temperature 5 to 10 degrees, narrow the pinch land, add an axial thickness spike at the weld position, increase mold close speed in the final travel, deepen the flash pocket |
| Brittle crack at base radius in cold drop test | Thin base radius from excessive draw; resin with insufficient low temperature impact; overly cold mold in the base zone | Add a wall spike in the base zone, increase base radius in the mold, verify resin low temperature impact data, moderate base cooling |
| Warpage and out-of-round body | Uneven cooling between mold halves or between zones; ejection too early; uneven wall causing differential shrinkage | Balance cooling circuits and verify equal flow rates, extend cooling or add internal cooling, correct the wall distribution, add a post-mold cooling fixture |
| Panel bulge in stacking test | Panel wall below target; rolling hoop under-formed; resin density or modulus too low | Raise panel wall in the program, sharpen hoop definition in the mold and add a local thickness spike, review resin grade for higher flexural modulus |
| Surface orange peel or matte patches | Melt fracture from excessive shear during a fast stroke; trapped air from inadequate venting; mold surface too cold; blow pressure too low | Slow the accumulator stroke slightly, raise melt temperature, add sintered vents in panel centers, raise mold surface temperature locally, increase blow pressure and check the pressure rise rate |
| Part weight fluctuation | Regrind ratio drifting with volumetric dosing; inconsistent regrind bulk density; accumulator plunger position drift; screw wear | Switch to gravimetric blending, screen and control regrind particle size, calibrate plunger position feedback, enable closed-loop weight control, inspect screw and barrel clearance |
| Black specks and streaks | Degraded melt in accumulator dead zones; contaminated regrind; overheated die zones | Purge and inspect the accumulator for stagnant areas, prefer a first-in-first-out head design, clean and screen the regrind stream, reduce die zone temperature and residence time |
| Neck thread deformation and closure leakage | Blow pin calibration mismatch, neck too hot at calibration, insufficient neck wall | Verify blow pin dimensions against the closure specification, add neck cooling, raise the neck wall in the parison program |
| Handle web tearing | Insufficient material at the web, poor weld across the handle pinch, sharp mold geometry | Use radial wall control to feed the web sector, increase the web pinch land contact, add radii at the web transition |
| Content loss and paneling in service | Permeation of non-polar contents through a monolayer wall | Add in-mold fluorination or move to a coextruded EVOH structure, verify barrier layer continuity at corners and pinch-off |
A disciplined approach to defect solving
The temptation on a new drum program is to change several parameters at once. That destroys the information content of the trial. The disciplined sequence is to first verify the mechanical baseline, meaning die centering, mold alignment, clamp parallelism, and cooling flow balance, then establish a stable thermal state by running long enough for the head and mold to equalize, then adjust one variable at a time with enough parts between changes to see a real effect. On a 150-second cycle, patience is expensive but guessing is more expensive.
Production Economics of Chemical Drum Molding
Chemical drum production economics are dominated by three factors: material utilization, energy consumption per kilogram, and labor per unit produced. Because this guide avoids specific currency figures, the analysis below uses an index basis where a conventional hydraulic monolayer line producing a 200-liter drum with external cooling only is set at a baseline of 100 index points, and other configurations are expressed relative to it.
Material utilization
Material is by far the largest single input in heavy-wall molding. A 200-liter drum at 9.5 kilograms finished weight with 25 percent flash generates 2.4 kilograms of flash per cycle. If that flash is returned at full value the effective material cost per drum is close to the finished weight; if it is sold as scrap the effective consumption rises to roughly 11.9 kilograms per drum, a penalty of about 25 percent on the largest cost item in the operation. This single fact justifies a well-engineered flash recovery system in almost every case.
Three levers improve material utilization. First, parison programming resolution: a 200-point axial program with radial control routinely achieves a 5 to 10 percent weight reduction at equal performance compared with a coarse 20-point program, because material stops being distributed as a safety margin everywhere and starts being placed where it is needed. Second, closed-loop weight control eliminates the deliberate over-weighting that operators apply when weight drifts, typically worth 2 to 4 percent. Third, flash geometry optimization in the mold reduces the flash percentage itself, often by several points.
Energy per kilogram
Specific energy consumption for extrusion blow molding of heavy-wall polyethylene typically falls between 0.45 and 0.85 kilowatt hours per kilogram of processed resin, covering extrusion, hydraulics, clamping, blowing air, and process cooling. The spread is wide because it depends heavily on hydraulic system design, on whether the extruder drive is a fixed-speed motor with throttling or a servo or inverter drive matched to demand, and on how efficiently the chiller is run.
The largest single improvement available on a hydraulic machine is a servo-driven hydraulic pump that delivers flow on demand rather than running at full flow and dumping excess over a relief valve. On a drum machine with long cooling phases during which the hydraulics are essentially idle, this typically reduces total energy consumption by 20 to 35 percent. Internal cooling adds compressed air energy but reduces cycle time so much that energy per kilogram usually falls despite the added load.
| Configuration | Relative output index | Relative energy per part index | Relative material per part index | Relative labor per part index | Equipment investment level |
|---|---|---|---|---|---|
| Baseline: conventional hydraulic, external cooling, 20 point program, manual deflashing | 100 | 100 | 100 | 100 | Low |
| Add 200 point axial plus radial wall control | 102 | 95 | 92 | 100 | Medium |
| Add internal cooling | 145 | 78 | 100 | 70 | Medium |
| Add servo hydraulic pump drive | 100 | 72 | 100 | 100 | Medium |
| Add robot take-out, automatic deflashing, in-line weighing | 108 | 101 | 97 | 45 | Medium to High |
| Full configuration: all of the above combined | 158 | 56 | 89 | 42 | High |
| Full configuration plus six-layer coextrusion barrier | 150 | 62 | 96 | 44 | Premium |
Reading the table: output index above 100 means more parts per day from the same machine, while energy, material and labor indices below 100 mean lower consumption per part, so lower is better in those three columns. The full configuration produces roughly 58 percent more parts per day while consuming about 44 percent less energy per part and requiring well under half the direct labor, at the cost of a higher initial equipment level. For a plant running a single shift on a low-volume specialty program the baseline configuration may still be the right commercial answer; for a three-shift dangerous goods packaging operation the full configuration is almost always justified.
Labor and staffing
A manually deflashed drum line typically requires two to three operators per shift for part handling, trimming, stacking, and quality checks. Adding robot take-out and automatic deflashing usually reduces this to one operator supervising the cell plus a shared material handler across several machines. On a three-shift operation the labor saving compounds, and it also improves consistency, because manual trimming is a significant source of dimensional variation at the neck and chime.
Scrap and quality cost
The hidden cost item in certified drum production is quality-related scrap. A container rejected at leak test has already consumed its full material, energy, and cycle time. Startup scrap after a mold change is also substantial on long cycles, because the head and mold need many cycles to reach thermal equilibrium. Recipe management that recalls a proven parameter set, and thermal pre-conditioning of the mold before the first shot, reduce startup scrap noticeably. A realistic target for a well-run heavy-wall line is a total reject rate below 2 percent including startup, and every point above that erodes the economics faster than any energy measure can compensate.
Service and Support
A chemical drum line is a long-term capital asset that must hold a certified process for years, so the support package behind the machine matters as much as the specification sheet. Apollo, as a Wanplas factory, applies the group service standard to every machine it ships.
Every machine is inspected and tested at the factory before shipment, running the customer’s own mold where the mold is supplied by Apollo, so that the process window is established before the equipment leaves Zhangjiagang rather than discovered on the customer’s floor. Engineers travel to the customer site for installation and commissioning, covering foundation and utility verification, mechanical and hydraulic setup, electrical connection, first article production, and operator handover. Machine customization is available for molds and for the local voltage and frequency standard, which matters for a machine of this size where the drive package must match the local grid.
The spare parts policy is USD 500 free parts per year, a Wanplas brand-level commitment that covers the routine wear items a blow molding line consumes. Ongoing support includes usage tracking, remote assistance on the control system, and periodic customer visits. Buyers are welcome to visit the factory to inspect machines under construction, witness a trial run with their own mold, and review the build quality before acceptance. Apollo also provides a production capacity guarantee and a quality standards guarantee as part of the commercial package.
Frequently Asked Questions
What is the smallest container volume that really needs an accumulator head?
The threshold is shot weight rather than volume, and it sits at approximately 1.2 to 1.5 kilograms. Below that, continuous extrusion produces the parison fast enough that sag remains manageable and the higher cavitation of a continuous machine gives better output. Above it, sag becomes the dominant wall thickness error and an accumulator head is the correct choice. For a typical 2.2-millimeter-wall jerry can this threshold falls around 25 to 30 liters, which is why the 20 to 30-liter band is the genuine crossover zone between the ABLB and ABLD ranges.
Can one machine cover 20-liter jerry cans and 200-liter drums?
Yes. The ABLD 120 with its 20-liter accumulator head and 220 kN clamp covers the whole band, and this is one of the most common configurations for a chemical packaging plant. The practical constraints are mold changeover time, which on a machine this size is measured in hours rather than minutes, and the fact that running a small product on a large head means the plunger operates over a short portion of its stroke, so position feedback resolution must be adequate. Where a plant runs both products in high volume, two dedicated lines usually beat one shared line on total output and changeover loss.
Is fluorination or coextruded EVOH the better barrier choice?
For most agrochemical, fuel, and solvent applications, in-mold fluorination delivers the required barrier at a moderate equipment and process cost, and it keeps the flash recovery simple because the container is monolayer. Coextruded EVOH delivers a substantially higher barrier and is the right answer for the most aggressive aromatic and chlorinated contents, for very long storage periods, and where odor transfer is unacceptable. The main downsides of coextrusion are the premium equipment level, the tighter melt temperature window, and the fact that flash can only return into a dedicated regrind layer.
How much regrind can be used in a UN certified chemical drum?
Dangerous goods packaging must be manufactured to a defined and approved material composition, and the regulations restrict the use of recycled material. Standard practice is to use only in-house production scrap from the same resin and the same process, at a controlled percentage typically in the 15 to 35 percent range, with the figure declared in the approved design type documentation. Post-consumer recycled material is generally excluded unless a specific approval route is followed. Gravimetric blending and documented control of the regrind percentage are essential, because the certification is tied to the composition actually used.
How much cycle time does internal cooling actually save?
On heavy-wall containers the measured reduction is between 25 and 40 percent, with the larger figures on the thickest walls. On a 200-liter drum a typical 165-second cycle with external cooling only drops to roughly 110 seconds with internal cooling, which is a 33 percent reduction and translates into a 50 percent increase in daily output. The system requires a compressed air dryer capable of a minus 30 to minus 40 degree dew point, air conditioning to the working temperature, blow pin porting for supply and exhaust, and the associated controls.
What causes most drop test failures and how are they fixed?
The overwhelming majority of cold drop test failures occur at the bottom pinch-off weld. The root causes are melt that is too cold at the pinch land when the mold closes, a pinch land that is too wide so the melt freezes before it knits, insufficient local wall thickness at the weld position, and a flash pocket that is too shallow so clamping force is absorbed by compressing flash. The fixes are correspondingly specific: raise the die zone temperature by 5 to 10 degrees, narrow the pinch land, add an axial wall thickness spike at the weld position, increase mold closing speed in the final travel, and deepen the flash pocket.
What melt flow rate should I specify for chemical drum resin?
For containers above roughly 30 liters, specify high molecular weight HDPE with a melt flow rate of 0.2 to 0.4 grams per ten minutes at 190 degrees Celsius under a 2.16 kilogram load, with density in the 0.945 to 0.955 grams per cubic centimeter range and a documented environmental stress crack resistance figure. For jerry cans in the 5 to 20-liter band, a slightly easier flowing grade at 0.3 to 0.5 is usually acceptable and improves surface quality and cycle time. Always confirm low temperature notched impact performance if the container must pass a minus eighteen degree drop test.
How long does mold changeover take on a large accumulator machine?
Realistically, changing a drum mold on an ABLD-class machine takes between two and five hours depending on mold weight, whether the die and mandrel also change, and how well the plant is equipped with quick-change clamping, pre-heated molds, and overhead lifting. Quick-change plates, standardized cooling connections, and pre-heating the incoming mold to operating temperature before installation are the three measures with the largest effect. Recipe management in the machine control eliminates parameter re-entry and shortens the time to first good part.
Should I buy one large machine or two smaller ones for the same output?
Two smaller machines almost always win on operational flexibility and risk. They allow two products to run simultaneously, they keep half the output alive during a mold change or a maintenance stop, and they let the plant match machine size to product size instead of running everything on an oversized frame. One large machine wins on floor space, on the total number of operators required, and on unit output when the entire program is a single large product with steady long-run demand. For a chemical packaging plant serving multiple customers with different drum specifications, the two-machine configuration is usually the better commercial decision.
What utilities does a 200-liter drum line need?
Plan for a three-phase power supply matched to an installed load of roughly 90 kilowatts for an ABLD 120, with actual average draw substantially lower than installed power. Process cooling requires a chiller in the 240 to 320 kilowatt range for a line processing around 400 kilograms per hour, delivering water at 8 to 12 degrees Celsius. Compressed air is needed at blow pressure with adequate volume for the blow and exhaust cycle, plus a dried supply for internal cooling if fitted. Add exhaust ventilation, and if fluorination is used, the dedicated gas supply, scrubbing, and safety systems that process requires.
Conclusion
Choosing the best EBM machine for chemical drum production is an exercise in working backwards from the packaging specification to the machine specification. The drop test at minus eighteen degrees tells you that pinch-off weld quality is critical, which tells you that you need fast accumulator delivery, precise axial wall programming at the weld position, and a mold with correctly engineered pinch land geometry. The stacking test tells you that panel wall consistency matters, which tells you that closed-loop weight control and radial wall distribution are not luxuries. The chemical compatibility requirement tells you whether you need a fluorination package or a six-layer coextrusion head, and that decision has to be made before the head is built. And the economics of a thick wall tell you that internal cooling is where the output actually comes from.
Mapped onto the Apollo range, the logic resolves cleanly. Below about 1.2 kilograms of shot weight, the ABLB series with continuous extrusion and multi-cavity molds gives the best output for small chemical bottles and jerry cans up to 20 liters. From 20 to 200 liters, which is where most dangerous goods packaging volume sits, the ABLD 120 with its 20-liter accumulator head and 220 kN clamp is the natural choice. For 1,000-liter IBC inner containers and large drums, the ABLD 150 with a 40-liter head and 400 kN clamp is the right frame. For bulk storage tanks up to 1,500 liters, the ABLD 200 with its 80-liter head, 600 kN clamp, and four-column platen guidance completes the range. Behind all of them stands a Wanplas factory with more than twenty years of extrusion blow molding experience, 4,000 machines running in over 90 countries, and a service standard that includes factory testing, on-site commissioning, and the USD 500 free parts per year policy.
If you are planning a chemical drum program, the most useful next step is to share the concrete specification: container volume and geometry, target wall thickness and part weight, resin grade and melt flow rate, the contents and their aggressiveness, the UN packing group you need to satisfy, and the daily output the business plan requires. With those inputs Apollo engineers can propose a specific machine size, accumulator capacity, wall thickness control configuration, barrier route, and downstream layout, and can run a trial with your mold at the factory so you can see the container and its test results before the machine ships. Buyers are welcome to visit the plant, inspect the build, and witness the trial in person.