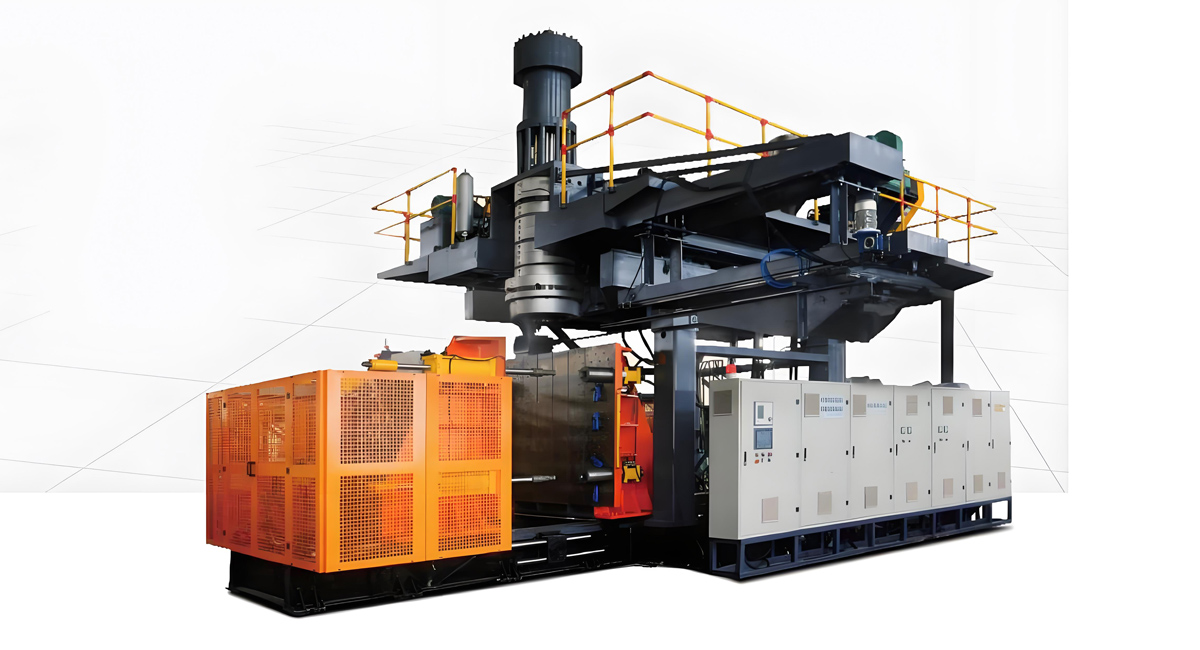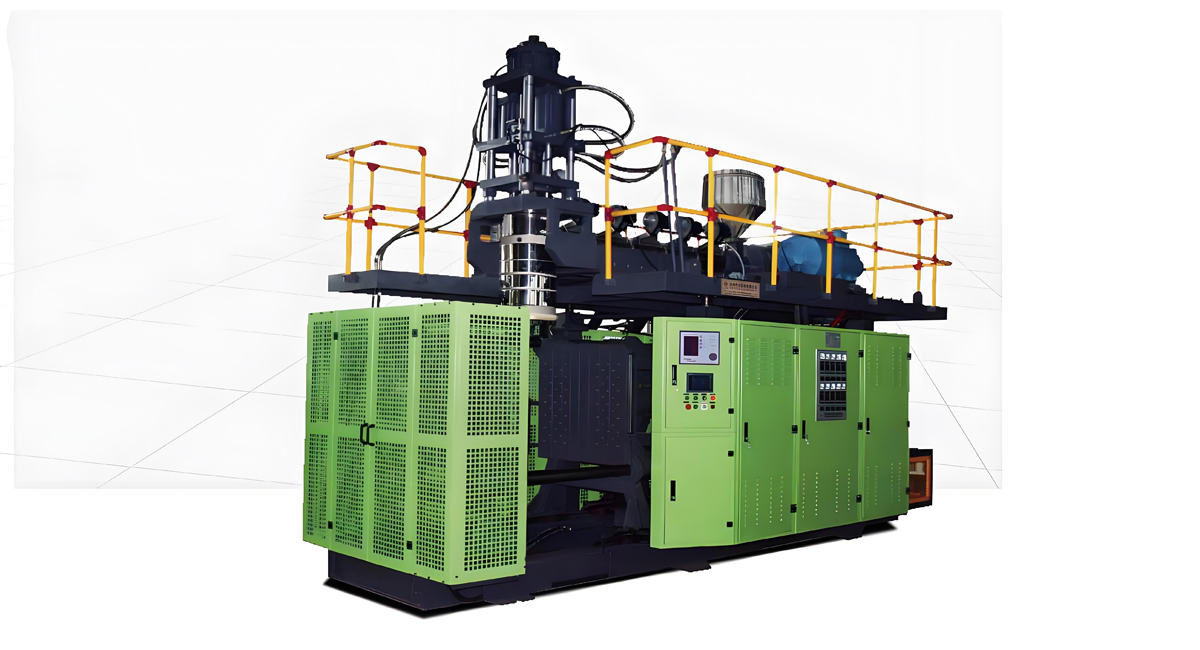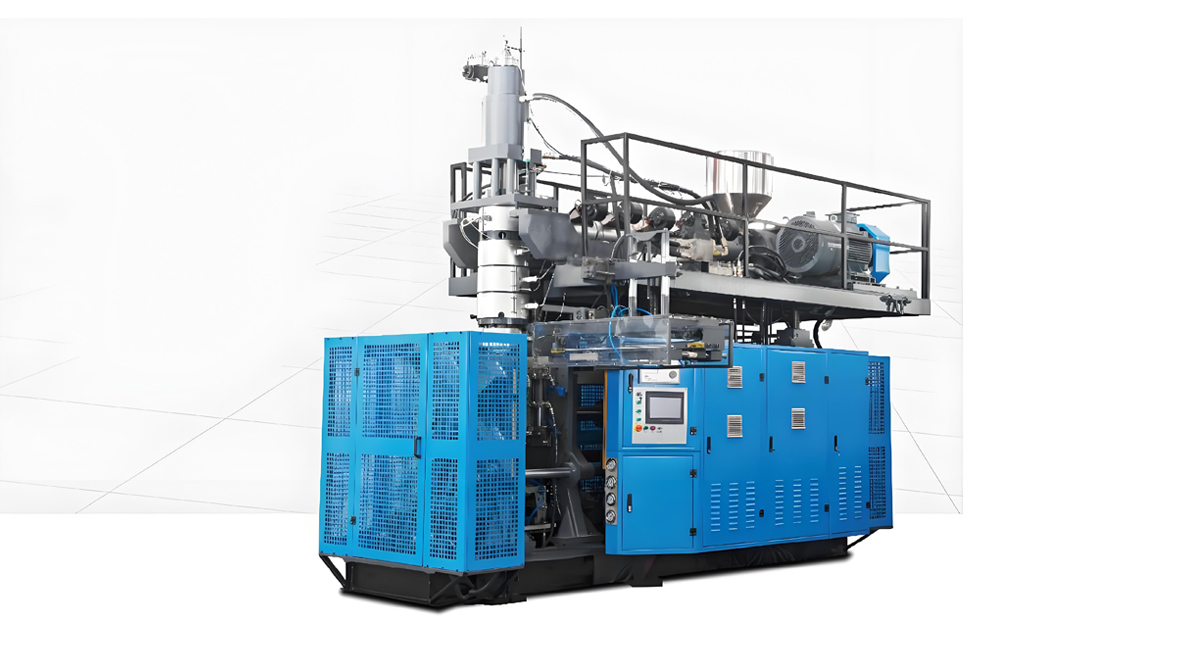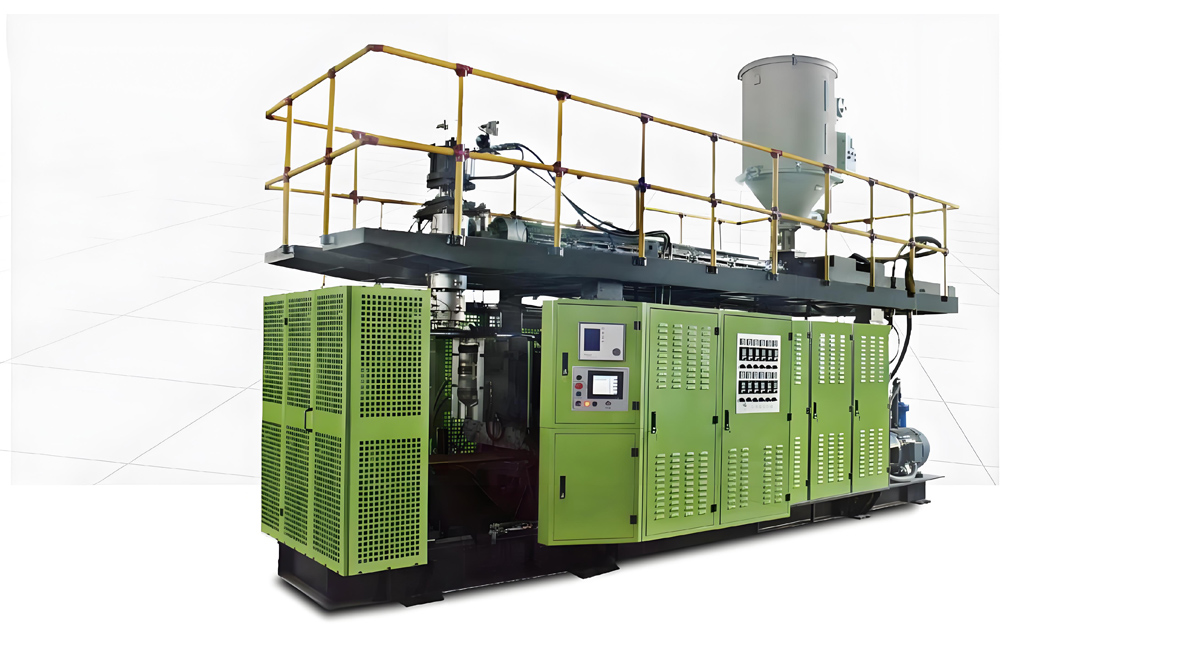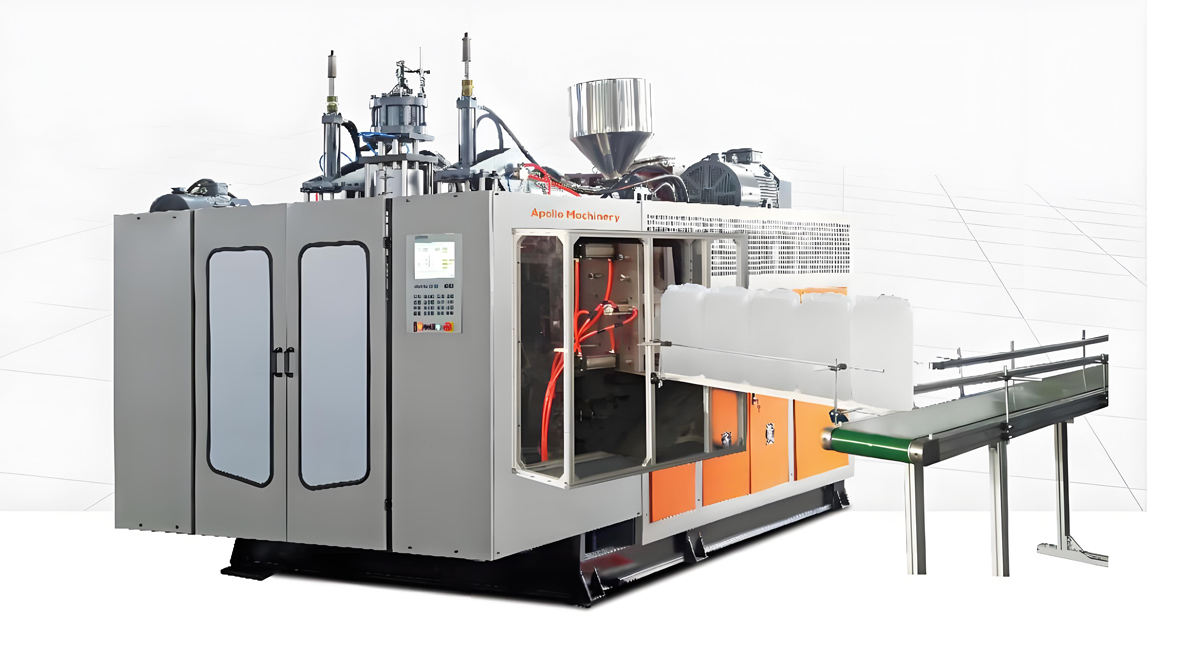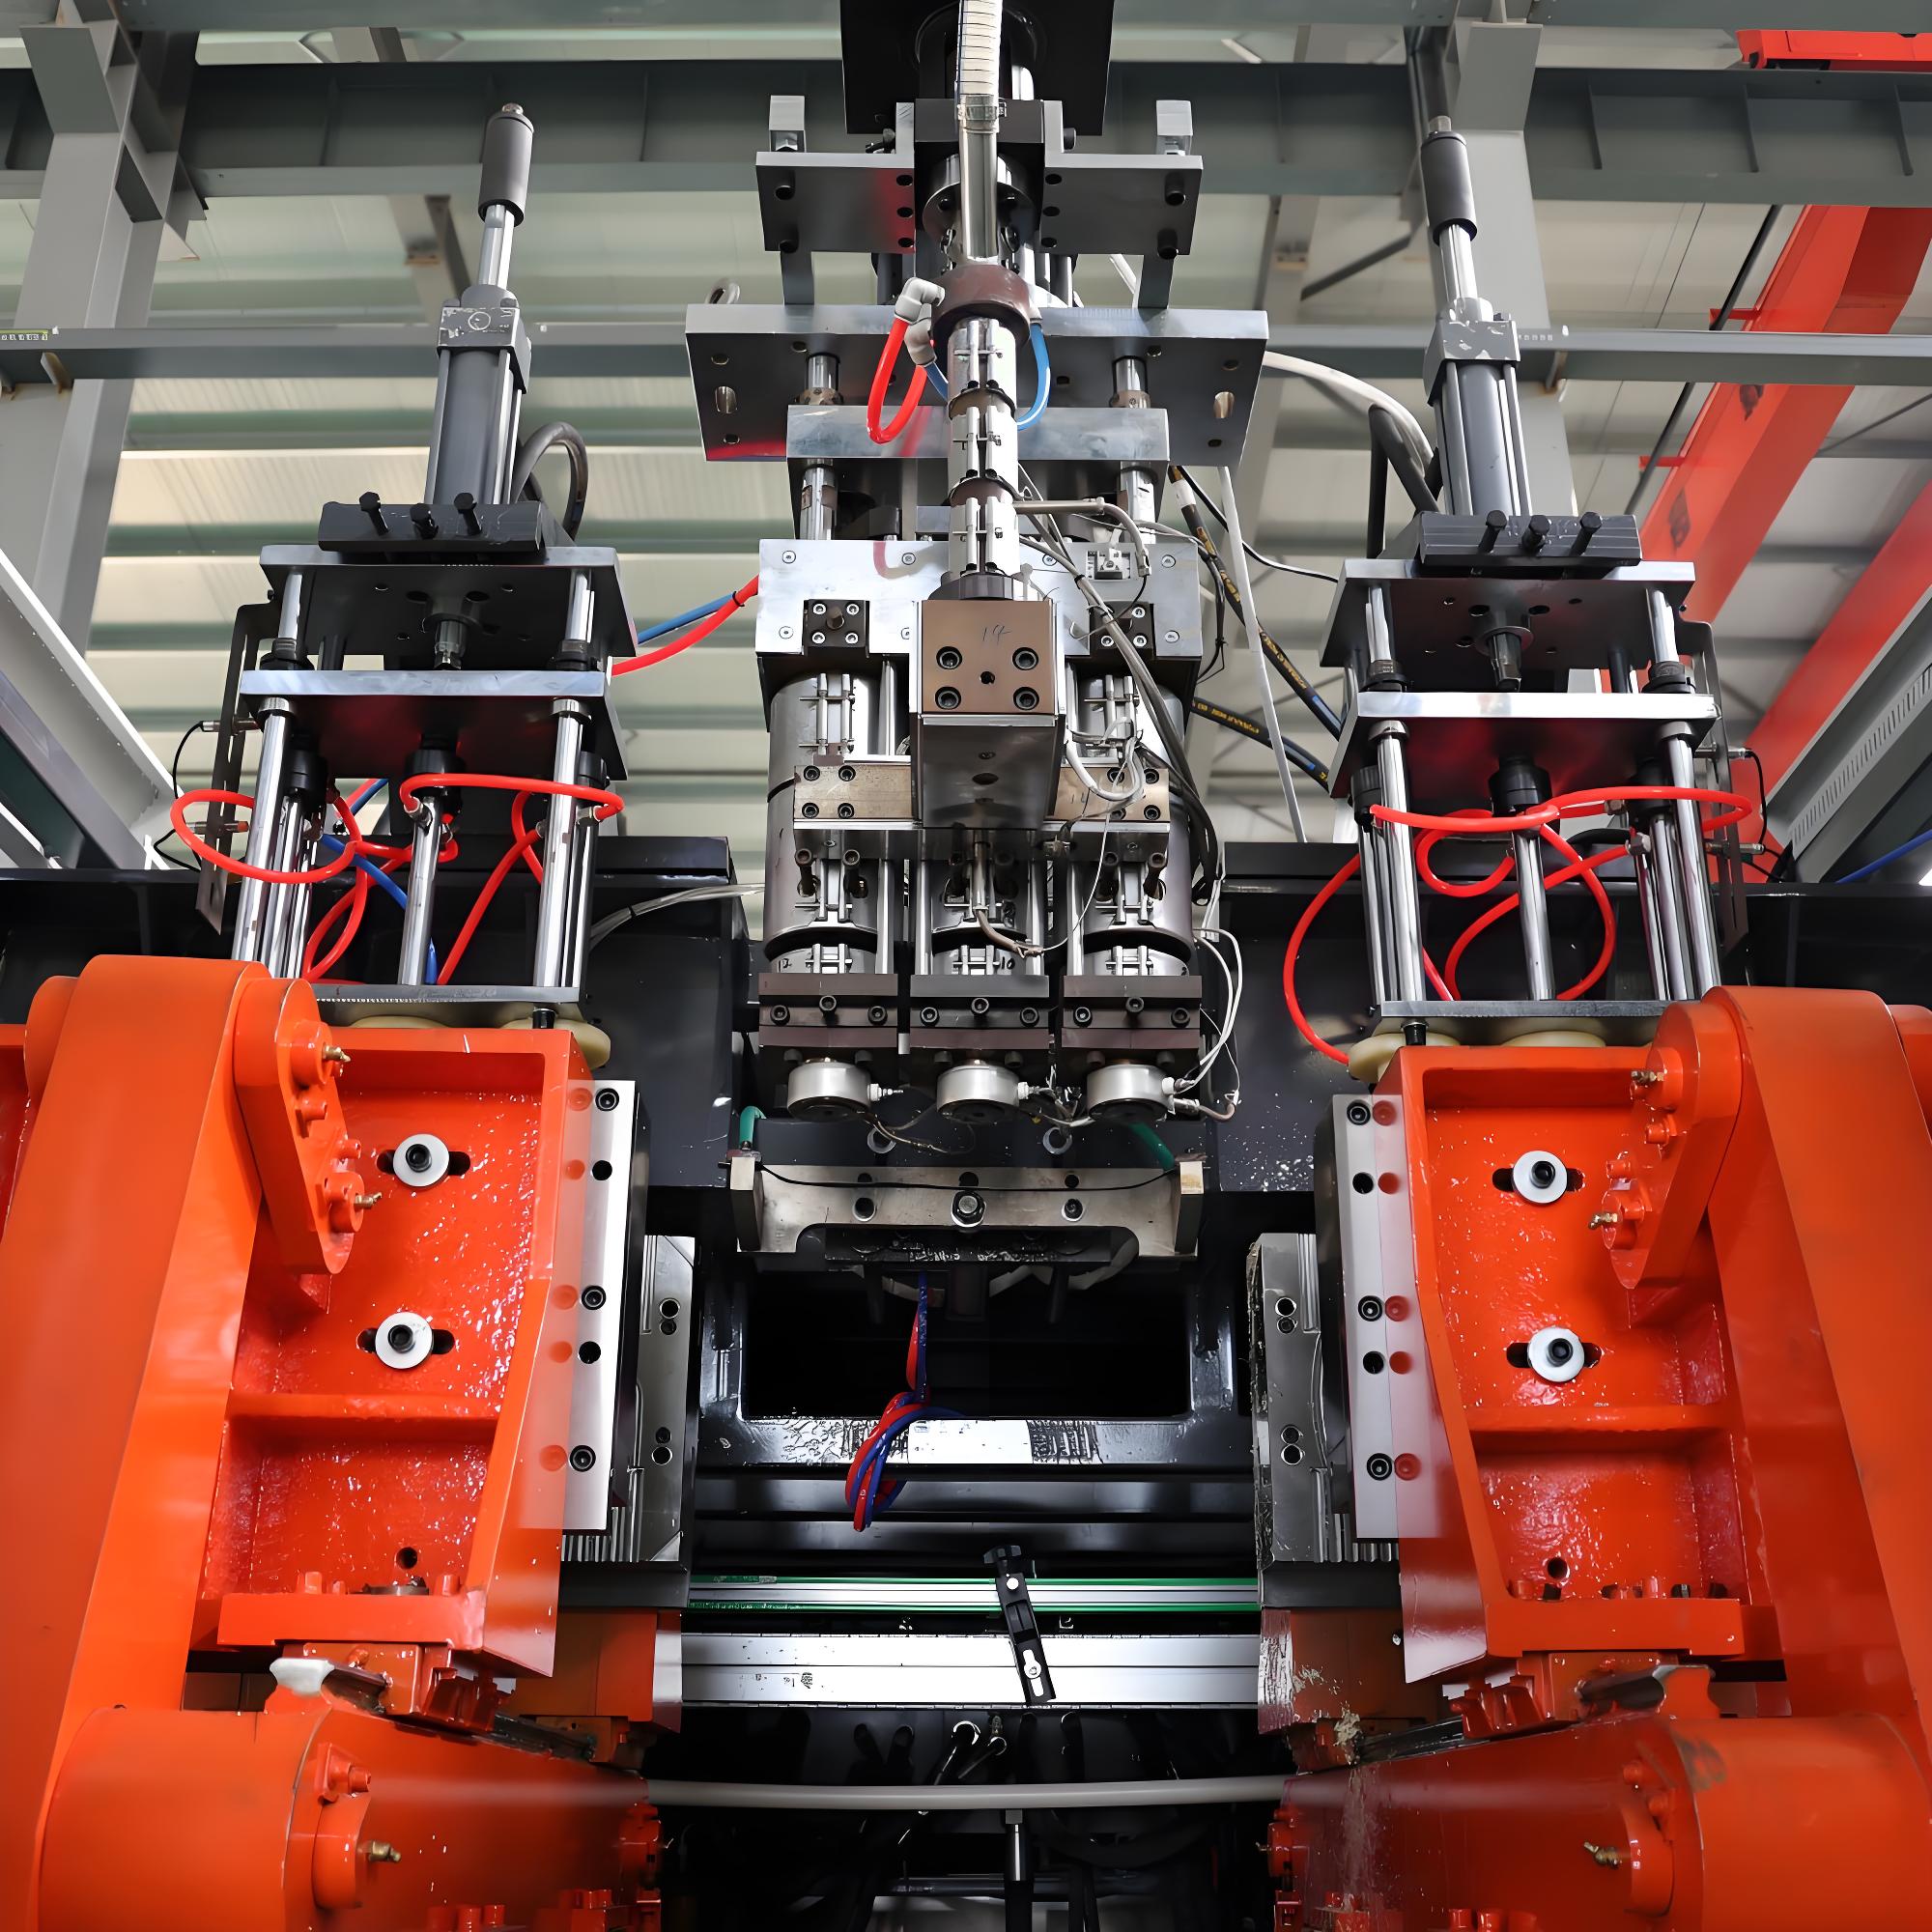

A hydraulic system is the part of an extrusion blow molding machine that customers notice least when it works and complain about most when it fails. The extruder and the die head shape the parison, the mold clamping unit closes it, and the blow pin inflates it, but every one of those motions is timed, forced, and positioned by pressurized oil moving through valves, cylinders, and accumulators. When that oil is clean, at the right viscosity, and at the right temperature, an extrusion blow molding machine will run 6,000 hours a year with consistent wall thickness and repeatable cycle time. When the oil degrades, the same machine drifts: clamping force falls off, the carriage stroke becomes hesitant, parison programming loses its calibration, and scrap climbs. Hydraulic system maintenance for extrusion blow molding machines is therefore not a housekeeping task delegated to whoever is available on a Friday afternoon; it is a structured, tiered program with defined intervals, measurable acceptance criteria, and documented safety procedures. This article, prepared with the engineering team at Apollo, a Wanplas factory that has built extrusion blow molding machines in Zhangjiagang for more than 20 years and has over 4,000 sets running in more than 90 countries as of 2026, sets out the complete checklist: the architecture of the circuit, hydraulic oil selection and contamination control, filtration strategy, a graded daily-to-annual maintenance schedule, wear part intervals with relative cost planning, a diagnostic fault tree for the seven most common hydraulic problems, and the safety and compliance framework that must sit around all of it.
Table of Contents
- Inside the Hydraulic System of an Extrusion Blow Molding Machine
- Hydraulic Oil Selection: Viscosity Grade, Additive Package and Temperature Window
- Contamination Control: ISO 4406 Targets, NAS 1638 and Oil Analysis
- Filtration Management: Beta Ratio, Dirt-Holding Capacity and Change Intervals
- The Complete Hydraulic Maintenance Checklist, Daily to Annual
- Wear Parts, Replacement Intervals and Relative Cost Planning
- Hydraulic Fault Tree: Seven Failure Modes and How to Trace Them
- Accumulators and Parison Programming: The Precision Link
- Safety and Compliance: LOTO, Accumulator Discharge, ISO 4413, EN 422 and CE
- Building a Maintenance Program Around Apollo ABLB, ABLD and Fully Electric Machines
- Frequently Asked Questions
- Conclusion
Inside the Hydraulic System of an Extrusion Blow Molding Machine
An extrusion blow molding machine hydraulic circuit is a closed loop with one job: convert electrical power into precisely controlled linear force and motion at four or five points on the machine. Understanding what each component does is the precondition for maintaining any of them, because most hydraulic faults present as a symptom at one component while the root cause sits two or three components upstream. A technician who can trace the oil path from reservoir to cylinder and back will diagnose in twenty minutes what an untrained operator will chase for two shifts.
The circuit begins at the oil tank or reservoir. On a mid-size machine this holds anywhere from 150 to 600 liters and does far more than store fluid. It de-aerates the returning oil, allows heavy contaminants to settle, and provides the thermal mass that stabilizes oil temperature. A properly designed reservoir has a baffle plate separating the return zone from the suction zone, a magnetic drain plug, a sight glass with minimum and maximum marks, a cleanable strainer on the suction line, and an air breather with a filtration rating that matches the target cleanliness of the system. That breather is one of the most neglected items on the entire machine and one of the cheapest to replace.
From the reservoir the oil is drawn by the pump. Extrusion blow molding machines use three main pump types. Gear pumps are simple, tolerant of contamination, and inexpensive, and appear on auxiliary circuits or on smaller machines with fixed displacement. Vane pumps offer smoother flow and lower noise, historically common on mid-range clamp circuits. Axial piston pumps, either variable displacement with a swashplate or fixed displacement, deliver higher pressure capability, better volumetric efficiency, and the fine control needed for closed-loop parison programming. Piston pumps are also the least tolerant of dirty oil, which is exactly why machines built around them demand tighter contamination targets. Suppliers commonly specified on this class of machine include Bosch Rexroth, Parker Hannifin, Yuken, and Eaton Vickers, and Apollo selects the pump family according to the series and the customer’s duty cycle.
Downstream of the pump the oil is routed by valves. A directional control valve — usually a solenoid-operated four-way, three-position spool valve — decides which port of a cylinder receives pressure and which returns to tank. A proportional valve modulates flow or pressure continuously in response to an analog command signal, which is what allows a clamp to decelerate smoothly before the mold halves touch instead of slamming shut. A servo valve is the high-response version of the same idea, with a torque motor, a much tighter spool overlap, and a bandwidth high enough to follow a parison wall-thickness profile in real time. The step from directional to proportional to servo valve is a step up in performance and a step down in contamination tolerance: a servo valve with a spool clearance of a few micrometers will be destroyed by particles that a spool-type directional valve would pass without complaint.
The hydraulic accumulator stores energy in compressed nitrogen behind a bladder or a piston, then releases it in a burst when the circuit needs more instantaneous flow than the pump can supply. On an extrusion blow molding machine this typically supports rapid clamp closing, fast blow pin entry, and pressure-holding during the blow phase. Bladder accumulators respond faster and are the common choice up to moderate volumes; piston accumulators handle larger volumes and higher compression ratios. The nitrogen pre-charge pressure is set as a fraction of the working system pressure — generally between 0.6 and 0.9 times the system pressure, with 0.9 times the minimum working pressure the usual rule for bladder types and a lower ratio chosen for piston types where a large volumetric swing is needed. Set the pre-charge too high and the accumulator bottoms out against the poppet on every cycle; set it too low and the bladder is over-extended and will fail early.
Cylinders convert the pressure into work. Three functional groups matter: the clamping cylinders that generate clamping force and hold the mold shut against internal blow pressure; the carriage or shuttle cylinders that move the mold station between the die head and the blowing or take-out position; and the parison programming cylinder or servo actuator that moves the mandrel inside the die head to vary wall thickness along the parison length. The third of these is the most precision-critical component in the whole circuit, since a positional error of a fraction of a millimeter shows up directly as a wall thickness deviation in the finished container.
Filters are placed at three positions: a coarse suction strainer protecting the pump, a fine pressure-line filter protecting the valves, and a return-line filter capturing wear debris before it re-enters the reservoir. Finally a heat exchanger or oil cooler, usually a shell-and-tube or plate type fed with cooling water from a chiller or cooling tower, removes the heat generated by throttling losses and internal leakage. On machines running in tropical plants the cooler is often the difference between a healthy 45 °C oil temperature and a destructive 65 °C.
Component Function and Failure Consequence at a Glance
| Component | Primary Function on an EBM Machine | Typical Symptom When It Degrades |
|---|---|---|
| Reservoir / oil tank | Storage, de-aeration, settling, thermal buffering | Foaming oil, rising temperature, water accumulation |
| Pump (gear / vane / axial piston) | Generates flow against system resistance | Slow cycle, pressure will not build, whining noise |
| Directional control valve | Routes flow to the correct cylinder port | Missed motion, sticking spool, sequence fault alarm |
| Proportional valve | Continuous flow or pressure modulation | Harsh clamp closing, zero-point drift, hunting |
| Servo valve | High-response control of parison programming | Wall thickness drift, profile no longer repeatable |
| Accumulator (bladder / piston) | Peak flow supply, shock absorption, pressure holding | Loss of clamp speed, pressure pulsation, longer cycle |
| Clamping cylinder | Generates and holds clamping force | Flash at the parting line, pressure decay during blow |
| Carriage cylinder | Moves the mold station between positions | Stick-slip crawling, position overshoot |
| Filters (suction / pressure / return) | Maintain target fluid cleanliness | Bypass indication, cavitation, accelerated valve wear |
| Heat exchanger / oil cooler | Removes throttling and leakage heat | Oil above 60 °C, viscosity collapse, seal hardening |
Hydraulic Oil Selection: Viscosity Grade, Additive Package and Temperature Window
Hydraulic oil is not a consumable to be chosen on price; it is a machine component with a specification. The correct fluid for an extrusion blow molding machine is an anti-wear hydraulic oil of the HLP type as defined in DIN 51524 part 2, in a viscosity grade selected against the ambient temperature of the plant and the pump type installed. Choosing one grade too thin causes internal leakage, pressure loss, and boundary-lubrication wear at the pump; choosing one grade too thick causes cavitation at the pump inlet on cold starts, higher throttling losses, and a permanently elevated oil temperature.
The three practical grades are ISO VG 32, ISO VG 46, and ISO VG 68. ISO VG 32 suits cool plants and machines with high-response servo valves, where low viscosity improves valve dynamics. ISO VG 46 is the global default for extrusion blow molding machines in temperate and moderately warm conditions and is what Apollo supplies as the standard recommendation for the ABLB and ABLD series. ISO VG 68 belongs in hot climates or in plants where ambient temperature routinely exceeds 35 °C, and it is common on machines shipped to Southeast Asia, the Middle East, and equatorial Africa. Where a plant swings widely between summer and winter, an oil with a high viscosity index — 140 or above, achieved through a viscosity index improver — narrows the viscosity spread across the operating range and is worth the higher purchase cost.
Temperature is the single largest determinant of oil life. The healthy operating window for a hydraulic system on an extrusion blow molding machine is 40 to 55 °C measured in the reservoir. Below 40 °C the oil is thicker than design, response is sluggish, and condensation is more likely. Above 55 °C oxidation accelerates measurably, and above 60 °C the process runs away. The governing relationship is the Arrhenius rule of thumb familiar to every lubrication engineer: for every 10 °C rise above roughly 60 °C, the oxidation rate approximately doubles and the useful life of the oil is approximately halved. An oil that would deliver 8,000 hours at 55 °C may deliver only 4,000 hours at 65 °C and 2,000 hours at 75 °C. Every hour spent running hot is therefore an hour of oil life spent at double or quadruple rate, and it also hardens seals, degrades the anti-wear additive package, and produces the varnish that eventually jams a proportional valve spool.
Water is the second enemy. Free or emulsified water hydrolyses the zinc dialkyldithiophosphate anti-wear additives used in most HLP oils, produces acids, promotes rust on cylinder bores and valve spools, and destroys the oil’s ability to release air. The target for a production hydraulic system is water content below 0.1 percent, which is 1,000 parts per million, with best practice for servo-controlled machines below 200 parts per million. Water arrives through the breather during thermal cycling, through a leaking oil cooler tube, and through wash-down water finding an open filler cap. A cooler that is developing a leak will often announce itself first as a slow, unexplained rise in water content before it ever produces a visible problem.
Hydraulic Oil Selection and Cleanliness Target Table
| Plant Ambient / Machine Type | Recommended Grade | Specification | ISO 4406 Cleanliness Target | NAS 1638 Equivalent |
|---|---|---|---|---|
| Cool plant below 20 °C, servo-valve machine | ISO VG 32 | HLP, DIN 51524-2 | 16/14/11 | Class 5 |
| Temperate plant 20–30 °C, proportional-valve machine | ISO VG 46 | HLP, DIN 51524-2 | 17/15/12 | Class 6 |
| Hot plant above 35 °C, heavy-duty large machine | ISO VG 68 | HLP, DIN 51524-2 | 17/15/12 | Class 6 |
| Wide seasonal swing, any valve type | ISO VG 46, VI 140 or above | HVLP, DIN 51524-3 | 17/15/12 | Class 6 |
| Gear-pump auxiliary circuit only | ISO VG 46 or VG 68 | HLP, DIN 51524-2 | 19/17/14 | Class 8 |
Contamination Control: ISO 4406 Targets, NAS 1638 and Oil Analysis
Somewhere between 70 and 80 percent of hydraulic component failures in industrial machinery are attributed to fluid contamination rather than to mechanical fatigue or manufacturing defect. That statistic, widely cited across the fluid power industry, is the reason that a serious maintenance program measures cleanliness rather than assuming it. On an extrusion blow molding machine the components most sensitive to particles are precisely the ones that determine product quality: the servo valve controlling parison programming and the proportional valve shaping the clamp motion profile.
ISO 4406 expresses cleanliness as three numbers, each a code for the number of particles per milliliter larger than 4, 6, and 14 micrometers respectively. Each code step represents a doubling of particle count, so a system at 19/17/14 has four times the particle population of one at 17/15/12 and sixteen times that of one at 15/13/10. The practical targets are straightforward: a servo-valve controlled circuit should be held at 16/14/11, and a proportional-valve circuit at 17/15/12. A machine with only directional control valves and gear pumps can be run at 19/17/14 without penalty, but the moment a servo or proportional valve is fitted anywhere in the circuit, the whole system inherits the tighter target because all the oil eventually reaches every component.
NAS 1638, the older American classification, is still quoted by many maintenance departments and is useful as a cross-reference. As a working conversion, ISO 16/14/11 corresponds to roughly NAS Class 5, ISO 17/15/12 to NAS Class 6, ISO 18/16/13 to NAS Class 7, and ISO 19/17/14 to NAS Class 8. The two systems count differently and no conversion is exact, so a maintenance program should adopt one standard and report against it consistently rather than switching between them.
Measurement requires sampling, and sampling done badly produces numbers that are worse than no numbers at all. Take the sample from a dedicated minimess sampling point in a live, turbulent line — ideally the pressure line downstream of the pump or a return line before the filter — while the machine is at operating temperature and has been cycling for at least thirty minutes. Never sample from the reservoir drain, where settled sludge distorts the result, and never sample into a bottle that has not been certified clean. Flush the sampling valve for several seconds before filling, cap the bottle immediately, and label it with the machine number, the running hours, the oil brand and grade, and the date.
A full oil analysis panel for an extrusion blow molding machine should report five things. Particle count against ISO 4406 shows whether the filtration is winning. Water content, by Karl Fischer titration for accuracy or by a crackle test for a quick shop-floor screen, shows whether the cooler or breather is leaking. Total acid number tracks oxidation; a rise of 0.3 to 0.5 mg KOH per gram above the new-oil baseline signals that the antioxidant reserve is exhausted. Kinematic viscosity at 40 °C reveals thermal cracking, shear-down of the viscosity index improver, or cross-contamination with a wrong grade; a deviation beyond plus or minus 10 percent is a change-out trigger. Ferrography and elemental spectroscopy identify which metal is wearing — iron from cylinder bores and pump housings, copper from bearing cages and cooler tubes, chromium from plated rods, silicon from ingested dust — and therefore point directly at the failing component. Rising copper with rising water almost always means a corroding oil cooler.
Filtration Management: Beta Ratio, Dirt-Holding Capacity and Change Intervals
Filters are the only active defense against contamination, and their performance is specified by the beta ratio. The beta ratio at a given particle size is the number of particles of that size upstream of the filter divided by the number downstream. A beta ratio of 200 at 10 micrometers, written β10 ≥ 200, means the element removes 99.5 percent of particles at and above 10 micrometers on a single pass. A rating of β3 ≥ 1000 means 99.9 percent removal at 3 micrometers and represents the fine filtration needed to protect a servo valve. Higher beta numbers are not automatically better in every position: a very fine element on a suction line will starve the pump and cause cavitation, which is why suction protection is a coarse strainer of 100 to 150 micrometers and the fine work happens on the pressure and return lines.
Dirt-holding capacity, measured in grams, determines how long an element lasts before it reaches its terminal differential pressure. A physically larger element with more pleat area holds more dirt at the same beta rating and therefore runs longer between changes, which is why undersizing a filter housing to save space is a false economy that the maintenance department pays for repeatedly. Every pressure-line and return-line filter on a well-specified extrusion blow molding machine carries a differential pressure indicator — either a visual pop-up button or an electrical switch wired to the PLC. When the indicator trips, the element is approaching its bypass setting and unfiltered oil is about to be sent straight to the valves. That indicator, not the calendar, is the primary authority on when to change a filter.
The interval schedule that works in practice has three tiers. The first change comes at 100 running hours after commissioning or after any major overhaul, because a new or rebuilt system sheds assembly debris, weld scale, thread sealant, and residual machining swarf far faster than a settled one. Skipping this first change is one of the most common and most expensive mistakes made with a new machine. Thereafter the interval is 1,000 to 2,000 running hours, at the shorter end for pressure-line elements protecting servo valves in dusty plants and at the longer end for return-line elements in clean, air-conditioned facilities. Overriding both is the differential pressure indicator: if it trips, change the element immediately, whatever the hour meter says. The air breather on the reservoir should be treated as a filter in its own right and changed on the same 1,000 to 2,000 hour cycle, or more often in a plant with airborne regrind dust or talc.
Filter Position, Rating and Interval
| Filter Position | Typical Rating | Protects | First Change | Routine Interval |
|---|---|---|---|---|
| Suction strainer | 100–150 µm mesh | Pump inlet against large debris | 100 h (clean, do not discard) | Clean at every oil change |
| Pressure-line filter | β3 ≥ 1000 or β5 ≥ 1000 | Servo and proportional valves | 100 h | 1,000 h or on differential pressure |
| Return-line filter | β10 ≥ 200 | Reservoir against wear debris | 100 h | 1,000–2,000 h or on differential pressure |
| Air breather | 3–10 µm, desiccant type optional | Reservoir against airborne dust and humidity | 1,000 h | 1,000–2,000 h, sooner in dusty plants |
| Offline / kidney-loop unit | β3 ≥ 1000 plus water absorber | Whole system, continuous polishing | Per unit manual | On differential pressure or moisture saturation |
The Complete Hydraulic Maintenance Checklist, Daily to Annual
A maintenance program only works when each task has an owner, an interval, an acceptance criterion, and a place to record the result. The tiered checklist below is the operational core of hydraulic system maintenance for extrusion blow molding machines. It is structured so that the daily tier can be completed by a trained operator at shift handover in ten minutes, while the quarterly and annual tiers require a maintenance technician, tooling, and planned downtime. Apollo supplies this structure with every machine and its field engineers walk customers through it during on-site installation and commissioning.
Daily Checks — Every Shift, Operator Level
| Check Item | Method | Acceptance Criterion | Action If Out of Limit |
|---|---|---|---|
| Oil level | Sight glass, machine idle, all cylinders retracted | Between minimum and maximum marks | Top up with identical grade only; investigate loss |
| Oil temperature | Reservoir gauge or HMI readout after 1 h running | 40–55 °C, never above 60 °C | Check cooling water flow and relief valve setting |
| Abnormal noise | Listen at pump and valve block during a full cycle | Steady hum, no whine, rattle or knocking | Suspect cavitation or aeration; stop and diagnose |
| External leakage | Visual sweep of hoses, fittings, cylinder rods, manifold faces | No drips, no wet film, no oil on the floor | Mark and schedule; a weep becomes a burst |
| Pressure gauge readings | Record system, clamp and blow pressures at the same cycle point | Within 5 percent of the recorded baseline | Log the deviation and trend it before adjusting |
| Accumulator behaviour | Observe clamp closing speed and pressure hold | Consistent with baseline cycle time | Schedule nitrogen pre-charge verification |
| Filter blockage indicators | Visual pop-up buttons and HMI alarms | All in the green, no alarm latched | Change element at the next planned stop |
Weekly Checks — Maintenance Technician
| Check Item | Method and Reference | Acceptance Criterion |
|---|---|---|
| Hose and fitting inspection | Visual and tactile check against SAE J517 and EN 853 construction marking | No cover cracking, no exposed braid, no kinking, no abrasion at clamps |
| Cooling water flow to the oil cooler | Flow meter or inlet and outlet temperature difference | Design flow achieved, temperature rise across cooler as per manual |
| Solenoid valve actuation | Cycle each directional valve, listen and feel for clean shift | Crisp shift, no buzzing coil, no overheated solenoid body |
| Reservoir air breather | Visual inspection of element and housing seal | Not clogged, not oil-soaked, cap correctly seated |
| Manifold and valve block bolt torque | Spot check with a torque wrench at known settings | Within specified torque, no seepage at the interface seal |
| Cylinder rod condition | Visual check of chrome plating and wiper seals | No scoring, no pitting, no oil carried out past the wiper |
Monthly Checks — Maintenance Technician
| Check Item | Method | Acceptance Criterion |
|---|---|---|
| Oil appearance and water quick test | Draw a sample into a clean glass jar; crackle test on a hot plate | Clear and bright, no haze, no crackle, no dark varnish colour |
| Proportional valve zero-point drift | Compare commanded and actual position or pressure at null with the machine warm | Drift within the manufacturer’s null band; re-null if outside |
| Accumulator nitrogen pre-charge | Isolate and discharge the hydraulic side, then read with a charging rig | Within 0.6–0.9 times system pressure per the machine specification |
| Pressure switch and relief valve settings | Verify trip and crack pressures against the hydraulic schematic | Within tolerance stated in the machine documentation |
| Cooler surface and water side | Inspect for scale, fouling and external corrosion | Clean surfaces, no scale bloom at the water connections |
Quarterly (Approximately 500 Hours) — Planned Downtime
| Task | Procedure | Pass Criterion |
|---|---|---|
| Filter element replacement | Change pressure and return elements; clean the suction strainer; cut open the old element and inspect the debris | No metallic flakes, no rubber particles, no varnish sheets in the pleats |
| Pump outlet pressure and flow test | Measure delivered flow at rated pressure with a flow tester | Volumetric efficiency within 10 percent of the commissioning baseline |
| Cylinder internal leakage test | Pressurise the clamping cylinder, isolate it, and hold for 10 minutes | Pressure decay less than 5 percent over 10 minutes |
| Tie bar and platen parallelism spot check | Dial indicator across the platen faces at four corners | Within the tolerance stated for the machine series |
| Full oil sample to laboratory | Live-line sample, particle count plus water plus viscosity | Meets the ISO 4406 target for the valve class installed |
Semi-Annual (Approximately 2,000 Hours)
| Task | Detail |
|---|---|
| Full oil analysis panel | Particle count to ISO 4406, water by Karl Fischer, total acid number, kinematic viscosity at 40 °C, elemental spectroscopy and ferrography |
| Oil cooler cleaning | Chemical descale or mechanical brushing of the water side; verify the temperature difference across the cooler is restored to the design value |
| Hose replacement assessment | Record the manufacture date stamped on each hose; rubber hydraulic hoses should be replaced on a fixed 5 to 6 year cycle regardless of visible condition, and immediately on any sign of cover cracking or braid exposure |
| Accumulator bladder integrity | Check pre-charge retention over a recorded interval; a pre-charge falling repeatedly indicates bladder permeation or a leaking gas valve core |
| Servo and proportional valve recalibration | Re-run the null and gain calibration routine; verify the parison programming profile repeats against a reference container |
| Reservoir internal inspection | Inspect for sludge, water pooling and rust on the tank walls at the oil line; clean the magnetic drain plug |
Annual (Approximately 4,000 Hours)
| Task | Detail |
|---|---|
| Oil change or condition-based extension | Change the charge at approximately 4,000 hours, or extend on the authority of a clean analysis showing viscosity within 10 percent, total acid number within 0.3 mg KOH per gram of baseline, and cleanliness at target |
| Pump and motor wear assessment | Case drain flow measurement on piston pumps, vibration signature, case temperature, and a repeat of the flow-at-pressure test against the commissioning baseline |
| System flushing | After an oil change or any component failure that released debris, flush with a filtration cart at high turbulent flow until the target ISO 4406 class is confirmed by particle count, not by appearance |
| Seal kit replacement on high-duty cylinders | Replace rod seals, piston seals and wipers on any cylinder that failed the 10 minute decay test or shows rod weepage |
| Safety system verification | Test guard interlocks, two-hand controls, emergency stop response and the accumulator automatic discharge circuit against ISO 4413 and EN 422 requirements |
| Documentation review | Update the machine history file, trend all measured values year on year, and revise intervals based on the evidence rather than the calendar |
Wear Parts, Replacement Intervals and Relative Cost Planning
Budgeting for hydraulic maintenance is easier when wear parts are grouped by expected life and by relative cost rather than by absolute price, which varies by market, currency, and specification. The table below uses a five-level relative scale — Low, Medium, High, Very High, Premium — so that a maintenance manager anywhere in Apollo’s 90-country service footprint can plan a spares inventory without reference to any particular currency. The general principle is that the cheapest items have the shortest intervals and prevent the most expensive failures, which is exactly why they are the ones most often skipped.
| Wear Part | Typical Replacement Interval | Relative Cost Level | Consequence of Neglect |
|---|---|---|---|
| Reservoir air breather | 1,000–2,000 h | Low | Airborne dust and humidity enter directly; cleanliness target lost |
| Return-line filter element | 1,000–2,000 h or on differential pressure | Low | Bypass opens, wear debris recirculates to the reservoir |
| Pressure-line filter element | 1,000 h or on differential pressure | Low to Medium | Servo and proportional valve spool erosion |
| Cylinder seal kit | 8,000–12,000 h, or on failed decay test | Medium | Internal leakage, clamping force loss, flash at the parting line |
| Hydraulic hose assembly | 5–6 years, or immediately on damage | Medium | Burst under pressure, oil loss, injection injury risk |
| Accumulator bladder | 3–5 years or on repeated pre-charge loss | Medium to High | Loss of peak flow, nitrogen entering the oil, cycle time increase |
| Full hydraulic oil charge | 4,000 h, extendable on analysis | High | Varnish, acid attack, additive depletion, valve sticking |
| Solenoid directional valve | On failure or sticking, typically 15,000 h and above | High | Missed motions, sequence faults, unplanned stoppage |
| Oil cooler / heat exchanger | On leakage or unrecoverable fouling | High | Chronic overheating and water ingress into the oil |
| Proportional valve | On failed calibration or irrecoverable drift | Very High | Harsh clamp motion, mold damage, inconsistent cycle |
| Axial piston pump | 20,000 h and above with clean oil | Very High | Total loss of pressure, catastrophic debris release into the circuit |
| Servo valve for parison programming | On failed response test, life is contamination-dependent | Premium | Wall thickness control lost, scrap rate and material cost climb |
Reading the table from the bottom up makes the economic case for the top of it. The Premium and Very High items — the servo valve, the axial piston pump, the proportional valve — are the components that clean, cool, dry oil protects. The Low-cost items at the top — a breather element, a filter cartridge — are the protection. A plant that changes breathers and filters on schedule and holds oil temperature in the 40 to 55 °C band will normally take a servo valve well past its nominal expectations, while a plant that runs hot with a bypassing filter can destroy one in a single year. Apollo supports customers with an annual complimentary spare parts allowance under the shared Wanplas after-sales policy, and the parts most worth drawing against that allowance are the inexpensive protective ones, not the expensive replacements they prevent.
Hydraulic Fault Tree: Seven Failure Modes and How to Trace Them
Diagnosing a hydraulic fault is a process of elimination that moves from the cheapest and most likely cause to the most expensive and least likely. The discipline that separates a good technician from a parts-changer is refusing to replace a component until the measurement says it is the component. Each of the seven failure modes below is presented with its probable causes in the order they should be checked, and with the corrective action.
Fault 1: System Pressure Will Not Build
Start at the relief valve, which is the most common culprit and the cheapest to check: a relief valve set too low, stuck open by a particle, or with a broken spring will dump flow to tank and cap the achievable pressure. Next check the pump: a worn axial piston pump shows excessive case drain flow, and a worn vane or gear pump shows low delivered flow at pressure. Then check for a directional valve stuck in a crossover or open-center position, an unloading valve that has failed to close, and finally a large internal leak in a cylinder. Measure, do not guess: a flow tester at the pump outlet distinguishes a pump problem from a valve problem in under ten minutes.
Fault 2: Clamp Closing Speed Has Slowed
Slow clamp motion is usually a flow problem, not a pressure problem. Check the accumulator pre-charge first, because a lost nitrogen charge removes the peak flow assist and immediately lengthens the closing stroke. Then check whether oil viscosity is too high because the oil is cold or the wrong grade was added, and whether a filter is in bypass or approaching it. Look for a partially closed flow control or a proportional valve whose gain has drifted. Only after these should pump wear be suspected. On a machine where the slowdown appeared gradually over months, pump wear and filter loading are the leading candidates; where it appeared overnight, an accumulator or a valve is far more likely.
Fault 3: Parison Programming Drift and Wall Thickness Variation
This is the fault that costs the most in material and scrap and the one most specific to extrusion blow molding. The parison programming actuator moves the mandrel to a commanded position hundreds of times per hour, and any loss of positional fidelity translates directly into wall thickness error. Check in this order: servo valve null drift caused by contamination or temperature change; feedback transducer fault, loose coupling or damaged cable; oil temperature outside the 40 to 55 °C window causing viscosity-driven gain change; internal leakage in the programming cylinder; and mechanical wear or backlash in the mandrel linkage. Note also that a wall thickness drift developing over a shift with a stable machine often points to oil warming beyond the window rather than to a hardware fault, which is why the daily temperature record matters so much.
Fault 4: System Overheating Above 60 °C
Heat in a hydraulic system is wasted energy, and every source of waste is a diagnostic clue. Check the cooling circuit first: water flow rate, water inlet temperature, and cooler fouling. Then check for a relief valve continuously cracking open, which converts full pump flow into pure heat. Then check for excessive internal leakage across worn pump or cylinder clearances, oil level below minimum so the reservoir cannot shed heat, incorrect and too-thin viscosity grade, and finally a poorly optimized cycle that leaves the pump deadheaded at pressure for long dwell periods. Restore the temperature before doing anything else, because every other measurement taken on a hot system is unreliable.
Fault 5: Milky or Emulsified Oil
Oil that has turned white and cloudy contains emulsified water, and the machine should be stopped rather than run on. The dominant cause on an extrusion blow molding machine is a leaking oil cooler tube, which lets cooling water at higher pressure cross into the oil. Other paths are condensation through a saturated or missing breather, wash-down water entering a filler cap or a loose inspection cover, and moisture from ambient humidity in tropical plants running with a cold start every morning. Confirm with a Karl Fischer water test, pressure-test the cooler to identify the leak, repair or replace the cooler, then drain, flush, and refill. Running a system on emulsified oil strips the lubricating film, corrodes valve spools, and can destroy a pump within days.
Fault 6: High-Frequency Noise and Cavitation
A rising whine or a sound like gravel passing through the pump means the pump is not being fed. Cavitation occurs when pressure at the pump inlet falls below the vapour pressure of the oil, causing vapour bubbles to form and then collapse violently against metal surfaces, eroding them. Check the suction strainer for blockage, the oil level for being too low, the suction line for a collapsed hose or a closed isolation valve, the oil viscosity for being too high on a cold start, and the reservoir breather for being clogged so that a vacuum forms as oil is drawn out. Aeration, a related but distinct problem, produces foam in the reservoir and a spongy, erratic cylinder motion, and is usually caused by air being drawn in past a suction-line fitting or a worn pump shaft seal.
Fault 7: Stick-Slip or Crawling Motion
Stick-slip is the jerky, stuttering motion seen most often on the carriage or on a slow-moving clamp approach, and it is caused by the difference between static and dynamic friction combined with fluid compressibility. The usual causes are air entrained in the oil, worn or over-tightened cylinder seals producing high breakaway friction, a scored cylinder bore or rod, a sticking valve spool, insufficient counterbalance or back pressure, and mechanical binding in the guide rails. Bleed the circuit thoroughly first, since entrained air is both the easiest to fix and the most common cause. If the motion remains jerky after bleeding, the fault is mechanical or in the seals.
Hydraulic Troubleshooting Matrix
| Symptom | Most Probable Cause | Check Sequence | Corrective Action |
|---|---|---|---|
| Pressure will not build | Relief valve open or misadjusted | Relief setting → pump flow test → directional valve position → cylinder leakage | Reset or clean the relief valve; overhaul the pump only after a failed flow test |
| Clamp closing slower than baseline | Accumulator pre-charge lost | Pre-charge → oil viscosity and temperature → filter differential pressure → valve gain → pump wear | Recharge nitrogen to specification; replace the bladder if the charge will not hold |
| Wall thickness drift on the parison | Servo valve null drift or oil temperature excursion | Valve null → feedback transducer → oil temperature → cylinder leakage → mechanical backlash | Re-null the valve, restore the temperature window, replace worn linkage components |
| Oil temperature above 60 °C | Cooling failure or continuous relief bypass | Water flow → cooler fouling → relief valve state → internal leakage → oil level and grade | Restore cooling flow, descale the cooler, correct the relief setting |
| Milky, white or hazy oil | Cooler tube leak admitting water | Karl Fischer water test → cooler pressure test → breather condition → cover and cap seals | Stop the machine, repair the cooler, drain, flush and refill with new oil |
| Whining noise, gravel sound at the pump | Cavitation from restricted suction | Suction strainer → oil level → suction hose condition → viscosity at start-up → breather | Clean the strainer, correct the level, replace a collapsed hose, warm the oil before full load |
| Jerky, crawling carriage or clamp motion | Entrained air or high seal friction | Bleed the circuit → reservoir foam → seal condition → bore and rod scoring → guide rail binding | Bleed thoroughly, replace the seal kit, hone or replace a scored cylinder |
| Flash at the mold parting line | Clamping force decay from cylinder internal leakage | 10 minute decay test → clamp pressure setting → platen parallelism → mold face condition | Replace the seal kit if decay exceeds 5 percent; re-align the platens if parallelism is out |
Accumulators and Parison Programming: The Precision Link
Two components on an extrusion blow molding machine share the word accumulator and must never be confused in a maintenance conversation. The accumulator head is a melt accumulator: a chamber in the die head where molten polymer is collected and then rapidly pushed out by a ram to form a large parison in a single fast shot, which is how large containers on machines such as Apollo’s ABLD series for 20 L to 1500 L products are made. The hydraulic accumulator is a nitrogen-charged pressure vessel in the oil circuit. On an accumulator-head machine the two work together, because the hydraulic accumulator is what supplies the burst of flow that drives the melt accumulator ram fast enough to extrude a heavy parison before it sags. Maintenance of the hydraulic accumulator therefore has a direct, visible effect on the quality of the largest parts the machine can make.
Verifying nitrogen pre-charge is a routine but safety-critical procedure. The hydraulic side must first be fully isolated and discharged to tank, confirmed by a gauge reading of zero, before the gas valve cap is removed. A charging rig with a regulator and a bleed valve is then fitted, and the reading is taken with the accumulator at ambient temperature, since nitrogen pressure varies with temperature and a reading taken on a hot accumulator will be misleadingly high. The correct setting is stated in the machine documentation and typically falls between 0.6 and 0.9 times the working system pressure. Bladder accumulators are normally set toward the upper end of that band, around 0.9 times the minimum working pressure, to keep the bladder from over-extending. Piston accumulators, which tolerate larger volumetric swings, are often set lower.
A pre-charge that has fallen means one of three things: nitrogen has permeated slowly through the bladder wall, which is normal over years and is corrected by recharging; the gas valve core is leaking, which is a cheap repair; or the bladder has ruptured, in which case nitrogen enters the oil and produces aeration, foam, spongy motion, and eventually cavitation damage at the pump. A recorded pre-charge history is the cleanest way to tell these apart. A charge that falls a little each year is permeation. A charge that falls to zero between two monthly checks is a rupture, and the accumulator must be taken out of service.
For parison programming itself, the hydraulic requirements are exacting. A modern programmer resolves the parison into 64, 100, or more points along its length, and the servo actuator must reach each commanded mandrel position within milliseconds while the melt is flowing. This demands stable oil viscosity, which means stable temperature; clean oil at 16/14/11, which means fine filtration; and zero entrained air, which means a properly bled circuit and an intact accumulator bladder. When a customer reports that container weight has crept upward or that a handle-ware bottle has developed a thin corner, the hydraulic condition of the programming circuit should be checked before anyone adjusts the profile in the controller. Compensating for a hydraulic fault by editing the wall thickness profile hides the problem and guarantees it will return.
Safety and Compliance: LOTO, Accumulator Discharge, ISO 4413, EN 422 and CE
Hydraulic maintenance is one of the most hazardous routine activities in a blow molding plant, because a system that appears to be switched off can still hold enough stored energy to kill. A charged accumulator retains full system pressure with the pump stopped and the machine isolated. A pinhole leak in a hose at working pressure produces a jet that penetrates skin and injects oil into tissue, an injury that looks trivial for the first hour and then becomes a surgical emergency. Every task in the checklist above must therefore sit inside a safety procedure, not alongside one.
Lockout-tagout is the foundation. The full sequence is: notify affected personnel; shut down the machine through its normal stopping procedure; isolate the main electrical disconnect and apply a personal lock and tag; isolate compressed air and cooling water; discharge all stored energy including hydraulic accumulators and pneumatic receivers; verify zero energy by attempting a normal start and by reading pressure gauges; and only then begin work. Each person working on the machine applies their own lock. The lock is removed only by the person who applied it, only after the work is complete and guards are refitted.
Accumulator discharge deserves its own written procedure because it is the step most often skipped. A correctly built machine has a manual or automatic bleed valve that vents the accumulator’s hydraulic side to tank when the pump stops. That valve must be verified as functional during the annual safety check, not assumed. Before opening any line that could be connected to an accumulator, the technician confirms zero pressure at a gauge on that circuit, then opens the bleed valve manually, then cracks the fitting slowly with a rag and appropriate personal protective equipment. Never use a hand to search for a hydraulic leak; use a piece of cardboard held at a distance.
ISO 4413, the international standard for the safety requirements of hydraulic fluid power systems and their components, is the governing reference for how the circuit itself should be designed and maintained. It covers protection against uncontrolled movement, requirements for pressure relief and isolation, accessibility of components for maintenance, marking and identification, and the content of the technical documentation that must be supplied with the machine. A maintenance department that follows the ISO 4413 documentation requirements — a legible hydraulic schematic at the machine, component identification matching the schematic, and recorded setting values — cuts diagnostic time on every fault in this article.
EN 422 is the European safety standard specific to blow molding machines for the production of hollow plastic articles. It addresses guarding of the mold clamping unit, safe access to the die head area, control of stored energy, interlocking requirements, and the residual risks that must be documented for the operator. Together with the CE marking obligations under the Machinery Directive 2006/42/EC, it defines what a machine sold into the European market must provide and what a plant must maintain in working order. Apollo builds machines to CE requirements for customers in the relevant markets, and the practical consequence for a maintenance manager is straightforward: defeating an interlock to speed up a maintenance task does not merely create a hazard, it invalidates the conformity of the machine.
Building a Maintenance Program Around Apollo ABLB, ABLD and Fully Electric Machines
The checklist in this article is generic in its physics and specific in its application, and the right way to deploy it depends on which machine a plant is running. Apollo, a Wanplas factory operating from an 8,000 square meter plant in Zhangjiagang with an annual capacity of around 100 machine sets, builds ten series with more than eighty models, and the hydraulic maintenance emphasis shifts across the range.
The ABLB series, covering 200 ML to 20 L containers across eight machine types, is the workhorse for daily chemical bottles, food and beverage containers, pharmaceutical packaging, and lubricant bottles. These machines run high cycle rates with moderate clamping force, so the wear emphasis falls on the carriage and clamp cylinders, which accumulate enormous stroke counts, and on the parison programming circuit, which must repeat precisely for containers whose wall thickness budget is measured in tenths of a millimeter. For an ABLB machine the highest-value maintenance activities are the monthly proportional valve null check, the quarterly cylinder decay test, and rigorous filtration discipline.
The ABLD series, covering 20 L to 1500 L products across three machine types, handles jerry cans, industrial drums, chemical tanks, road barriers, and automotive components. These machines run longer cycles, far higher clamping force, and typically an accumulator head with a large melt shot. The maintenance emphasis moves to the hydraulic accumulator bank, the high-force clamping cylinders, the larger reservoir volume and its thermal management, and hose integrity on long runs between the power pack and the clamp station. Oil volume is greater, oil temperature is harder to control, and the consequences of a cylinder decay failure are more severe because the internal blow pressure acting over a large projected area demands every kilonewton of clamping force the machine can hold.
The Fully Electric series, covering 200 ML to 20 L, changes the picture entirely: with no hydraulic power pack, there is no oil to analyse, no filter to change, and no accumulator to discharge. Maintenance shifts to servo motor and drive health, ball screw and linear guide lubrication, belt tension, and encoder calibration. Plants with strict cleanroom or contamination requirements — pharmaceutical and certain food applications — often choose this route specifically to remove hydraulic oil from the environment. For a plant running mixed assets, the practical implication is that two distinct maintenance disciplines and two distinct spare parts inventories are required, and the checklist in this article applies fully to the ABLB and ABLD lines and only in its safety and general-mechanical sections to the electric line.
Across all three, the material being processed influences the hydraulic duty more than most maintenance planners expect. Apollo machines process PE, PP, PVC, PA, PC, ABS, PS, EVA, TPU, and PETG. High-viscosity high-molecular-weight PE grades used for large industrial containers demand higher extrusion pressure and a more forceful accumulator-head shot, loading the hydraulic system harder than a low-viscosity PP bottle grade would. PVC’s narrow thermal window means longer purge and idle periods, during which a deadheaded pump generates heat with no useful work. Engineering resins like PC and PA raise melt temperature and therefore radiant heat load around the die head, which reaches the hydraulic lines routed nearby. A plant that switches from commodity PE to a demanding resin should re-baseline its oil temperature and pressure records rather than assume the previous norms still apply. Where a plant also runs regrind through its extruder, coordination with the wider Wanplas network helps: Polyretec, another Wanplas factory, supplies washing and pelletizing systems, and Kerke, a Wanplas factory building twin-screw compounding extruders, handles the compounding step upstream, so material consistency reaching the blow molding machine can be managed at source rather than compensated for at the die head.
Finally, the program needs an owner and a record. Apollo’s service model includes engineers for on-site installation, machine inspection before shipment, ongoing tracking of machine usage status, and an annual complimentary spare parts allowance shared across the Wanplas brand. None of that substitutes for a plant-level maintenance log. The single most valuable document a blow molding plant can hold is a machine history file in which every measured value from the tables above is recorded and trended: oil temperature by month, pressure readings against baseline, filter differential pressure at change, accumulator pre-charge at each verification, and oil analysis results over the life of the charge. Trends predict failures. Snapshots only confirm them.
Frequently Asked Questions
How often should hydraulic oil be changed on an extrusion blow molding machine?
The default interval is approximately 4,000 running hours, roughly annually for a single-shift operation. However, hours are the fallback, not the authority. A machine on a condition-based program changes oil when the analysis says so: when kinematic viscosity at 40 °C has moved more than plus or minus 10 percent from the new-oil value, when total acid number has risen more than 0.3 to 0.5 mg KOH per gram above baseline, when water content exceeds 0.1 percent, or when cleanliness cannot be brought back to the ISO 4406 target by filtration. A well-maintained system running at 45 to 50 °C with good filtration can frequently exceed 8,000 hours on the same charge, while a system running above 65 °C may not reach 3,000.
What ISO 4406 cleanliness class does a blow molding machine hydraulic system need?
It depends on the most sensitive component in the circuit. A machine with servo valves controlling parison programming should be held at 16/14/11. A machine with proportional valves but no servo valves should be held at 17/15/12. A simple circuit with only spool-type directional control valves and gear pumps can run at 19/17/14. Because all the oil in a system eventually passes through every component, the whole circuit must be maintained to the target of its most sensitive element, not to an average.
How do I check and set the nitrogen pre-charge on a hydraulic accumulator?
Isolate the hydraulic side and discharge it to tank, verify zero pressure on a gauge, then fit a charging rig to the gas valve and read the pre-charge with the accumulator at ambient temperature. The correct value is stated in the machine documentation and typically lies between 0.6 and 0.9 times the working system pressure, with bladder types usually set near 0.9 times the minimum working pressure. Check monthly, record every reading, and treat a repeated loss of charge as a bladder or gas valve failure rather than something to be topped up indefinitely. Never remove the gas valve cap before the hydraulic side is confirmed at zero pressure.
Why is my hydraulic oil turning milky white?
Milky or hazy oil means emulsified water. On a blow molding machine the most common cause is a leaking oil cooler tube allowing cooling water into the oil, followed by condensation through a saturated or missing reservoir breather and by wash-down water entering through a filler cap or inspection cover. Stop the machine, confirm with a Karl Fischer water test, pressure-test the cooler, repair the source, then drain, flush, and refill. Continuing to run on emulsified oil strips the lubricating film from bearing surfaces, corrodes valve spools, and can destroy a piston pump within days.
What is the correct filter change interval, and how do I know I got it right?
Change filters for the first time at 100 running hours after commissioning or overhaul, then every 1,000 to 2,000 hours, and always immediately when the differential pressure indicator trips. Verification is the important part: cut open the removed element and inspect the pleats. Clean grey loading is normal. Metallic flakes point to pump or cylinder wear. Rubber particles point to a failing seal or hose liner. Sheets of varnish point to thermal degradation of the oil. The used element is the cheapest diagnostic sample available on the machine and is thrown away unread on most plants.
How do I test a hydraulic cylinder for internal leakage without removing it?
Extend the cylinder against a mechanical stop or a closed mold, pressurise it to its normal working pressure, then close the isolation valve so the cylinder is hydraulically sealed and hold for 10 minutes with a calibrated gauge fitted. A pressure decay of less than 5 percent over 10 minutes indicates healthy piston seals. Larger decay indicates internal leakage past the piston seal, and the cylinder should be scheduled for a seal kit. Perform the test with the oil at normal operating temperature, because a cold-oil test will give an optimistically low decay figure and mask a developing fault.
Do fully electric blow molding machines eliminate hydraulic maintenance entirely?
They eliminate the hydraulic circuit and everything attached to it: no oil analysis, no filter changes, no accumulator pre-charge, no oil cooler, no hose replacement cycle, and no oil-related contamination of the plant environment. They do not eliminate maintenance. Servo drives, ball screws, linear guides, belts, and encoders each carry their own inspection and lubrication schedules, and precision alignment becomes more rather than less important. Apollo’s Fully Electric series covering 200 ML to 20 L is chosen most often by plants with strict contamination requirements, and those plants trade a hydraulic maintenance discipline for an electromechanical one rather than escaping maintenance.
How long should hydraulic hoses last, and when must they be replaced regardless of appearance?
Rubber hydraulic hose assemblies on a production machine should be replaced on a fixed 5 to 6 year cycle counted from the manufacture date stamped on the hose cover, regardless of whether they look serviceable. Elastomer ageing, heat exposure, and flex fatigue degrade a hose internally long before the outer cover shows it. Replace immediately, without waiting for the cycle, on any cover cracking, braid exposure, blistering, kinking, corrosion at the crimp ferrule, or seepage at the fitting. Always fit a replacement of equal or higher pressure rating and matching construction per SAE J517 or EN 853, and route it with the same bend radius and clamping as the original.
Conclusion
Hydraulic system maintenance for extrusion blow molding machines comes down to four disciplines executed consistently: keep the oil clean to the ISO 4406 target that the most sensitive valve in the circuit demands, keep it in the 40 to 55 °C window where oxidation stays slow, keep it dry below 0.1 percent water, and measure rather than assume. Everything in the tiered checklist — the daily ten-minute walk, the weekly hose and cooling checks, the monthly valve null and accumulator pre-charge verification, the quarterly filter change and cylinder decay test, the semi-annual full analysis and cooler clean, the annual oil change and system flush — exists to serve those four disciplines. The relative cost table makes the economic argument plainly: the Low-cost protective items at the top prevent the Premium and Very High failures at the bottom, and no maintenance budget ever saved money by skipping a breather element.
Just as important is the safety envelope. Lockout-tagout applied by every person working on the machine, verified accumulator discharge before any line is opened, no hand ever used to search for a leak, and no interlock ever defeated. ISO 4413 defines how the hydraulic system should be documented and maintained, EN 422 defines the safety requirements specific to blow molding machines, and the CE marking obligations under the Machinery Directive 2006/42/EC tie both into a legal framework for machines placed on the European market.
Apollo, a Wanplas factory with more than 20 years in extrusion blow molding and over 4,000 sets running in more than 90 countries as of 2026, supplies this checklist structure with its ABLB, ABLD, and Fully Electric series and walks customers through it during on-site commissioning. The Wanplas brand’s shared commitment — engineers for on-site installation, factory inspection before shipment, ongoing usage tracking, and an annual complimentary spare parts allowance — is designed to keep machines producing rather than to sell replacement components. Plants that want to build or audit a hydraulic maintenance program for their extrusion blow molding equipment, specify the right oil grade and cleanliness target for their climate and valve configuration, or arrange a technical review of an existing installation, are welcome to contact Apollo’s engineering team to discuss the machine series and duty cycle in question.