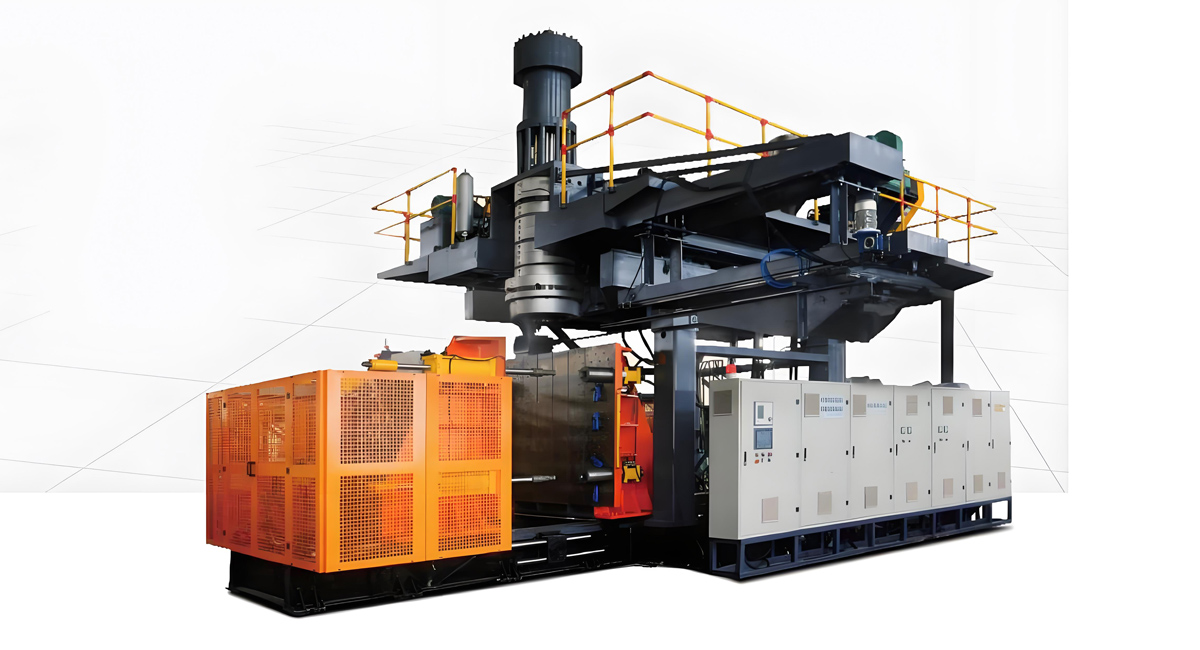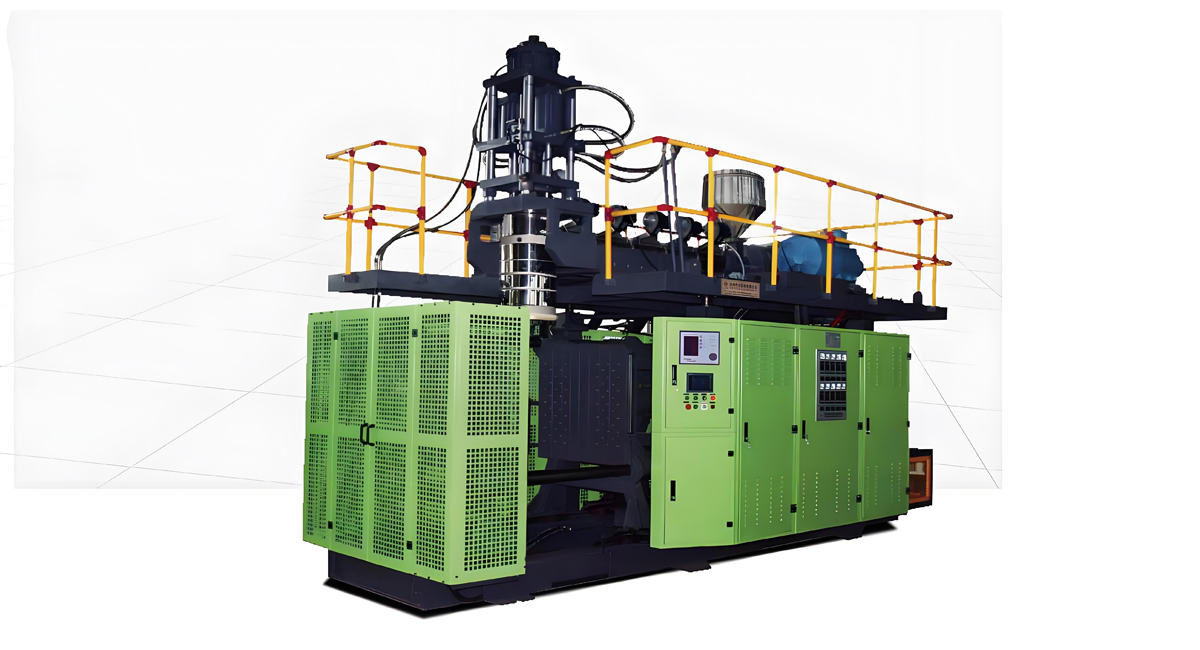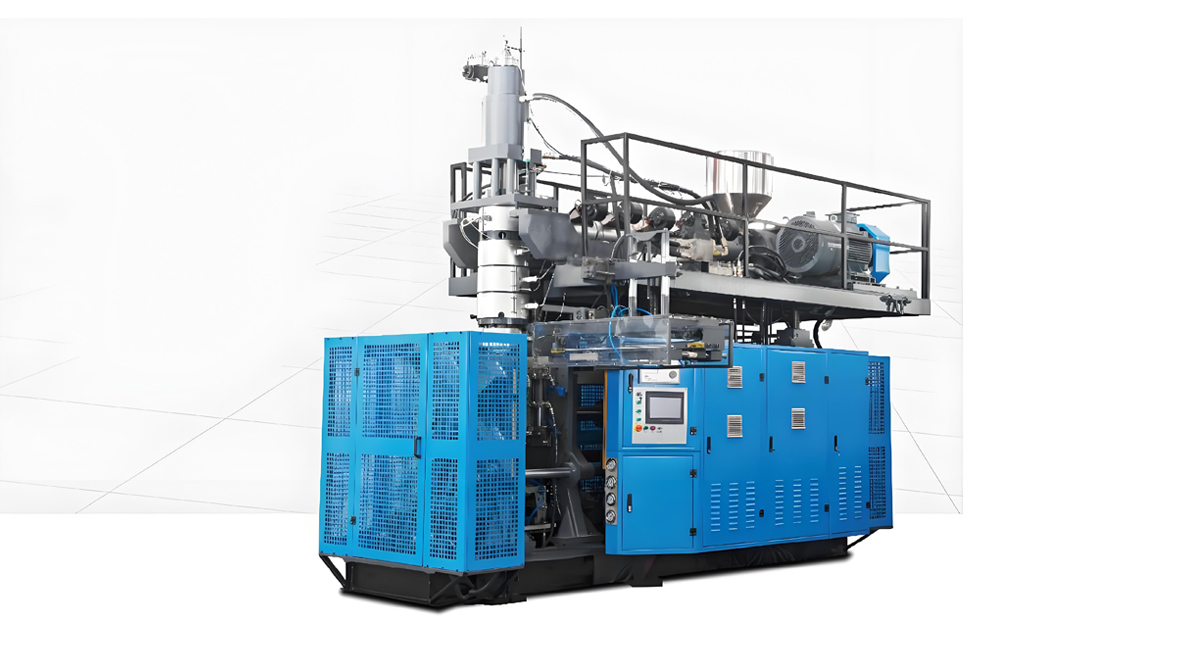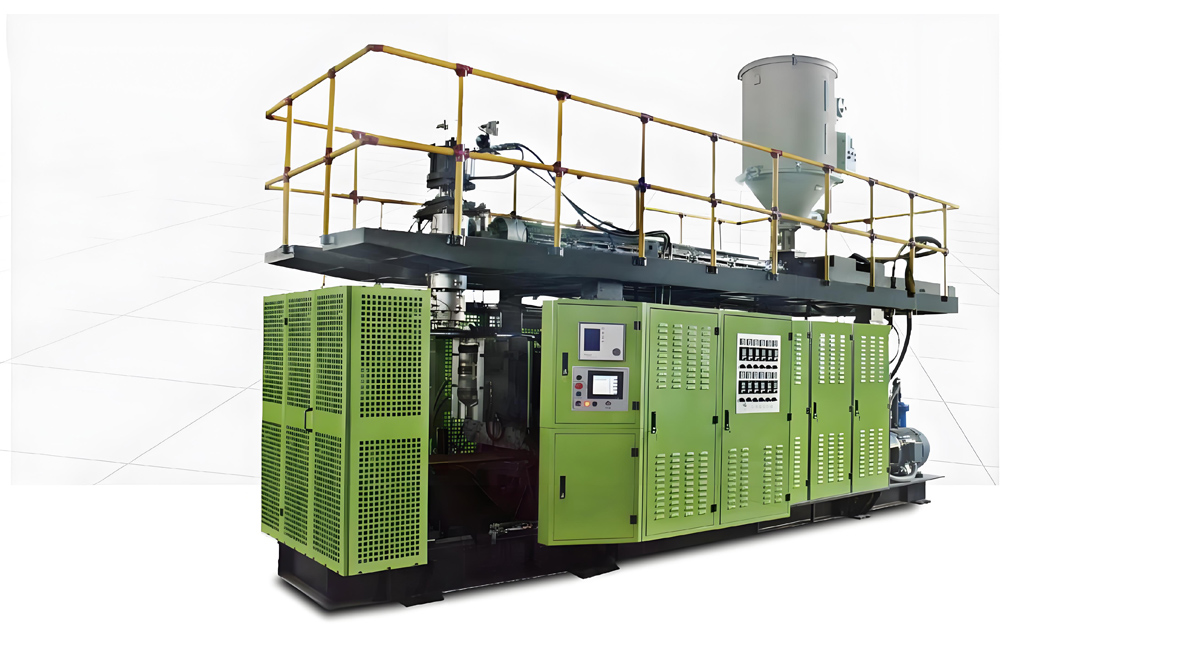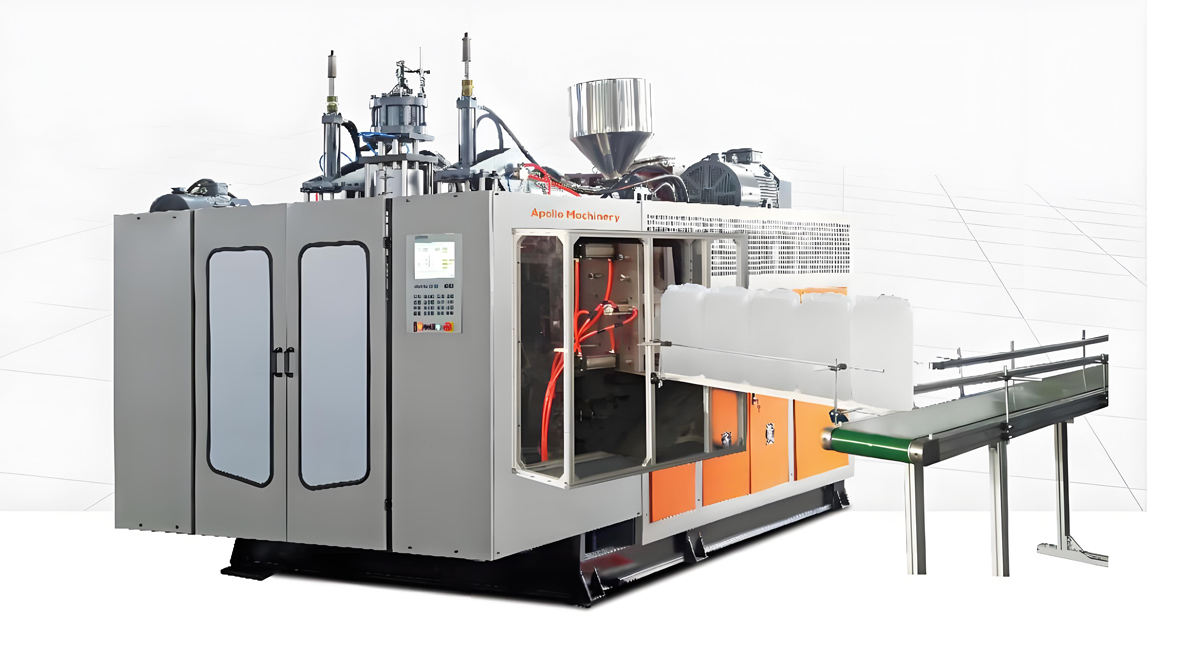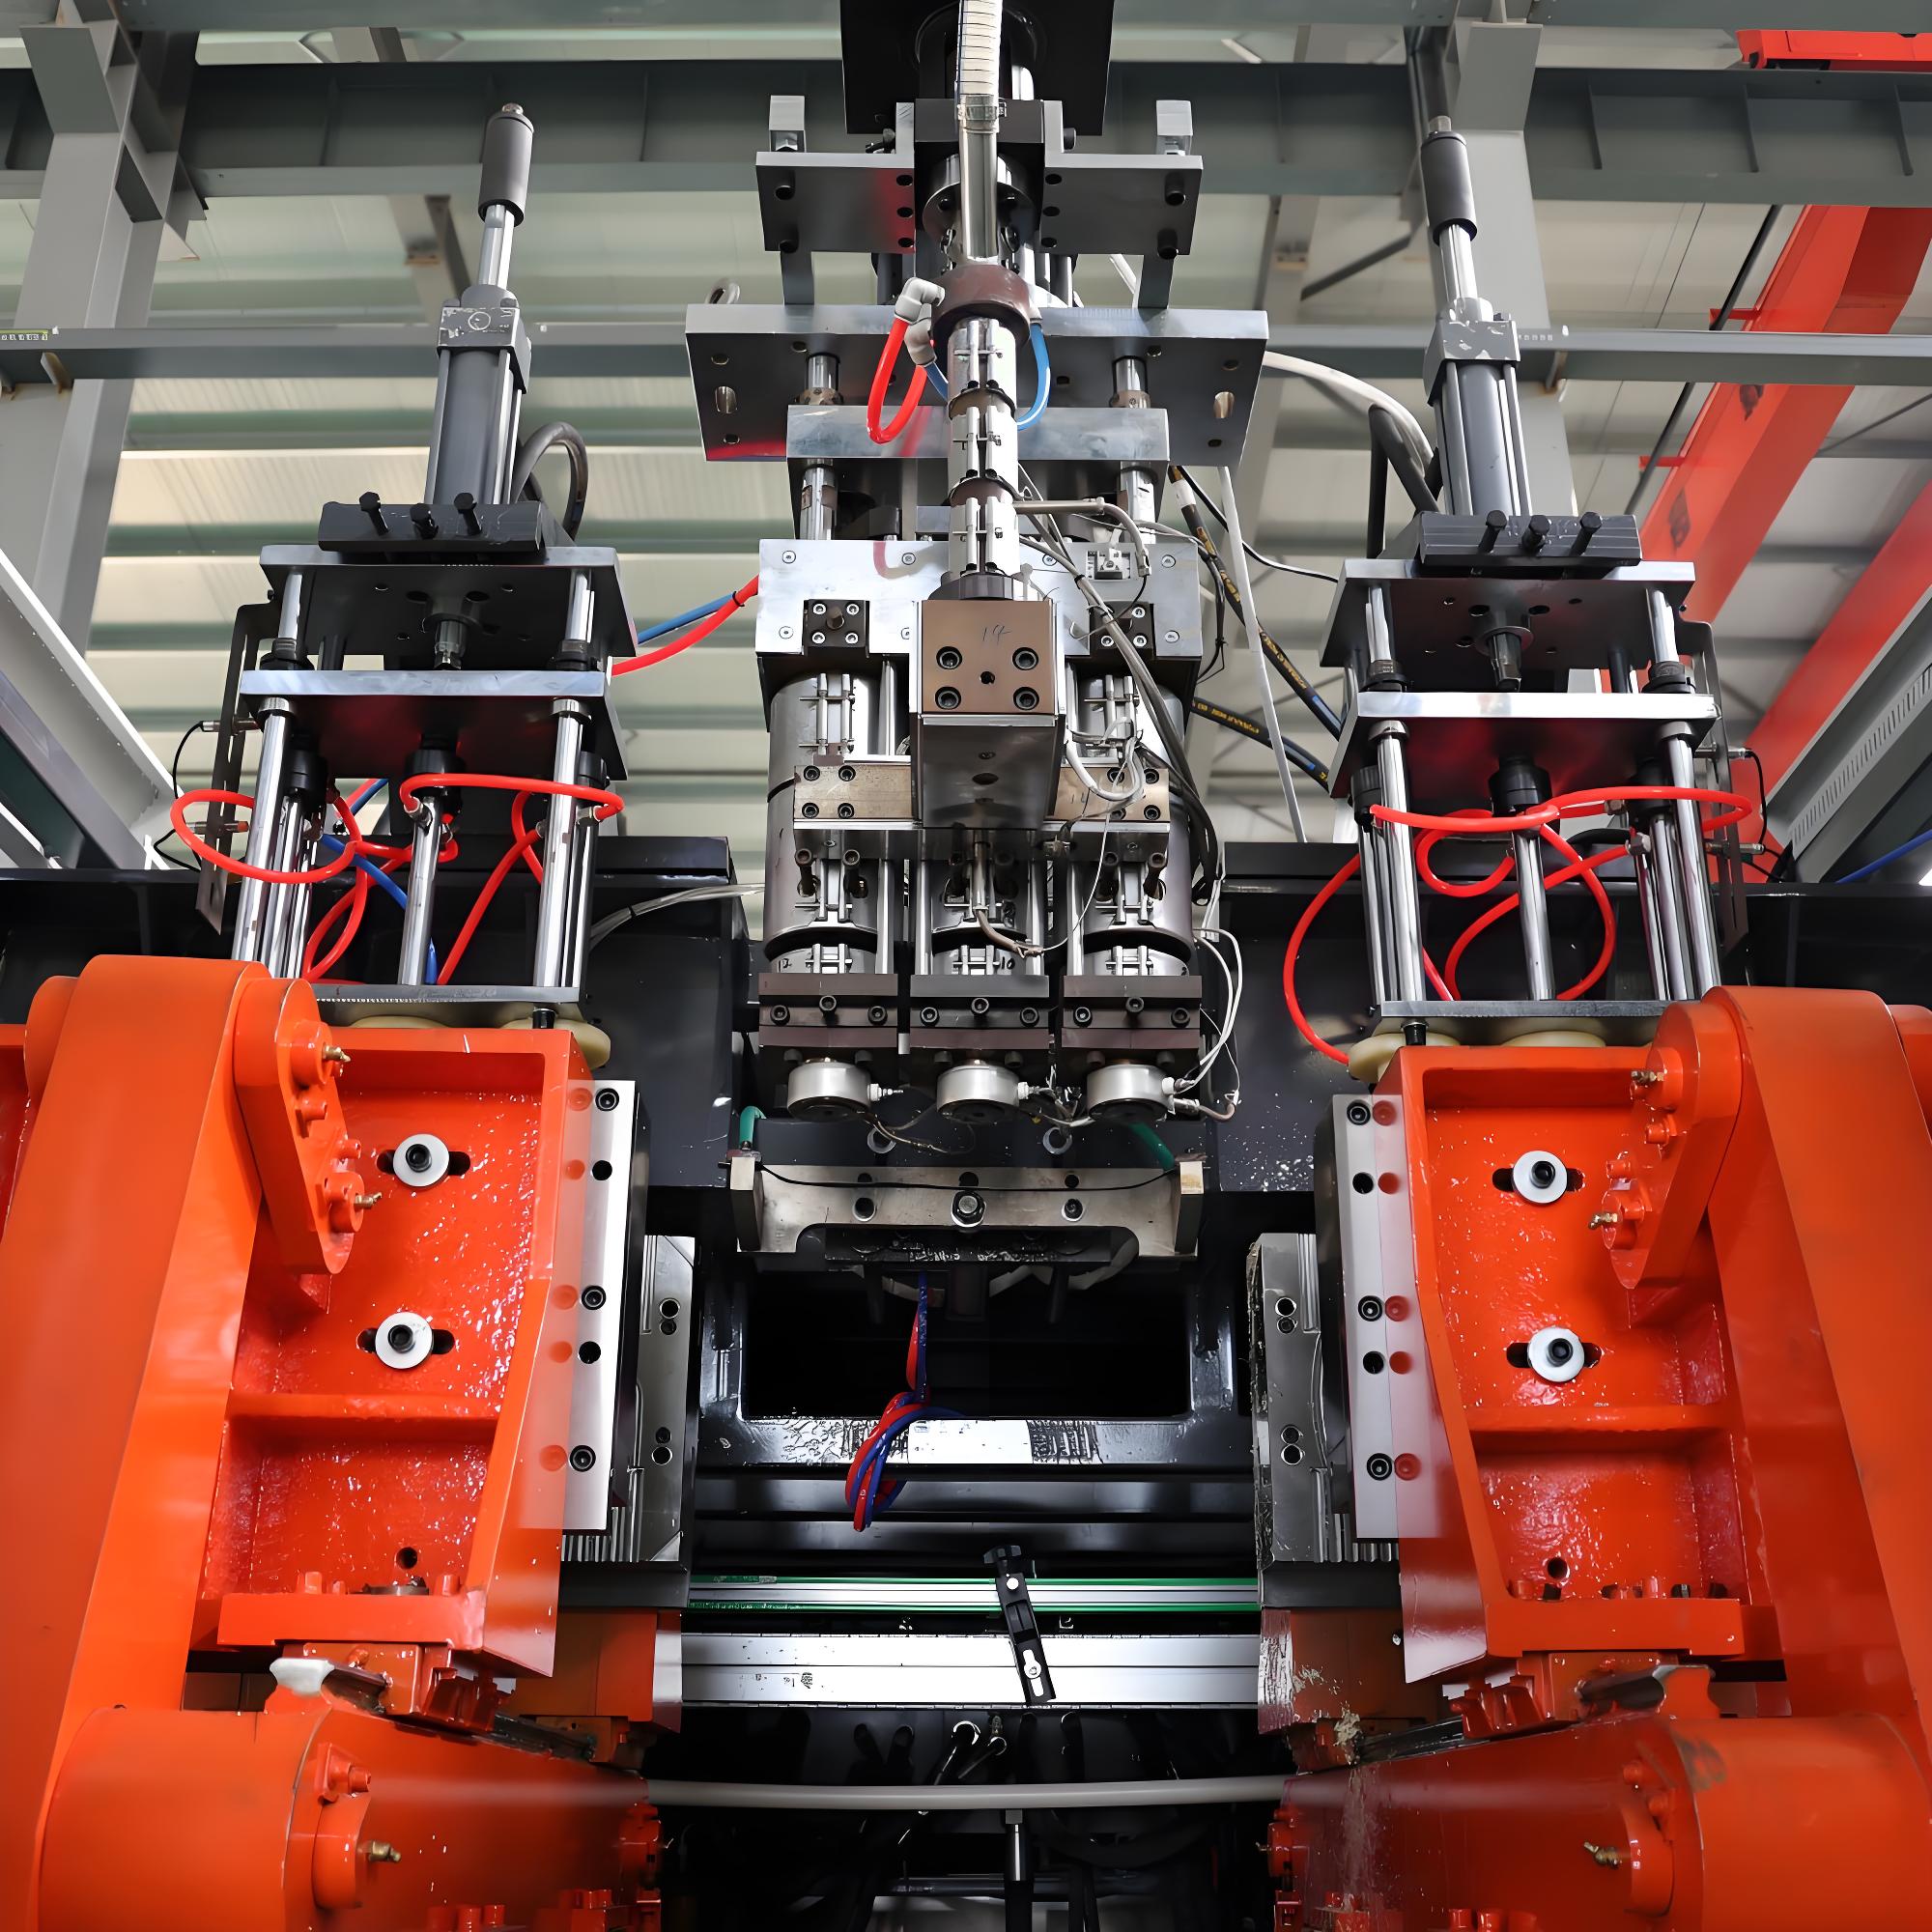

Choosing your first EBM machine is the moment when a plastic production business stops being an idea and becomes a set of hard engineering commitments. Extrusion blow molding is one of the most accessible entry points in plastics manufacturing, because a single machine, a mold and a compressor can turn resin pellets into a finished, sellable container in under a minute. But accessibility is not the same as simplicity. The specification you sign today fixes your container volume range, your cycle time, your gram weight, your energy bill and your ability to accept the second and third customer order that arrives eighteen months from now. Most first-time buyers discover this only after the machine is bolted to the floor.
This guide is written for entrepreneurs, converters diversifying into packaging, and small factories buying their first extrusion blow molding machine for containers in the 500 ml to 5 L range. It walks through the decision chain in the order that actually works: define the product first, then the material, then the container volume and the number of die head modules, and only then the machine model. It explains machine architecture, drive technology, the parameters that matter on a specification sheet, parison control, auxiliary equipment, workshop utilities, trial run acceptance and the classic mistakes that cost new producers their first year of margin.
Apollo, a Wanplas factory, has manufactured automatic extrusion blow molding machines for more than twenty years from an 8,000 square meter plant in Zhangjiagang near Shanghai, with an annual output of around 100 sets and more than 4,000 machines running in over 90 countries. That installed base spans ten machine series and more than eighty models covering hollow plastic products from 200 ml to 1,500 L. The practical consequence for a first-time buyer is simple: the questions in this guide are the same questions Apollo engineers ask before proposing a configuration, and answering them honestly before you shop will save you far more than any negotiation on the machine itself.
Start With the Product, Not the Machine: The Correct Decision Chain
The single most reliable predictor of success for a new blow molding operation is the order in which decisions are made. Profitable first-time producers define the product, then the material, then the volume and module count, then the machine. Unprofitable ones buy a machine because it was available, then go looking for something to make on it. The second path almost always ends with a machine that is either too small to accept the order that finally arrives or too large to run economically at the volumes the business actually has.
Work the chain in four stages. Stage one is the product: what exactly are you making, for whom, in what quantity, and what does the buyer inspect on arrival? A 1 L lubricant bottle with a printed shoulder, a 100 ml daily chemical bottle with a threaded neck finish and a 5 L agrochemical jerry can with an integrated handle are three completely different engineering problems, even though all three are extrusion blow molded from polyethylene. Stage two is the material, which follows from the product’s contact medium, drop resistance, barrier requirement and regulatory context. Stage three is the geometry: container volume, gram weight, neck finish, handle, and therefore the mold size, the number of cavities, and the die head module count. Stage four, and only stage four, is the machine.
The Four-Stage Decision Chain in Practice
| Stage | Question to Answer | Output You Must Fix | Typical Mistake at This Stage |
|---|---|---|---|
| 1. Product definition | Which container, which customer, which annual quantity, which inspection criteria? | Drawing or physical sample, tolerance list, target gram weight, annual volume | Planning for “bottles in general” instead of one specific bottle with a real buyer |
| 2. Material selection | What goes inside, what is the drop and stacking load, what compliance applies? | Resin family and grade window (for example blow molding HDPE at MFR 0.3 to 1.0 g/10min) | Choosing an injection grade resin because it was cheaper or locally available |
| 3. Geometry and cavitation | What container volume, what mold footprint, how many modules per cycle? | Mold dimensions, die head module count 1 to 6, required clamping force, shot weight | Ignoring platen size and tie bar spacing until the mold is already being cut |
| 4. Machine selection | Which screw diameter, L/D, station layout, drive type and control level? | Model, plasticizing capacity in kg/h, installed power, station count, parison control level | Buying on headline output figures measured with a different resin and wall thickness |
Notice how much of the machine specification is already determined by the time you reach stage four. If your product is a 1 L HDPE lubricant bottle at 55 g, running two cavities per cycle at a target of 1,400 bottles per hour, the required plasticizing rate, shot weight, clamping force and mold space are effectively fixed. The remaining decisions are about drive technology, control sophistication and how much growth headroom you want to buy today. That is a far healthier negotiating position than walking into a supplier discussion with only a vague output target.
Why “Buy the Machine, Then Find the Orders” Fails
The reverse sequence fails for three structural reasons. First, molds are product-specific and represent a meaningful share of total project commitment; a machine bought without a defined product almost guarantees that the first mold will be a compromise or a write-off. Second, cavitation determines profitability more than machine brand does, and cavitation cannot be chosen without a volume forecast. A single-cavity setup running a product that the market wants at four cavities will lose money on labor and overhead no matter how good the machine is. Third, an unmatched machine forces process compromises that show up as quality defects, and defects in packaging are usually discovered by your customer’s filling line, not by you.
A disciplined alternative is to secure a letter of intent, a trial order or at minimum a credible demand estimate from one named customer before finalizing the configuration. Then design backwards. Apollo’s engineering team routinely works from a customer drawing or a physical sample, calculates gram weight and cycle time, and proposes a machine and mold combination that meets the stated hourly output with a defined margin of spare capacity. That single step converts machine buying from a leap of faith into an engineering calculation.
How Extrusion Blow Molding Actually Works
Extrusion blow molding forms a hollow container by extruding a molten tube of plastic, called a parison, capturing it between two mold halves, and inflating it against the cooled cavity walls with compressed air. The entire cycle for a small container completes in seconds, and the process produces the neck finish, the body, the base and any integrated handle in one operation. Understanding the five phases of the cycle is the fastest way to make sense of every specification on a machine data sheet.
Phase one, plasticizing. Resin pellets fall from the hopper into a heated barrel where a rotating screw conveys, compresses, melts and homogenizes them. The screw diameter and L/D ratio determine how much melt the machine can deliver per hour and how uniform that melt is. For blow molding polyolefins, an L/D of 24 to 30 with a moderate compression ratio provides the balance of output and melt quality that most container work needs. Excessive shear degrades the polymer and shows up as odor, discoloration or reduced drop strength.
Phase two, parison formation. Melt travels into the die head, where it is turned through an annular channel and extruded downwards as a tube. The gap between the die and the mandrel sets the parison wall thickness. On a continuous extrusion machine this tube emerges without interruption; on an accumulator machine the melt is first collected in a reservoir and then pushed out rapidly as a single shot. Parison quality determines almost everything downstream, which is why die head design, melt temperature stability and wall thickness control receive so much engineering attention.
Phase three, clamping. The mold halves close around the parison, pinching it off at the base and at the neck. The pinch-off geometry creates the weld line at the bottom of the container, and the quality of that weld determines drop test performance. Clamping force must be high enough to resist internal blow pressure across the projected area of the cavity without deforming the mold or the platens. For containers up to about 5 L, clamping forces in the range of 3 to 25 tons cover most requirements, with higher figures needed as module count and projected area grow.
Phase four, blowing and cooling. Compressed air enters through a blow pin or needle and inflates the parison against the cavity wall. The air simultaneously calibrates the neck finish when a blow pin is used. Cooling dominates the cycle: the container must lose enough heat through the mold wall to be dimensionally stable at ejection. Cooling channel design, chilled water temperature and flow rate therefore directly control cycle time. For thicker-walled products, internal air exchange or cooled blowing air can shorten the cycle noticeably.
Phase five, ejection and deflashing. The mold opens, the container is removed, and the flash created at the pinch-off and the tail is trimmed, either in the mold, at a downstream station or by an operator. Flash is not waste if it is captured cleanly, granulated and returned to the feed stream at a controlled ratio. A closed-loop flash recycling arrangement is one of the highest-return investments a small blow molding plant can make, because flash can represent a significant fraction of the total shot weight on handled containers.
Why EBM Suits a First Production Business
Extrusion blow molding is attractive as a first process for four reasons. The tooling is comparatively simple, because the mold only has to form the outer surface and the pinch-off, with no core to align. Material choice is broad, spanning PE, PP, PVC, PA, PC, ABS, PS, EVA, TPU and PETG on Apollo machines, so a single machine can address several market segments. Product geometry can include handles, offset necks, oval sections and view stripes that other hollow forming processes handle with difficulty or not at all. And the process scales gradually: adding a second, third or fourth die head module multiplies output without replacing the base machine, provided the machine was specified with enough plasticizing capacity and clamping area to allow it.
Machine Architecture: Single Station, Double Station, Continuous and Accumulator
Machine architecture is the first structural decision, and for containers in the 500 ml to 5 L class it comes down to two axes: how many clamping stations serve one extruder, and whether the melt is extruded continuously or stored in an accumulator head. Getting this pair right typically has a larger effect on your cost per bottle than any other single specification choice.
Single Station Versus Double Station
A single-station machine has one extruder, one die head and one mold clamping unit. The parison is extruded, the mold closes, the container is blown and cooled, the mold opens, and the cycle repeats. It is mechanically simple, occupies less floor area, costs less to buy and to maintain, and is easy for a new team to learn. Its weakness is that the extruder must either pause or divert melt while the mold is closed and cooling, which limits how effectively the plasticizing capacity is used.
A double-station machine places two clamping units on either side of a single die head, usually on a shuttle or transfer mechanism. While one station is blowing and cooling, the other is receiving a fresh parison. The extruder therefore runs continuously and productively, and the effective output for the same screw size can rise substantially, commonly in the range of 60 to 90 percent higher than a comparable single station on cooling-dominated products. The trade-offs are a larger footprint, more moving parts, and a higher level of operator skill.
| Criterion | Single Station, Continuous Extrusion | Double Station, Continuous Extrusion | Accumulator Head |
|---|---|---|---|
| Best-fit container volume | 200 ml to 5 L | 200 ml to 5 L at higher hourly output | Large and heavy parts, outside the scope of a typical first machine |
| Extruder utilization | Moderate; idle share rises as cooling time grows | High; extruder feeds alternating stations continuously | High during fill, then a rapid discharge stroke |
| Relative output for the same screw | Baseline = 100 index points | Approximately 160 to 190 index points | Not comparable; sized by shot weight, not by hourly bottle count |
| Relative capital commitment | Low | Medium | High to Very High |
| Floor area required | Low | Medium | High, plus crane access |
| Operator skill needed | Entry level, trainable in days | Intermediate; two molds to keep in step | Advanced process discipline |
| Changeover flexibility | Fast, one mold to change | Slower, two molds must be matched | Slow; heavy tooling handling |
| Recommended for a first machine | Yes, for one to two products and moderate volume | Yes, when a confirmed order exceeds single-station capacity | No |
Continuous Extrusion Versus Accumulator Heads
Continuous extrusion is the correct architecture for the container sizes this guide addresses. Melt flows without interruption, the parison is cut or captured on each cycle, and the process reaches thermal equilibrium quickly. Because the melt residence time in the head is short and consistent, thermally sensitive materials behave predictably and color changes are relatively fast.
Accumulator heads exist to solve a different problem: forming very large or very heavy parts where a continuously extruded parison would sag under its own weight before the mold could close. The melt is collected in a reservoir and then discharged in a fast stroke. This architecture belongs to industrial drums, large tanks and technical parts, and it carries higher capital commitment, more complex process control and longer melt residence times. For a first machine producing 500 ml to 5 L packaging, an accumulator head is an unnecessary complication. Apollo’s ABLD series covers that heavy-duty territory when a business genuinely grows into it, but it is not the entry point.
Station Count and Die Head Modules Are Different Things
New buyers frequently confuse station count with module count, and the confusion produces badly sized machines. Stations are clamping units. Modules are the number of parisons the die head extrudes side by side in one cycle, typically one to six on machines in this class. A single-station machine with a four-module head produces four containers per cycle. A double-station machine with a single-module head produces one container per cycle but at a shorter effective cycle. The right combination depends on container size, cooling time and the mold width your platens can accept. As a rule of thumb, small containers below about 1 L benefit most from multiple modules, while larger containers with long cooling times benefit most from a second station.
Drive Systems Compared: Hydraulic, Servo-Hybrid and Fully Electric
Drive technology determines your energy consumption, your repeatability and a meaningful share of your maintenance workload over the machine’s life. Three architectures dominate the extrusion blow molding market: conventional hydraulic systems with fixed-displacement pumps, servo-driven hydraulic systems, and fully electric machines. For a first machine in the 500 ml to 5 L class, the realistic choice is usually between servo-hydraulic and fully electric, with conventional hydraulic remaining relevant only where energy is inexpensive and initial capital is the binding constraint.
Conventional Hydraulic Systems
A conventional hydraulic machine runs its pump at constant speed whenever the machine is powered, regardless of whether the cycle currently demands flow. Excess flow is dumped across a relief valve, converting electrical energy into heat that the cooling system must then remove. On a blow molding cycle, where clamping and carriage movements occupy only a fraction of the total cycle and the rest is cooling, this idling loss is substantial. Conventional hydraulics are mechanically robust and widely understood, but they carry three recurring costs: energy, oil temperature management, and the seal and valve maintenance that comes with continuously circulating hot oil.
Servo-Driven Hydraulic Systems
A servo-hydraulic machine replaces the constant-speed motor with a servo motor that varies pump speed to match instantaneous flow demand. During cooling, the motor slows to near standstill and draws only what the system needs to hold pressure. The energy effect is significant: compared with a conventional fixed-displacement hydraulic system, servo drives typically reduce total machine energy consumption in the range of 30 to 50 percent, with results at the upper end on cooling-dominated products where the hydraulic duty cycle is low. Secondary benefits matter almost as much. Oil runs cooler, which extends seal and fluid life; noise levels drop noticeably; and closed-loop speed control improves the repeatability of clamp and carriage movements, which stabilizes pinch-off quality.
Fully Electric Machines
A fully electric extrusion blow molding machine replaces hydraulic actuation entirely with servo-driven mechanical axes. There is no hydraulic power unit, no oil, no risk of oil contamination on the product, and no oil cooling load. Positioning accuracy and repeatability are the highest of the three architectures because every axis is under direct closed-loop control. Apollo produces a Fully Electric series covering 200 ml to 20 L for applications where environmental and cleanliness requirements are strict, which in practice means medical and pharmaceutical containers, food contact packaging, and any plant where energy cost or a corporate sustainability commitment drives the decision. The trade-off is a higher entry level of capital commitment and a maintenance profile that shifts from hydraulic fitting to electrical and mechanical drive competence.
| Attribute | Conventional Hydraulic | Servo-Driven Hydraulic | Fully Electric |
|---|---|---|---|
| Energy consumption index (conventional = 100) | 100 | 50 to 70 | 40 to 60 |
| Relative capital commitment | Low | Medium | High to Premium |
| Movement repeatability | Adequate; drifts with oil temperature | Good; closed-loop pump speed control | Excellent; every axis servo-positioned |
| Oil contamination risk on product | Present; requires disciplined maintenance | Present but reduced by lower oil temperature | Eliminated; no hydraulic circuit |
| Cooling load from the drive | High; oil cooler sized accordingly | Medium | Low |
| Noise level | Highest | Lower, drops sharply during cooling | Lowest |
| Maintenance skill profile | Hydraulic fitting, seals, filtration | Hydraulic plus drive electronics | Electrical, servo and mechanical transmission |
| Best fit for a first machine | Single shift, low tariff, capital-constrained start | The default recommendation for most startups | Multi-shift, high tariff, medical or food grade output |
How to Decide Without Overthinking It
Use three filters. First, shift pattern: if the plan is one shift for the first year, the energy advantage of a fully electric machine accumulates slowly and a servo-hydraulic machine is usually the balanced choice. If two or three shifts are planned from the start, the electrical energy difference becomes a first-order operating item and the fully electric option deserves serious evaluation. Second, product cleanliness: medical, pharmaceutical and certain food contact products effectively mandate oil-free operation. Third, local energy tariff and grid stability: where tariffs are high, an electric machine’s lower demand also reduces the transformer capacity you must install, which has knock-on effects on the electrical infrastructure you need to build.
Reading an EBM Spec Sheet: The Parameters That Decide Your Output
An extrusion blow molding specification sheet contains perhaps forty numbers, but only a dozen of them determine whether the machine can make your product at your required rate. Learning to read those twelve turns a confusing document into a straightforward compatibility check. The parameters below are grouped by what they actually control: melt supply, clamping, mold space and process capability.
Melt Supply Parameters
Screw diameter is the headline sizing parameter, commonly 45 to 90 mm on machines for 200 ml to 20 L containers. It sets the upper bound on plasticizing rate. A 55 mm screw suits small to mid-size containers at moderate output; a 75 mm screw supports larger containers or higher module counts; a 90 mm screw serves the top of the ABLB range. Choosing too large a screw is not a free safety margin, because a screw running far below its designed throughput produces long residence times and unstable melt temperature.
L/D ratio, the ratio of screw length to diameter, typically 24 to 30 for blow molding polyolefins, controls how thoroughly the melt is homogenized. A longer screw gives better mixing of regrind and masterbatch, more stable melt temperature and better color dispersion, at the cost of slightly higher shear input. If you plan to run a significant proportion of regrind or to make frequent color changes, favor the longer end of the range.
Plasticizing capacity in kg/h is the number that most directly limits your hourly output, but it is also the most frequently misquoted. Output figures depend on the resin, the melt temperature and the screw speed at which they were measured. Always ask which material and which conditions produced the quoted figure, and calculate your own requirement as hourly bottle count multiplied by total shot weight including flash, divided by expected utilization.
Clamping and Mold Space Parameters
Clamping force must exceed the internal blow pressure multiplied by the projected area of all cavities plus a safety factor. For containers up to about 5 L on machines in this class, forces from roughly 3 to 25 tons are typical, rising with module count. Insufficient clamping force produces flash at the parting line and dimensional drift; excessive force wastes energy and accelerates wear on the pinch-off edges of the mold.
Mold mounting dimensions, tie bar spacing and mold opening stroke are the constraints that most often derail a project late. The mold must physically fit between the tie bars, mount to the platen bolt pattern, and have enough opening stroke to release the container plus any handle undercut. Confirm these three numbers against your mold drawing before the mold is cut, not after.
Die head module count, typically one to six on this machine class, multiplies output but also multiplies plasticizing demand, clamping requirement and mold width. A four-module head on a 55 mm screw may be starved of melt at the rate you actually need. Module count, screw size and clamping force must be specified as a set.
| Parameter | Typical Range for a First Machine | What It Actually Controls | Consequence of Getting It Wrong |
|---|---|---|---|
| Screw diameter | 45 to 90 mm | Maximum melt throughput and shot weight capability | Too small caps output; too large causes long residence time and melt instability |
| L/D ratio | 24 to 30 | Melt homogeneity, regrind and masterbatch dispersion | Short L/D gives color streaks and unstable parison temperature |
| Plasticizing capacity | Match to hourly shot weight including flash | Ceiling on hourly container output | Nameplate output not achievable with your resin and wall thickness |
| Clamping force | 3 to 25 tons for containers up to about 5 L | Resistance to blow pressure across projected cavity area | Parting line flash, dimensional drift, weak pinch-off welds |
| Tie bar spacing and platen size | Confirm against mold drawing | Whether the mold physically fits | Mold rework or a machine that cannot run your tooling |
| Mold opening stroke | Container diameter plus handle clearance plus safety | Clean part release, especially for handled containers | Scuffed containers, deformed handles, ejection jams |
| Die head modules | 1 to 6 | Containers produced per cycle | Melt starvation or uneven parison distribution across modules |
| Parison programming points | 20 to 100 points where fitted | Axial wall thickness distribution and gram weight control | Overweight containers or thin spots at corners and handles |
| Installed power | Sum of heating, drive and auxiliary loads | Transformer sizing and cable specification | Voltage drop, breaker trips, costly electrical rework |
| Air pressure requirement | 0.7 to 0.8 MPa control air; 2.5 to 4.0 MPa blowing where required | Blow-up ratio achievement and detail definition | Poor surface definition, incomplete neck formation, slow cycles |
Calculating Your Real Requirement
Convert your commercial target into machine language with a short calculation. Suppose you need 12,000 one-liter HDPE bottles per day at a finished weight of 50 g, with flash adding 20 percent to the shot, running two shifts of eight hours at 85 percent utilization. Total resin passing through the machine per day is 12,000 multiplied by 60 g, which is 720 kg. Divided by 16 hours and then by 0.85 utilization, the required plasticizing rate is approximately 53 kg/h. Cross-check the cycle: if the cooling-dominated cycle for that bottle is 18 seconds and the head has two modules, the machine produces 400 bottles per hour per module pair cycle, or 800 bottles per hour, which over 16 hours at 85 percent gives about 10,900 bottles. That shortfall tells you to move to a three-module head or a double-station layout before you sign, not after.
Material Basics for a First-Time EBM Producer
Material selection is where new producers lose the most money, because resin is the largest recurring input and a wrong grade quietly degrades output, scrap rate and drop test performance every single shift. Apollo machines process PE, PP, PVC, PA, PC, ABS, PS, EVA, TPU and PETG, but four families cover the overwhelming majority of first-time projects: HDPE, PP, PETG and PVC.
HDPE: The Default Starting Material
High density polyethylene in a dedicated blow molding grade is the workhorse of extrusion blow molding. Look for melt flow rate roughly in the 0.3 to 1.0 g/10min range measured at the standard blow molding condition. Lower MFR means higher molecular weight, better melt strength, less parison sag and better environmental stress crack resistance, which matters for detergent and agrochemical contents. Higher MFR flows more easily and cycles faster but sags more and offers less stress crack resistance. Melt temperature typically runs around 170 to 210 degrees Celsius, with barrel zones profiled to reach that gradually. HDPE is forgiving, does not normally require drying, tolerates regrind well, and handles handles, pinch-offs and thick base welds without drama.
PP: Clarity, Rigidity and Heat Resistance
Polypropylene, usually a random copolymer or a dedicated high melt strength blow molding grade, is chosen for better clarity, higher rigidity and higher service temperature than HDPE, which suits hot-fill sauces, some cosmetic packaging and containers that must survive warm warehouse conditions. Melt temperature typically runs around 190 to 230 degrees Celsius. The main process challenges are lower melt strength in standard grades, which increases parison sag, and slower crystallization, which lengthens cooling and therefore cycle time. Mold cooling design and chilled water temperature matter more with PP than with HDPE.
PETG: Glass-Like Clarity Without Stretch Blow Molding
PETG is used when a container needs high transparency and gloss but the geometry or volume does not justify a stretch blow molding route. Typical melt temperature is around 200 to 230 degrees Celsius. PETG is hygroscopic and must be dried before processing, usually in a dehumidifying dryer, otherwise hydrolytic degradation produces streaks, bubbles and a marked loss of mechanical strength. It also demands careful screw selection and gentle shear, and it tolerates regrind less generously than polyolefins. For a first machine, PETG is realistic as a second material once the team has mastered polyolefin processing.
PVC: Capable but Unforgiving
Rigid PVC offers excellent clarity, chemical resistance and barrier properties for certain contents, and it is common in some cosmetic and specialty chemical packaging. Melt temperature is low, generally around 165 to 195 degrees Celsius, and the processing window is narrow because PVC degrades thermally and releases corrosive decomposition products. It requires a dedicated low-shear screw geometry, corrosion-resistant barrel and screw surfaces, careful dead-spot-free die head design, and disciplined shutdown procedures. PVC is not a recommended first material for a new team unless the target market specifically requires it and the supplier configures the machine for it from the outset.
| Material | Typical Melt Temperature | Grade Indicator | Screw and Drying Notes | Suitability for a First Machine |
|---|---|---|---|---|
| HDPE (blow molding grade) | 170 to 210 degrees Celsius | MFR 0.3 to 1.0 g/10min | General purpose PE screw, L/D 25 to 30; drying not normally required | Recommended first material |
| PP (blow molding copolymer) | 190 to 230 degrees Celsius | High melt strength grade preferred | PP screw with gradual compression; drying not normally required | Good second material; expect longer cooling |
| PETG | 200 to 230 degrees Celsius | Extrusion blow molding grade | Low-shear screw; dehumidifying dryer mandatory | Second stage, after polyolefin experience |
| Rigid PVC | 165 to 195 degrees Celsius | Blow molding compound with heat stabilizer | Dedicated low-shear PVC screw, corrosion-resistant surfaces, streamlined die head | Only if the market requires it and the machine is configured for PVC |
| LDPE and LLDPE blends | 160 to 200 degrees Celsius | Used for squeezable containers | Standard PE screw; watch parison sag on tall parisons | Suitable for squeeze bottle niches |
Regrind Ratios and the Flash Loop
Every extrusion blow molded container generates flash at the pinch-off, the tail and often the neck. On handled containers, flash can approach a third of the total shot weight, and on simple cylindrical bottles it is often 10 to 20 percent. That material is not scrap unless you allow it to become scrap. A beside-the-press granulator with sound enclosure, a metal separator, and a dosing unit that blends regrind with virgin resin at a controlled ratio turns flash into a closed loop within minutes of it being trimmed.
Set a practical ceiling on regrind ratio rather than pushing it to the maximum. For general-purpose HDPE containers with no direct food or pharmaceutical contact, in-house clean flash at 20 to 30 percent is a common working range, and some producers run higher on non-critical products. Above that, mechanical properties, color consistency and melt stability start to drift, and each additional heat history reduces the polymer’s molecular weight. For food, pharmaceutical or regulated contact applications, follow the applicable regulation and the resin supplier’s guidance, which frequently means virgin material for the contact layer or for the whole container. Keep regrind clean, dry, size-consistent and free of foreign material; contaminated regrind causes black specks and pinholes that will fail a leak test.
Parison Control: When Wall Thickness Programming Pays for Itself
The parison is the single most influential variable in extrusion blow molding, because everything the container will be, its weight, its wall distribution, its strength and its appearance, is decided before the mold even closes. There are two levels of parison control available to a first-time buyer: a fixed die gap, and axial wall thickness programming with 20 to 100 control points. Understanding when the second is worth its cost is one of the most valuable pieces of judgment a new producer can develop.
Fixed Die Gap: Simple, Robust, Adequate for Simple Shapes
With a fixed gap, the die and mandrel are set to a constant clearance and the parison emerges with essentially uniform wall thickness along its length. The container’s final wall distribution is then determined entirely by how far each region of the parison has to stretch. Regions that expand the most, typically the widest part of the body and the shoulder, become thinnest. To ensure the thinnest region still meets specification, the whole parison must be run thicker than necessary, and the extra material appears as excess weight in regions that never needed it.
For a straight cylindrical bottle with modest blow-up ratio and a generous wall tolerance, this penalty is small and a fixed gap is perfectly reasonable. Many profitable small operations run fixed gap tooling for years on simple containers.
Axial Wall Thickness Programming: Material Savings and Geometry Freedom
Wall thickness programming moves the mandrel axially during parison extrusion under servo control, varying the die gap according to a stored profile with 20 to 100 discrete points along the parison length. Thickness is added where the container will stretch most, and removed where it will barely stretch at all. The result is a container that meets its minimum wall specification everywhere at a lower total gram weight.
The commercial logic is straightforward. If programming lets you reduce a 55 g bottle to 51 g while still passing top load and drop tests, you save roughly 7 percent of your largest recurring input on every unit produced, forever. At meaningful annual volumes, that recurring saving repays the option far faster than most first-time buyers expect. Programming also unlocks geometries that are difficult or impossible with a fixed gap: integrated handles, sharp shoulder transitions, deep offsets, oval sections, large diameter steps and view stripes.
| Product Situation | Fixed Die Gap | Axial Wall Thickness Programming | Verdict |
|---|---|---|---|
| Straight cylindrical bottle, 100 to 500 ml, loose wall tolerance | Fully adequate | Marginal benefit | Fixed gap |
| 1 L bottle with defined gram weight specification | Requires overweight safety margin | Typically several percent lighter at equal performance | Programming pays back at volume |
| Container with integrated handle | Thin spots at the handle bridge are hard to avoid | Material placed exactly where the stretch occurs | Programming strongly recommended |
| Sharp shoulder or large diameter step | Corner thinning and possible blowout | Controlled thickness at the transition | Programming required |
| Frequent product changeovers across several molds | Mechanical re-setting at each change | Stored profiles recalled per product recipe | Programming shortens changeover |
| Thin-wall lightweighting program for a demanding buyer | Limited headroom | The enabling technology for lightweighting | Programming essential |
Radial Wall Distribution and Die Tooling
Axial programming addresses thickness along the parison length. It does not correct uneven thickness around the circumference, which is a radial problem caused by die and mandrel concentricity, melt flow imbalance in the head, or a non-round container that stretches unevenly. Radial correction is handled by precise die centering, by tooling with a machined oval or contoured profile for non-round containers, and by careful head temperature uniformity. When you evaluate a machine, ask specifically how the die head is centered, whether the tooling can be profiled for your container shape, and how many independent temperature zones the head has, because those details determine how quickly a new mold can be brought to a stable process.
Two Realistic Starting Points From the Apollo ABLB Series
The Apollo ABLB series covers plastic containers from 200 ml to 20 L across eight machine types, and it is the range from which almost every first machine is selected. Rather than listing the whole series, this section presents two concrete starting points that bracket the typical entry decision: a compact single-station configuration for small to mid-size containers, and a step-up configuration for larger volumes, handled containers and higher hourly output. Both are drawn from the same design family, which means an operator trained on one is productive on the other.
Product Block 1: ABLB 55 — The Entry Configuration for 200 ml to 3 L
The ABLB 55 is the natural entry point for a business whose first product sits between 200 ml and 3 L: daily chemical bottles, shampoo and lotion containers, small food and sauce bottles, motor oil bottles up to 1 L, and simple industrial containers. It is built around a 55 mm extruder with a general-purpose polyolefin screw, a continuous extrusion die head that can be supplied in single or multi-module form, and a clamping unit sized for the projected areas typical of this container class. The machine is compact enough to fit a modest workshop, simple enough for a team with no blow molding background to learn quickly, and specified so that a second module or wall thickness programming can be added as the business grows.
| Specification Item | Apollo ABLB 55 — Representative Entry Configuration | Notes for a First-Time Buyer |
|---|---|---|
| Container volume range | 200 ml to 3 L | Covers the majority of daily chemical, personal care and small food packaging |
| Station configuration | Single station, continuous extrusion; double station available | Choose double station when confirmed orders exceed single-station capacity |
| Die head modules | 1 to 4 modules | Module count must be fixed together with screw size and clamping force |
| Screw diameter | 55 mm | General-purpose PE screw as standard; PP, PETG and PVC geometries on request |
| L/D ratio | 25:1 to 28:1 | Specify the longer option if you plan high regrind ratios or frequent color changes |
| Plasticizing capacity (HDPE) | Approximately 50 to 70 kg/h | Confirm against your own shot weight including flash, not against nameplate figures |
| Maximum shot weight | Approximately 200 to 260 g depending on head configuration | Shot weight is container weight plus flash, summed across all modules |
| Clamping force | Approximately 5 to 8 tons | Rises with module count and projected cavity area |
| Mold opening stroke | Adjustable, sized to container diameter plus handle clearance | Verify against your mold drawing before tooling is cut |
| Parison control | Fixed die gap standard; axial wall thickness programming with 20 to 100 points optional | Add programming if the product has a handle, sharp shoulder or tight gram weight target |
| Drive system | Hydraulic with servo pump option | Servo option targets an energy reduction of roughly 30 to 50 percent versus conventional hydraulics |
| Air supply requirement | 0.7 to 0.8 MPa control air; higher pressure circuit where the process requires it | Size the compressor for peak simultaneous demand, not average consumption |
| Installed power | Approximately 28 to 40 kW total connected load | Actual running draw is typically well below connected load; size the transformer on connected load |
| Control system | PLC with touch screen HMI, recipe storage, multi-zone temperature control | Recipe storage dramatically shortens changeover for multi-product operations |
| Representative shift output | Roughly 5,000 to 9,000 pieces per 8-hour shift for a 500 ml bottle on a two-module head | Highly dependent on wall thickness, cooling water temperature and utilization |
Representative configuration only. Head module count, screw geometry, clamping unit and control options are matched to the specific container, so the final data sheet is issued against your drawing or sample. The point of the table is not to fix numbers but to show which numbers you should be asking about.
Product Block 2: ABLB 75 — The Step-Up Configuration for 1 L to 5 L
The ABLB 75 is the configuration to specify when the first product is larger, heavier or handled: 2 L and 3 L household chemical containers, 4 L and 5 L lubricant and agrochemical jerry cans, larger food and condiment containers, and any container where an integrated handle and a defined gram weight specification make parison programming essential. It uses a 75 mm extruder, which roughly doubles the plasticizing envelope of the entry configuration, paired with a clamping unit and platen area sized for larger molds and higher projected areas. Apollo’s stated maximum container capacity of 5,000 ml on this class of machine sits comfortably within its envelope.
| Specification Item | Apollo ABLB 75 — Representative Step-Up Configuration | Notes for a First-Time Buyer |
|---|---|---|
| Container volume range | 1 L to 5 L, extendable within the ABLB envelope | Covers jerry cans, lubricant containers and large household chemical packs |
| Station configuration | Single or double station, continuous extrusion | Double station is the usual choice for cooling-dominated 4 L and 5 L containers |
| Die head modules | 1 to 4 modules, up to 6 on smaller containers | Multi-module heads need matched mold width and clamping capacity |
| Screw diameter | 75 mm | A 65 mm intermediate and a 90 mm larger option exist within the same series |
| L/D ratio | 26:1 to 30:1 | Longer barrel improves regrind dispersion on high-flash handled containers |
| Plasticizing capacity (HDPE) | Approximately 110 to 150 kg/h | Verify with your own resin grade and target melt temperature |
| Maximum shot weight | Approximately 500 to 800 g depending on head configuration | A 5 L jerry can with handle may carry 30 percent flash; include it in the calculation |
| Clamping force | Approximately 12 to 25 tons | Sized on projected area of all cavities plus a safety factor |
| Mold mounting space | Enlarged platen and tie bar spacing versus the entry configuration | Send the mold drawing early so platen and stroke are confirmed on the order |
| Parison control | Axial wall thickness programming, 20 to 100 points, strongly recommended | Essential for handles, sharp shoulders and gram weight reduction programs |
| Drive system | Servo-driven hydraulic standard on this class; fully electric available in a parallel series | Servo drive is the practical default for two-shift operation |
| Installed power | Approximately 55 to 85 kW total connected load | Confirm transformer headroom before ordering; include chiller and compressor loads |
| Cooling water requirement | Chilled circuit for molds plus a separate circuit for the hydraulic and feed throat | Mold cooling capacity is the most common hidden bottleneck on large containers |
| Representative shift output | Roughly 2,500 to 4,500 pieces per 8-hour shift for a 5 L handled jerry can, configuration dependent | Cooling time dominates; chilled water temperature has a direct effect on this figure |
Representative configuration only. As with the entry machine, the binding constraint is rarely the machine’s headline capability but the match between module count, cooling capacity and the specific container. Apollo issues the final data sheet against your drawing, gram weight target and hourly output requirement.
Where the Rest of the Range Fits
Two adjacent options are worth knowing about even if they are not your first purchase. The Fully Electric series covers the same 200 ml to 20 L container window without a hydraulic circuit, and it is the correct answer when the product is medical, pharmaceutical or high-grade food packaging, or when the plant runs continuously and energy consumption dominates the operating budget. The ABLD series covers 20 L to 1,500 L for industrial containers and large technical parts, and it uses accumulator technology and a completely different scale of tooling and handling infrastructure. For a first machine aimed at 500 ml to 5 L packaging, the ABLB series and the Fully Electric series are the relevant families, and the ABLD range is best understood as a growth path rather than a starting point.
What You Can Actually Produce: Applications and End Products
An extrusion blow molding machine is a general-purpose container factory, and the breadth of what it can produce is one of the strongest arguments for it as a first machine. Apollo machines serve food and beverage, daily chemical products, the chemical industry, building materials, medical and pharmaceutical, automotive production, transportation, and cultural and sports goods. For a business starting in the 500 ml to 5 L window, five end-product families account for most realistic first orders.
Daily Chemical and Personal Care Bottles
Shampoo, conditioner, body wash, hand soap, liquid detergent, fabric softener, surface cleaner and disinfectant bottles from 200 ml to 5 L are the most common entry market worldwide. Demand is steady, local brands are numerous, and buyers value reliable neck finish dimensions above all because their capping lines are unforgiving. HDPE dominates, with PP used where clarity or rigidity is preferred. Typical requirements are a consistent neck finish, good top load for palletizing, resistance to the surfactant content, and repeatable gram weight. Handled 5 L detergent containers are a natural step up once wall thickness programming is in place.
Food, Sauce and Condiment Containers
Cooking oil bottles, sauce and vinegar bottles, honey and syrup containers, dairy and beverage bottles, and seasoning containers from 250 ml to 5 L form a large second market. Food contact brings regulatory obligations that must be handled explicitly: appropriate food grade resin, documented compliance under the applicable regime such as FDA or EU 10/2011 depending on the destination market, hygienic workshop practice, and in many cases restrictions on regrind use in the contact surface. Squeezable sauce bottles typically use LDPE or LLDPE blends, while rigid oil bottles use HDPE or PP.
Lubricant and Automotive Fluid Containers
Motor oil bottles at 1 L and 4 L, brake fluid and coolant containers, and screen wash jugs are attractive because order sizes are large and specifications are stable. These containers are almost always HDPE with an integrated handle at the larger sizes, and they carry a defined gram weight and a drop test requirement. Environmental stress crack resistance matters because the contents are aggressive over long shelf lives. This family is the clearest case for specifying wall thickness programming from day one.
Agrochemical and Industrial Jerry Cans
Pesticide, herbicide and fertilizer containers from 1 L to 5 L, plus small industrial chemical containers, require careful attention to chemical compatibility, leak tightness and often a specific closure system. Buyers in this segment test aggressively: leak testing on every unit, drop testing to a defined standard, and sometimes compatibility testing with the specific formulation. A leak tester integrated downstream of the machine is not optional here, it is a condition of doing business.
Toys, Housewares and Miscellaneous Hollow Parts
Hollow toys, watering cans, small tool boxes, floats, cones, containers for cultural and sports goods, and simple building material components round out the picture. These products often have irregular geometry, which makes them a good showcase for parison programming, and they frequently accept higher regrind ratios than packaging, which improves material economics. They also tend to have less rigid quality specifications, which makes them useful for building operator skill in the first months of production.
| Application Family | Typical Volume Window | Usual Material | Critical Quality Item | Parison Programming Needed? |
|---|---|---|---|---|
| Daily chemical and personal care | 200 ml to 5 L | HDPE, PP | Neck finish repeatability and top load | Optional below 1 L, recommended above |
| Food, sauce and condiment | 250 ml to 5 L | Food grade HDPE, PP, LDPE blends | Regulatory compliance and contact surface cleanliness | Recommended for shaped bottles |
| Lubricant and automotive fluids | 500 ml to 5 L | HDPE with high stress crack resistance | Gram weight control and drop performance | Yes |
| Agrochemical and industrial | 1 L to 5 L | HDPE, sometimes with barrier treatment | Leak tightness on 100 percent of units | Yes |
| Cosmetic and clear packaging | 100 ml to 1 L | PETG, PP, PVC where permitted | Transparency, gloss and absence of streaks | Usually yes for shaped bottles |
| Toys, housewares and hollow parts | Varies widely | HDPE, PP, higher regrind tolerance | Dimensional stability and surface finish | Yes for irregular geometry |
Requirement-to-Model Selection Guide
The table below converts common first-time requirements directly into an Apollo configuration recommendation. It is a starting point for discussion rather than a substitute for engineering review, because module count and cooling capacity always have to be confirmed against the specific container geometry and the available chilled water temperature.
| Container Volume and Type | Material | Target Daily Output | Recommended Apollo Configuration | Key Options to Specify |
|---|---|---|---|---|
| 200 to 500 ml daily chemical bottle, cylindrical | HDPE or PP | Up to about 8,000 pieces | ABLB 55, single station, 2-module head | Servo pump, recipe storage, beside-the-press granulator |
| 500 ml to 1 L shampoo or lotion bottle, shaped | HDPE | 10,000 to 15,000 pieces | ABLB 55 double station or ABLB 65, 2 to 3 modules | Wall thickness programming, deflashing station, leak tester |
| 1 L lubricant bottle with handle | HDPE, high stress crack resistance grade | 8,000 to 12,000 pieces | ABLB 65 or ABLB 75, 2-module head | Programming with 50 or more points, in-mold deflashing, chiller upgrade |
| 2 to 3 L household chemical container | HDPE | 5,000 to 8,000 pieces | ABLB 75, single or double station, 1 to 2 modules | Programming, enlarged mold space, higher chiller capacity |
| 4 to 5 L jerry can with integrated handle | HDPE | 4,000 to 7,000 pieces | ABLB 75 double station, single or twin module | Programming, leak tester, robust flash recycling loop |
| 100 to 500 ml pharmaceutical or medical container | HDPE, PP, medical grade | Volume varies; cleanliness dominates | Fully Electric series, multi-module head | Oil-free operation, clean air filtration, controlled workshop environment |
| 100 to 300 ml clear cosmetic bottle | PETG | 6,000 to 10,000 pieces | ABLB 55 with PETG screw package | Dehumidifying dryer, low-shear screw, polished tooling |
| Hollow toys and irregular housewares | HDPE or PP with high regrind ratio | Order dependent | ABLB 55 or ABLB 75 depending on part size | Programming, longer L/D barrel, larger granulator |
| Multi-shift plant with high energy tariff | Any compatible resin | Continuous operation | Fully Electric series in the matching volume window | Energy metering, remote monitoring, preventive maintenance plan |
| Containers above 20 L | HDPE | Project specific | ABLD series, outside the scope of a typical first machine | Crane access, reinforced foundation, heavy tooling handling |
How to Use This Table in a Real Inquiry
Find the row closest to your product, then send four items to the engineering team: a drawing or physical sample of the container, the target gram weight or wall thickness specification, the required hourly or daily output, and your available electrical supply and chilled water conditions. Those four items are sufficient to produce a configuration proposal with a defensible output figure. Anything less, and any output number you receive is an estimate based on assumptions you have not seen.
The Auxiliary Equipment, Mold and Utility Checklist
The blow molding machine is rarely the largest single element of a first project, and first-time buyers who plan only for the machine consistently underestimate what it takes to reach saleable output. Molds, compressed air, cooling, material handling, flash recycling and quality testing all have to be in place before the first good container leaves the workshop. The checklist below uses relative investment levels rather than figures, because equipment scale, local sourcing and specification vary enormously between projects.
Compressed Air Is the Most Commonly Undersized Utility
Extrusion blow molding needs two distinct air services. Control and actuation air at roughly 0.7 to 0.8 MPa drives cylinders, knives, ejectors and conveyors. Blowing air at higher pressure, commonly in the region of 2.5 to 4.0 MPa where the process and product require it, inflates the parison and defines detail. Some containers with generous wall thickness and simple geometry can be blown at lower pressures, while thin-walled containers with sharp detail need the higher circuit. Confirm the requirement for your specific product with the machine supplier before sizing the compressor room.
Three failures recur. First, the compressor is sized on average consumption rather than peak simultaneous demand, so pressure sags during the blow phase and container detail suffers. Second, no receiver tank is installed, so every blow event pulls directly on the compressor. Third, air is not dried, so moisture and oil carry into the blow circuit and eventually onto the product’s interior surface, which is unacceptable for food, pharmaceutical and even many daily chemical applications. A refrigeration or desiccant dryer, an appropriately sized receiver, and filtration matched to the product’s cleanliness requirement are not optional extras.
Cooling: Where Cycle Time Is Won or Lost
Cooling typically consumes the majority of the blow molding cycle, so cooling capacity converts directly into output. A chiller sized for the machine and mold heat load, with adequate flow rate and correctly sized manifolds and hoses, is a core investment. Chilled water in the region of 8 to 15 degrees Celsius is common for polyolefin containers, with the exact temperature balanced against the risk of condensation on molds in humid climates. Undersized chillers and restrictive hose runs are among the most frequent causes of a machine failing to reach its rated output on site while performing perfectly at the factory.
A mold temperature controller is needed where a mold must be held at an elevated or precisely controlled temperature rather than simply chilled, which occurs with certain materials and surface finish requirements. Separate cooling circuits for molds, for the extruder feed throat and for the hydraulic oil cooler prevent one load from disturbing another.
| Item | Necessity Level | Relative Investment Level | Sizing Guidance | Consequence If Skipped or Undersized |
|---|---|---|---|---|
| Molds (per product) | Mandatory | Medium to High per product; often the largest non-machine item | One mold set per container design and cavitation; confirm platen fit first | No production at all; mold rework is slow and expensive in lost time |
| Low-pressure air compressor (0.7 to 0.8 MPa) | Mandatory | Medium | Size on peak simultaneous demand plus 20 to 30 percent headroom | Slow actuation, inconsistent cycle timing |
| High-pressure blowing air (2.5 to 4.0 MPa where required) | Process dependent | Medium to High | Confirm required pressure with the supplier for your specific container | Poor detail definition, incomplete neck formation, longer cycles |
| Air dryer, receiver tank and filtration | Mandatory | Low to Medium | Dew point and filtration grade matched to product cleanliness requirement | Moisture and oil inside containers; rejected food and pharmaceutical lots |
| Water chiller and cooling circuit | Mandatory | Medium | Size on mold plus machine heat load with margin for summer ambient conditions | Longer cycles, dimensional instability, output shortfall against contract |
| Mold temperature controller | Product dependent | Low | One unit per circuit requiring controlled elevated temperature | Surface defects and inconsistent shrinkage on sensitive products |
| Beside-the-press granulator | Strongly recommended | Low to Medium | Throughput at least equal to your hourly flash generation | Flash accumulates as scrap; material cost per container rises sharply |
| Regrind dosing and blending unit | Recommended | Low | Matched to target regrind ratio and hourly throughput | Uncontrolled regrind ratio causes color and property variation |
| Leak tester | Mandatory for chemical, agrochemical and most food work | Medium | Inline capacity matched to machine output | Leakers reach the customer’s filling line; contract loss |
| Material handling and hopper loader | Recommended | Low | Vacuum loader per machine; central system when several machines run | Manual filling, contamination risk, operator time lost |
| Dehumidifying dryer | Mandatory for PETG and other hygroscopic resins | Low to Medium | Capacity matched to throughput and required residence time | Hydrolytic degradation, streaks, bubbles and strength loss |
| Transformer and electrical distribution | Mandatory | Medium | Sum of machine, chiller, compressor and auxiliary connected loads plus growth margin | Voltage drop, nuisance tripping, costly retrofit during production |
| Quality lab basics (scale, wall gauge, drop rig) | Recommended | Low | Precision scale, ultrasonic or destructive wall thickness measurement, drop fixture | No objective evidence of conformance when a customer complains |
How to Sequence Auxiliary Purchases
Buy in three waves. Wave one is everything without which no saleable container exists: molds, compressors with dryer and receiver, chiller and cooling circuit, electrical infrastructure, and material handling. Wave two is everything that protects quality and margin from the first week of production: granulator, regrind dosing, leak tester, and the basic quality lab. Wave three is optimization: automation of deflashing and packing, additional molds for product variants, energy metering, and inline vision inspection. Attempting wave three before wave two is a common and costly inversion.
Workshop Layout, Utilities and EHS Planning
A blow molding workshop has a distinctive physical signature: the machine itself is relatively compact, but the space around it for mold storage, material, finished goods and flash handling is considerable, and the utility infrastructure is heavier than newcomers expect. Planning the building before the machine arrives is far cheaper than adapting it afterwards.
Floor Area and Layout Logic
Plan the workshop as a straight material flow: raw resin storage, drying and blending, the machine, deflashing and inspection, packing, then finished goods. Cross-flows waste labor and create contamination risk. Around the machine itself, allow clear access on all four sides for mold changes, screw removal, die head service and electrical cabinet access. Mold changes require a lifting arrangement, whether an overhead beam with a hoist, a jib crane or a mold cart, and the lifting route must be planned rather than improvised.
A single small to mid-size EBM cell with its auxiliaries, working stock and packing area typically needs a workshop footprint well beyond the machine’s own dimensions, with a common planning heuristic of allocating three to four times the machine footprint for the complete cell. Ceiling height matters more than most first-time buyers expect: the extruder hopper, the loader on top of it, and the crane or hoist clearance above set a practical minimum, and a low roof will force an inconvenient layout or manual material handling.
Electrical Supply
Calculate the total connected load as the sum of the blow molding machine, the chiller, the compressor, the granulator, the dryer, the loaders and the lighting and ventilation, then add a growth margin so that a second machine does not require a new transformer. Confirm voltage and frequency with the supplier, since machines can be configured for different supply standards, and confirm whether your grid is stable enough that a voltage stabilizer is warranted. Cable sizing and breaker coordination should be done by a qualified electrical contractor against the actual connected load, not estimated.
Cooling Water and Drainage
Specify the required chilled water flow rate and temperature, the make-up water source, water treatment to control scaling and biological growth, and drainage. Cooling towers, if used, need clear airflow and a maintenance access route. In humid climates, plan for condensation management on molds and pipework, because water dripping onto a hot mold surface or onto the floor around a machine is both a quality issue and a safety issue.
Ventilation, Safety and Environmental Compliance
Blow molding is a comparatively clean process, but three hazard categories require attention. Thermal hazards come from the barrel, die head and hot melt, which demand guarding, personal protective equipment and a purge procedure that directs melt safely away from operators. Mechanical hazards center on the clamping unit, and the machine’s guarding, interlocks and emergency stop circuits must remain functional; CE marked machines are supplied with the guarding and safety circuits required by the applicable directives, and defeating them is both dangerous and a compliance breach. Process emissions from heated polymer, particularly with PVC, require local extraction and general ventilation appropriate to the material.
Noise is the fourth item. Granulators are the loudest equipment in a typical blow molding workshop, so place them in an enclosure or a separate room, and provide hearing protection where exposure warrants it. Finally, plan for waste streams: purge material, rejected containers, and packaging waste all need designated collection so that recyclable material is not lost to general waste.
| Planning Item | What to Determine Before the Machine Ships | Who Provides the Data | Common Oversight |
|---|---|---|---|
| Floor loading and foundation | Machine weight, footprint and any leveling or anchoring requirement | Machine supplier drawing | Installing on an unlevel or insufficiently thick slab |
| Ceiling height and lifting | Hopper and loader height, mold lifting route, hoist clearance | Supplier plus your own building survey | No lifting provision, leading to unsafe manual mold handling |
| Electrical capacity | Total connected load, voltage, frequency, phases, growth margin | Supplier data sheet plus local electrical contractor | Counting only the machine and forgetting chiller and compressor |
| Compressed air | Peak flow at each pressure level, dew point, filtration grade | Supplier process data for your specific container | Sizing on average rather than peak simultaneous demand |
| Cooling water | Flow rate, supply temperature, pressure, water quality, drainage | Supplier heat load figures plus chiller vendor | Undersized chiller sized for spring conditions, not summer peak |
| Ventilation and extraction | General air changes plus local extraction at the die head where needed | Material safety data plus local regulation | No extraction when running PVC or heavily additived compounds |
| Storage areas | Resin, regrind, molds, spare parts, finished goods, packaging | Your production plan | Forgetting that blow molded containers are bulky and consume space fast |
| Safety systems | Guarding, interlocks, emergency stops, lockout procedure, fire provision | Machine documentation plus local EHS requirement | Bypassing interlocks to speed up mold trials |
Trial Runs and Acceptance Testing Before You Sign Off
Acceptance testing is the moment when a specification becomes a verified fact, and it is the single strongest protection a first-time buyer has. Testing happens in two places: at the manufacturer’s factory before shipment, and at your own workshop after installation. Apollo inspects and tests every machine at its own plant before shipment and provides engineers for on-site installation, and the disciplined buyer uses both opportunities.
Factory Acceptance: What to Verify Before Shipment
Ask for the machine to be run at the factory with your mold if it is available, or with a comparable mold if it is not. Watch the dry run first: all axes moving through their full range, clamp opening and closing repeatably, safety interlocks stopping motion when triggered, temperature zones reaching and holding setpoint, and the parison programming profile executing visibly on the die gap. Then watch a production run: parison stability over consecutive shots, container weight consistency, wall thickness distribution on cut samples, surface quality, and cycle time against the quoted figure.
Record everything. A short video of the machine running, a set of sample containers, a printout of the process parameters, and a signed test report make later discussion straightforward. If a factory visit is not practical, request a recorded test run and sample containers shipped in advance. Apollo operates an open factory policy and welcomes customer visits, which for a first-time buyer is worth using: seeing the assembly floor, the machining capability and other machines under test tells you more about a supplier than any document.
Site Acceptance: The Eight-Point Commissioning Checklist
| Test | Method | Acceptance Criterion | Why It Matters |
|---|---|---|---|
| 1. Dry run without mold | Cycle all axes through full stroke; trigger every interlock and emergency stop | Smooth motion, no abnormal noise, every safety device functions | Catches transport damage and commissioning errors before tooling is at risk |
| 2. Temperature stability | Hold all barrel and die head zones at setpoint for at least one hour | Each zone stable within its stated control band, no runaway or oscillation | Unstable zones produce parison variation that cannot be corrected downstream |
| 3. Parison quality check | Extrude free parisons and inspect for curl, sag, surface roughness and concentricity | Straight, smooth, concentric parison at production melt temperature | Parison defects propagate into every container produced |
| 4. Trial production with the mold | Run a defined number of consecutive cycles at the agreed cycle time | Cycle time meets the quoted figure at the agreed gram weight | This is the number your business plan depends on |
| 5. Wall thickness distribution | Cut sample containers into sections and measure at defined points | Minimum wall thickness met at every specified point across consecutive samples | Proves the parison program is doing its job rather than masking a problem with weight |
| 6. Drop, top load and leak testing | Fill and drop from the specified height; apply top load; leak test at the specified pressure | Zero failures across the agreed sample size | These are the tests your customer will run on arrival |
| 7. Energy measurement | Meter actual consumption over a steady production hour | Consumption per kilogram of output within the expected band | Establishes a baseline for future troubleshooting and cost control |
| 8. Continuous eight-hour stability run | Run one full shift, recording weight, cycle time and reject rate at intervals | Weight and cycle time stable, reject rate within the agreed limit | Short trials hide thermal drift, oil heating and cooling capacity shortfalls |
Record the Golden Parameters
When the machine reaches a stable, conforming process, save that parameter set as the reference recipe: all temperature zones, screw speed, back pressure, blow pressure and timing, cooling time, clamp timing, chilled water temperature and the full parison profile. Store it in the machine’s recipe memory and keep a printed copy in the mold file. Every future troubleshooting session starts by comparing the current state to the golden parameters, and every future mold trial starts from a known-good baseline. Operations that skip this step end up re-optimizing the same product repeatedly.
Ten Mistakes First-Time EBM Buyers Make
Most first-machine disappointments trace back to a short list of avoidable errors. Each of the ten below has been observed repeatedly across the global installed base of extrusion blow molding equipment, and each has a straightforward preventive action.
| Mistake | How It Shows Up | Preventive Action |
|---|---|---|
| 1. Buying the machine before defining the product | Machine cannot run the order that finally arrives, or runs it uneconomically | Fix product, material, volume and cavitation before requesting quotations |
| 2. Mold and machine not matched | Mold does not fit between tie bars, or stroke is insufficient for handle release | Exchange mold and machine drawings before either is manufactured |
| 3. Accepting headline output figures without conditions | On-site output falls well short of the quoted number | Require output to be quoted for your resin, gram weight, mold and cooling water temperature |
| 4. Underestimating auxiliaries and molds in the plan | Machine sits idle waiting for a chiller, compressor or second mold | Build the full equipment list at the planning stage, not after the machine is ordered |
| 5. Undersizing compressed air and cooling | Poor container detail, long cycles, output shortfall in hot weather | Size on peak demand and summer ambient conditions, with headroom |
| 6. Choosing resin on price rather than grade | Parison sag, drop test failures, stress cracking in service | Specify a dedicated blow molding grade with the correct MFR and stress crack resistance |
| 7. Ignoring the flash loop | Material cost per container far above plan; flash piles up as waste | Install a granulator and dosing unit from the start; set a controlled regrind ratio |
| 8. Skipping wall thickness programming on handled containers | Overweight containers or thin spots that fail drop testing | Specify programming with sufficient points for any handled or shaped container |
| 9. No plan for spare parts and service response | A minor wear part stops production for weeks | Agree a recommended spare parts list and confirm remote support arrangements before delivery |
| 10. Treating operator training as optional | High reject rates and slow changeovers persisting months after startup | Schedule structured training during commissioning and document the golden parameters |
The Two Mistakes That Cost the Most
Of the ten, two dominate the financial damage. The first is capacity overstatement accepted without conditions. An output figure means nothing unless it is tied to a specific resin, gram weight, mold, module count, cooling water temperature and utilization assumption. Put those conditions in writing, and the number becomes a commitment that can be verified during acceptance testing. Wanplas backs its machines with a production capacity guarantee alongside its quality standards commitment, and a buyer who has documented the conditions is in a position to use that guarantee meaningfully.
The second is neglecting the mold. The mold determines container quality more directly than the machine does, and a poorly built mold will limit an excellent machine forever. Pinch-off geometry, cooling channel layout, venting, steel selection and surface finish all deserve scrutiny. Apollo offers mold customization alongside machine customization, which allows the mold and the machine to be designed as a matched pair rather than sourced separately and reconciled on the shop floor.
Service, Spare Parts and Long-Term Support
For a first-time buyer, the supplier’s service structure is not a soft factor, it is part of the machine’s specification. A startup has no in-house process engineer, no spare parts inventory and no accumulated troubleshooting history, so the supplier’s responsiveness effectively becomes your maintenance department for the first year. Apollo, as a Wanplas factory, operates under the shared Wanplas service framework, and the elements below are the ones a new producer should confirm in writing before placing an order.
Testing Before Shipment
Every machine is inspected and tested at the Apollo factory before it leaves. For a first-time buyer the useful step is to make that test specific to your project: supply your mold, or agree a comparable mold, and have the machine run production samples under conditions close to your intended process. Ask for the test report, the process parameters and physical samples. A machine that has already produced acceptable containers in Zhangjiagang will produce them in your workshop far faster than one that has only completed a generic functional test.
Installation, Commissioning and Operator Training
Apollo sends engineers for on-site installation and commissioning, and this window is the highest-value training opportunity your team will ever get. Plan for it deliberately. Have the operators, the maintenance technician and the person who will own process settings all present. Work through mold change, purge and shutdown, startup from cold, parison program adjustment, temperature profile editing, recipe saving and basic fault diagnosis. Record the sessions if permitted, and write a one-page standard operating procedure for each routine task before the engineers leave. Teams that do this reach stable production in a fraction of the time taken by teams that watch passively.
Spare Parts Policy
Wanplas applies a group-wide policy of USD 500 free parts per year, together with free replacement of parts damaged within the warranty period. For a first machine, use that allowance strategically rather than reactively: agree a recommended spare parts list at the order stage, covering the items whose failure stops production and whose lead time is long. Typical candidates are heater bands and thermocouples, key seals and hydraulic components on hydraulic machines, sensors, contactors, and consumable die head components. Holding a small, well-chosen kit on site converts most potential multi-week stoppages into an hour of maintenance work.
Remote Support and Usage Tracking
Apollo tracks the usage status of machines in the field and conducts customer visits, which means problems can often be diagnosed against known behavior rather than from scratch. When a fault occurs, the fastest route to resolution is structured information: the machine model and serial number, the material and grade, the full parameter set, a photograph or video of the defect, and a description of what changed immediately before the problem appeared. Suppliers can resolve a large share of process issues remotely when they receive that package, and cannot do much with a message that only says the containers are bad.
Guarantees Worth Having in the Contract
The Wanplas brand promises cover four areas that matter directly to a first-time buyer: free parts each year, a transportation guarantee, a production capacity guarantee, and a quality standards guarantee under which a refund plus ten percent compensation applies if quality standards are not met. The production capacity guarantee is the one to operationalize. Write the capacity condition into the contract as a testable statement, naming the resin, the gram weight, the mold, the module count, the cooling water temperature and the utilization assumption. Then verify it during the eight-hour stability run at site acceptance. A guarantee tied to measurable conditions protects both parties and removes ambiguity from the most important number in your business plan.
Open Factory Policy
Apollo, in line with the Wanplas open factory policy, welcomes customer visits. For a first-time buyer this is genuinely worth the trip. Walking an 8,000 square meter plant that produces around 100 machine sets a year tells you about machining quality, assembly discipline, testing practice and the depth of the engineering team in a way that no specification sheet can. It is also the most efficient way to see several machine configurations side by side and to decide, with real machines in front of you, whether the entry configuration or the step-up configuration fits your plan.
Frequently Asked Questions
What size EBM machine should a startup buy first?
Size the machine from the product, not the other way round. For containers in the 500 ml to 5 L range, a single-station or double-station machine with a 55 mm to 75 mm screw, an L/D of 24 to 30 and a clamping force of roughly 3 to 25 tons covers the great majority of first-time projects. Confirm the number of die head modules you need per cycle before fixing the screw size, because module count drives both plasticizing demand and clamping requirement. If your confirmed order exceeds what a single station can deliver, move to a double station rather than pushing the extruder beyond its comfortable operating window.
Is a fully electric EBM machine worth it for a first machine?
A fully electric machine makes sense when energy tariffs are high, when the workshop runs two or three shifts, or when the end product is medical, pharmaceutical or food grade and oil-free operation is required. For a single-shift startup producing general daily chemical bottles, a servo-driven hydraulic machine usually delivers most of the energy benefit at a lower entry level of capital commitment. Apollo produces a Fully Electric series covering 200 ml to 20 L for exactly the cases where the electric architecture is the right answer.
How much energy can a servo pump save on an extrusion blow molding machine?
Compared with a conventional fixed-displacement hydraulic system, a servo-driven pump typically reduces total machine energy consumption by around 30 to 50 percent. The higher end of that range is reached on machines that spend a large share of each cycle in low-demand states such as cooling and parison extrusion, because that is when a conventional pump wastes the most energy across the relief valve. The exact saving depends on cycle structure, product wall thickness, and how much of the total load is barrel heating rather than hydraulic work.
Do I need parison wall thickness control on my first machine?
Fixed die gaps are adequate for simple cylindrical containers with generous wall tolerance, and many profitable operations run them for years. Axial wall thickness programming with 20 to 100 control points becomes worthwhile when the product has a handle, a sharp shoulder, a deep offset, a large diameter change, or a gram weight specification that must be held tightly. Because programming typically removes several percent of the weight from every container while still meeting minimum wall requirements, the recurring material saving repays the option quickly at meaningful annual volumes.
What material should a new EBM producer start with?
Start with a dedicated blow molding grade of HDPE, typically with a melt flow rate in the 0.3 to 1.0 g/10min range. It is forgiving of process variation, does not normally require drying, tolerates in-house regrind well, and serves the largest first-order markets: daily chemical, lubricant and general packaging containers. Add PP once the team is comfortable, since it brings better clarity, rigidity and heat resistance but lower melt strength and longer cooling. Treat PETG and rigid PVC as later additions requiring specific screw geometry, drying and corrosion protection.
How much regrind can I blend back into my containers?
For general-purpose containers with no direct food or pharmaceutical contact, clean in-house flash at a controlled ratio of roughly 20 to 30 percent is a common working range, and some producers run higher on non-critical products such as toys and housewares. Above that level, color consistency, melt stability and mechanical properties begin to drift as each pass adds heat history. For food, pharmaceutical or other regulated contact applications, follow the applicable regulation and your resin supplier’s guidance, which often means virgin material for the contact surface or the whole container.
What auxiliary equipment do I need besides the blow molding machine?
Plan for a low-pressure air compressor at roughly 0.7 to 0.8 MPa for actuation, a higher-pressure blowing circuit in the region of 2.5 to 4.0 MPa where the process requires it, an air dryer, receiver tank and filtration, a chiller and cooling circuit, a mold temperature controller where the product needs one, a granulator and dosing unit for the flash loop, a leak tester, material handling, the molds themselves, and adequate transformer capacity. A basic quality lab with a precision scale, wall thickness measurement and a drop test fixture pays for itself the first time a customer questions a shipment.
How long does installation and commissioning of an EBM line take?
With foundations, power, compressed air and cooling water ready before the machine arrives, mechanical placement and utility hook-up of a small to mid-size EBM machine typically takes a few days, followed by dry running, mold trials and process optimization. The variable is site readiness, not the machine. Apollo tests every machine at the factory before shipment and sends engineers for on-site installation, commissioning and operator training, so the critical path is usually whether your utilities and mold are genuinely ready on the agreed date.
How do I verify that a machine really achieves its quoted output?
Convert the quotation into testable conditions: resin grade, gram weight, mold, module count, chilled water temperature, and utilization assumption. Verify at the factory with a production run and sample containers, then verify again at site with a continuous eight-hour stability run, recording weight, cycle time and reject rate at intervals. Short trials hide thermal drift and cooling capacity shortfalls, which is exactly why an eight-hour run is the acceptance test that matters most.
Should I buy one larger machine or two smaller machines?
If you have one product family and a single confirmed high-volume order, one appropriately sized machine with a multi-module head is usually more efficient in energy, labor and floor area. If you have several products, uncertain volumes, or customers who demand short changeovers, two smaller machines provide production continuity when one is being retooled and reduce the risk that a single breakdown stops all output. For a first purchase with a single anchor customer, the single well-matched machine is normally the stronger choice, with the second machine added once demand is proven.
Conclusion: Your First Machine Should Fit Your First Order
Choosing your first EBM machine is an engineering exercise disguised as a purchasing decision. Work the chain in order: define the container and the customer, select the material grade that the contents and the compliance regime demand, fix the volume, gram weight, mold dimensions and die head module count, and only then specify screw diameter, L/D, station layout, clamping force, drive technology and parison control. Every step that is skipped reappears later as a capacity shortfall, a quality complaint or an unplanned second purchase.
The technical decisions that matter most for a 500 ml to 5 L startup are consistent across markets. Continuous extrusion rather than an accumulator head. A single station for moderate volume, a double station when confirmed orders exceed it. A servo-driven hydraulic system as the balanced default, with a fully electric machine where energy cost, multi-shift operation or oil-free cleanliness justify it. Screw diameters between 45 and 90 mm with an L/D of 24 to 30. Blow molding grade HDPE as the first material. Wall thickness programming wherever the container has a handle, a shaped shoulder or a gram weight target. A closed flash loop from day one. And a set of acceptance tests, ending with a continuous eight-hour stability run, that turn every quoted number into a verified fact.
Apollo, a Wanplas factory, has spent more than twenty years building exactly these machines, with ten series and over eighty models, more than 4,000 sets running in over 90 countries, an 8,000 square meter plant near Shanghai and an annual output of around 100 sets. The ABLB series covers 200 ml to 20 L for standard extrusion blow molding, the Fully Electric series covers the same window without a hydraulic circuit, and the ABLD series is there when a business grows into large industrial containers. Behind all of them sit the Wanplas commitments: machines tested before shipment, engineers on site for installation and commissioning, USD 500 free parts per year, warranty replacement, a transportation guarantee, a production capacity guarantee, quality standards backed by refund plus ten percent compensation, and an open factory that welcomes visitors.
If you are planning your first extrusion blow molding line, the most productive next step is to send the product rather than a machine model number. Share a drawing or a physical sample of the container, your target gram weight or wall thickness, the material you intend to run, and the daily or hourly output you need, together with your available electrical supply and cooling water conditions. The Apollo engineering team will work back from those inputs to a configuration proposal with a defensible output figure, arrange a sample trial run so you can see your own container produced before you commit, and welcome you to the factory to watch the machine that will run your first order. That is a considerably better way to start a plastic production business than buying a machine and hoping the orders follow.