
Tại sao khắc phục các lỗi đặt định nghĩa sự khả thi kinh doanh của EBM?
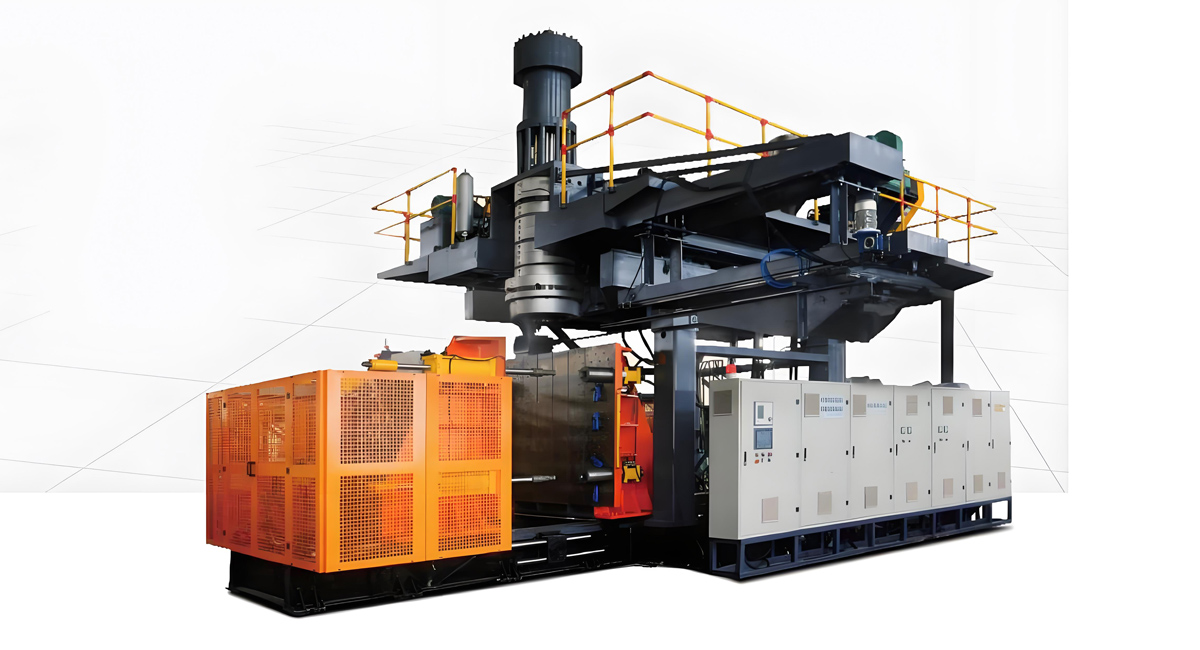
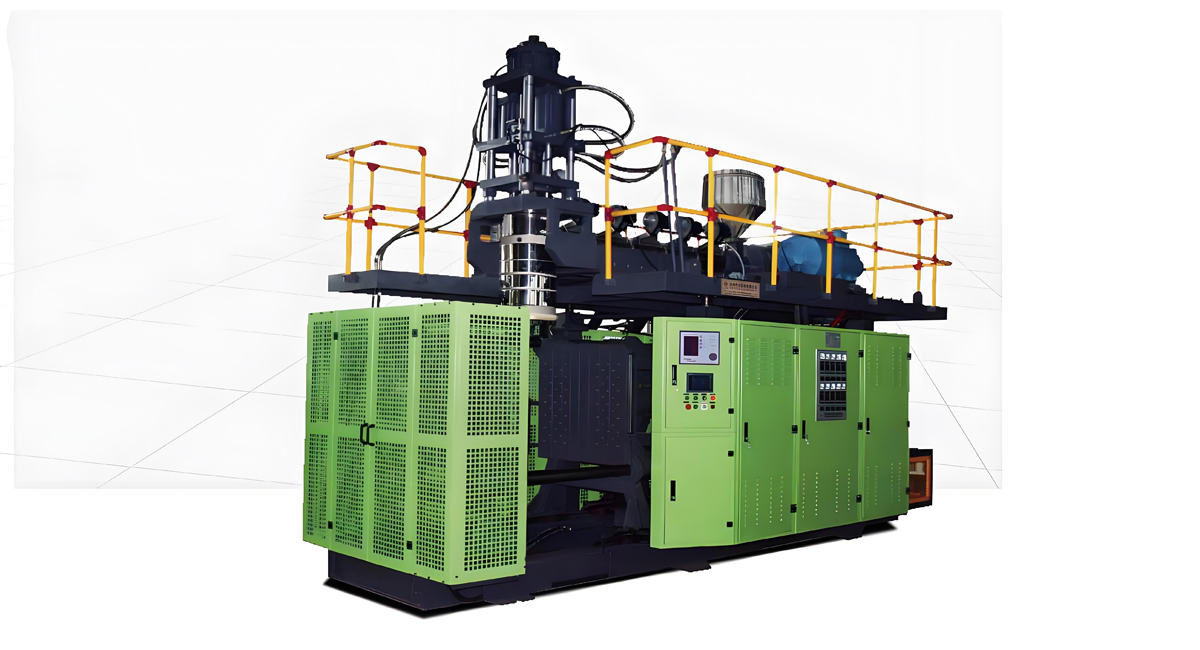
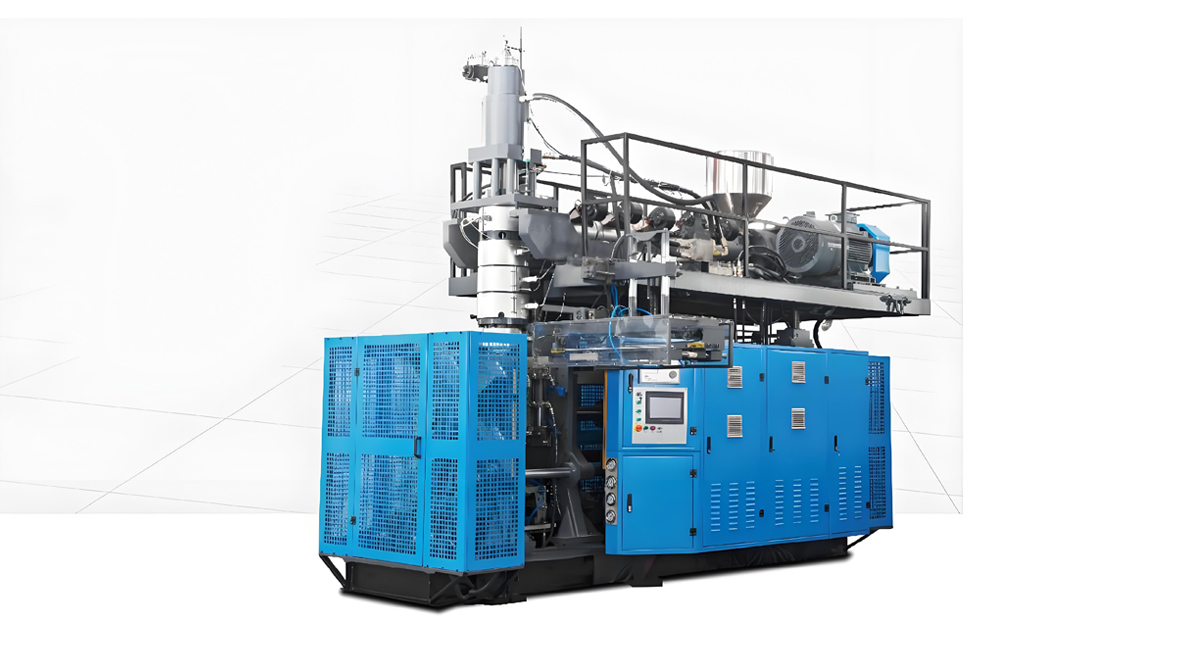
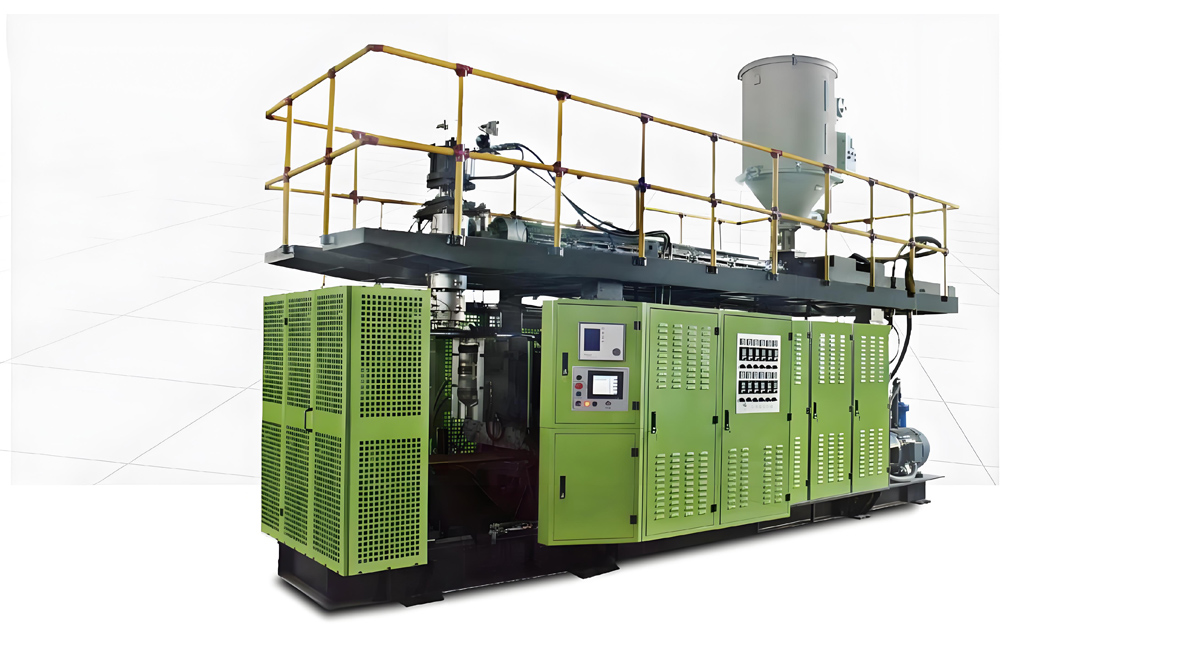
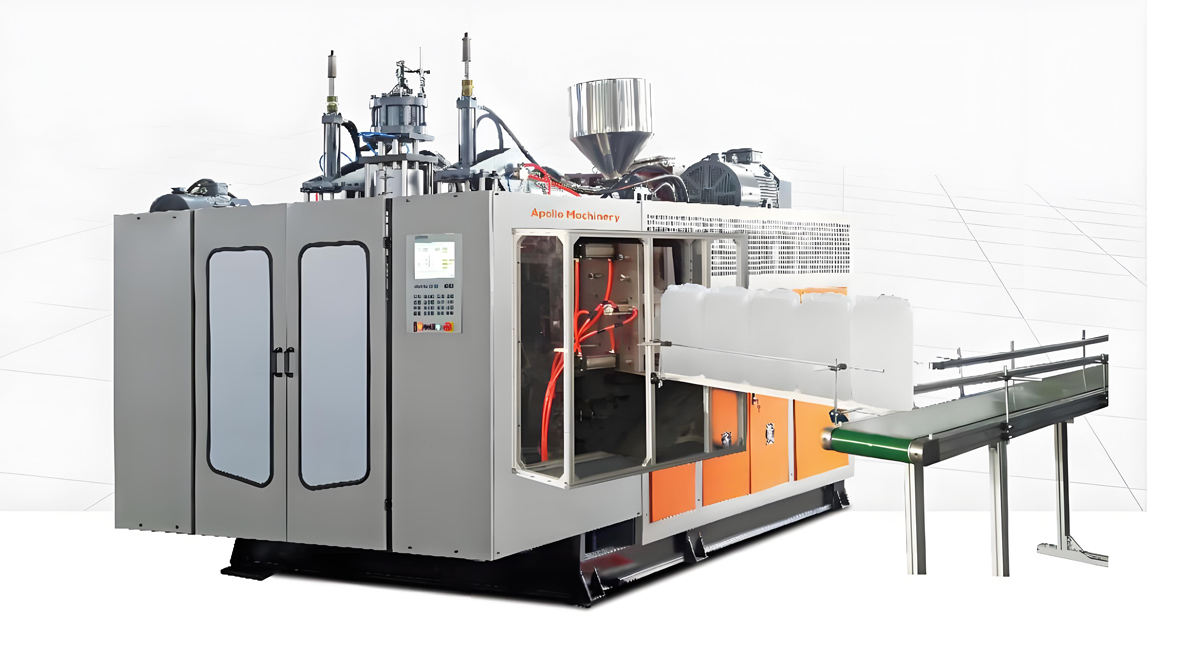
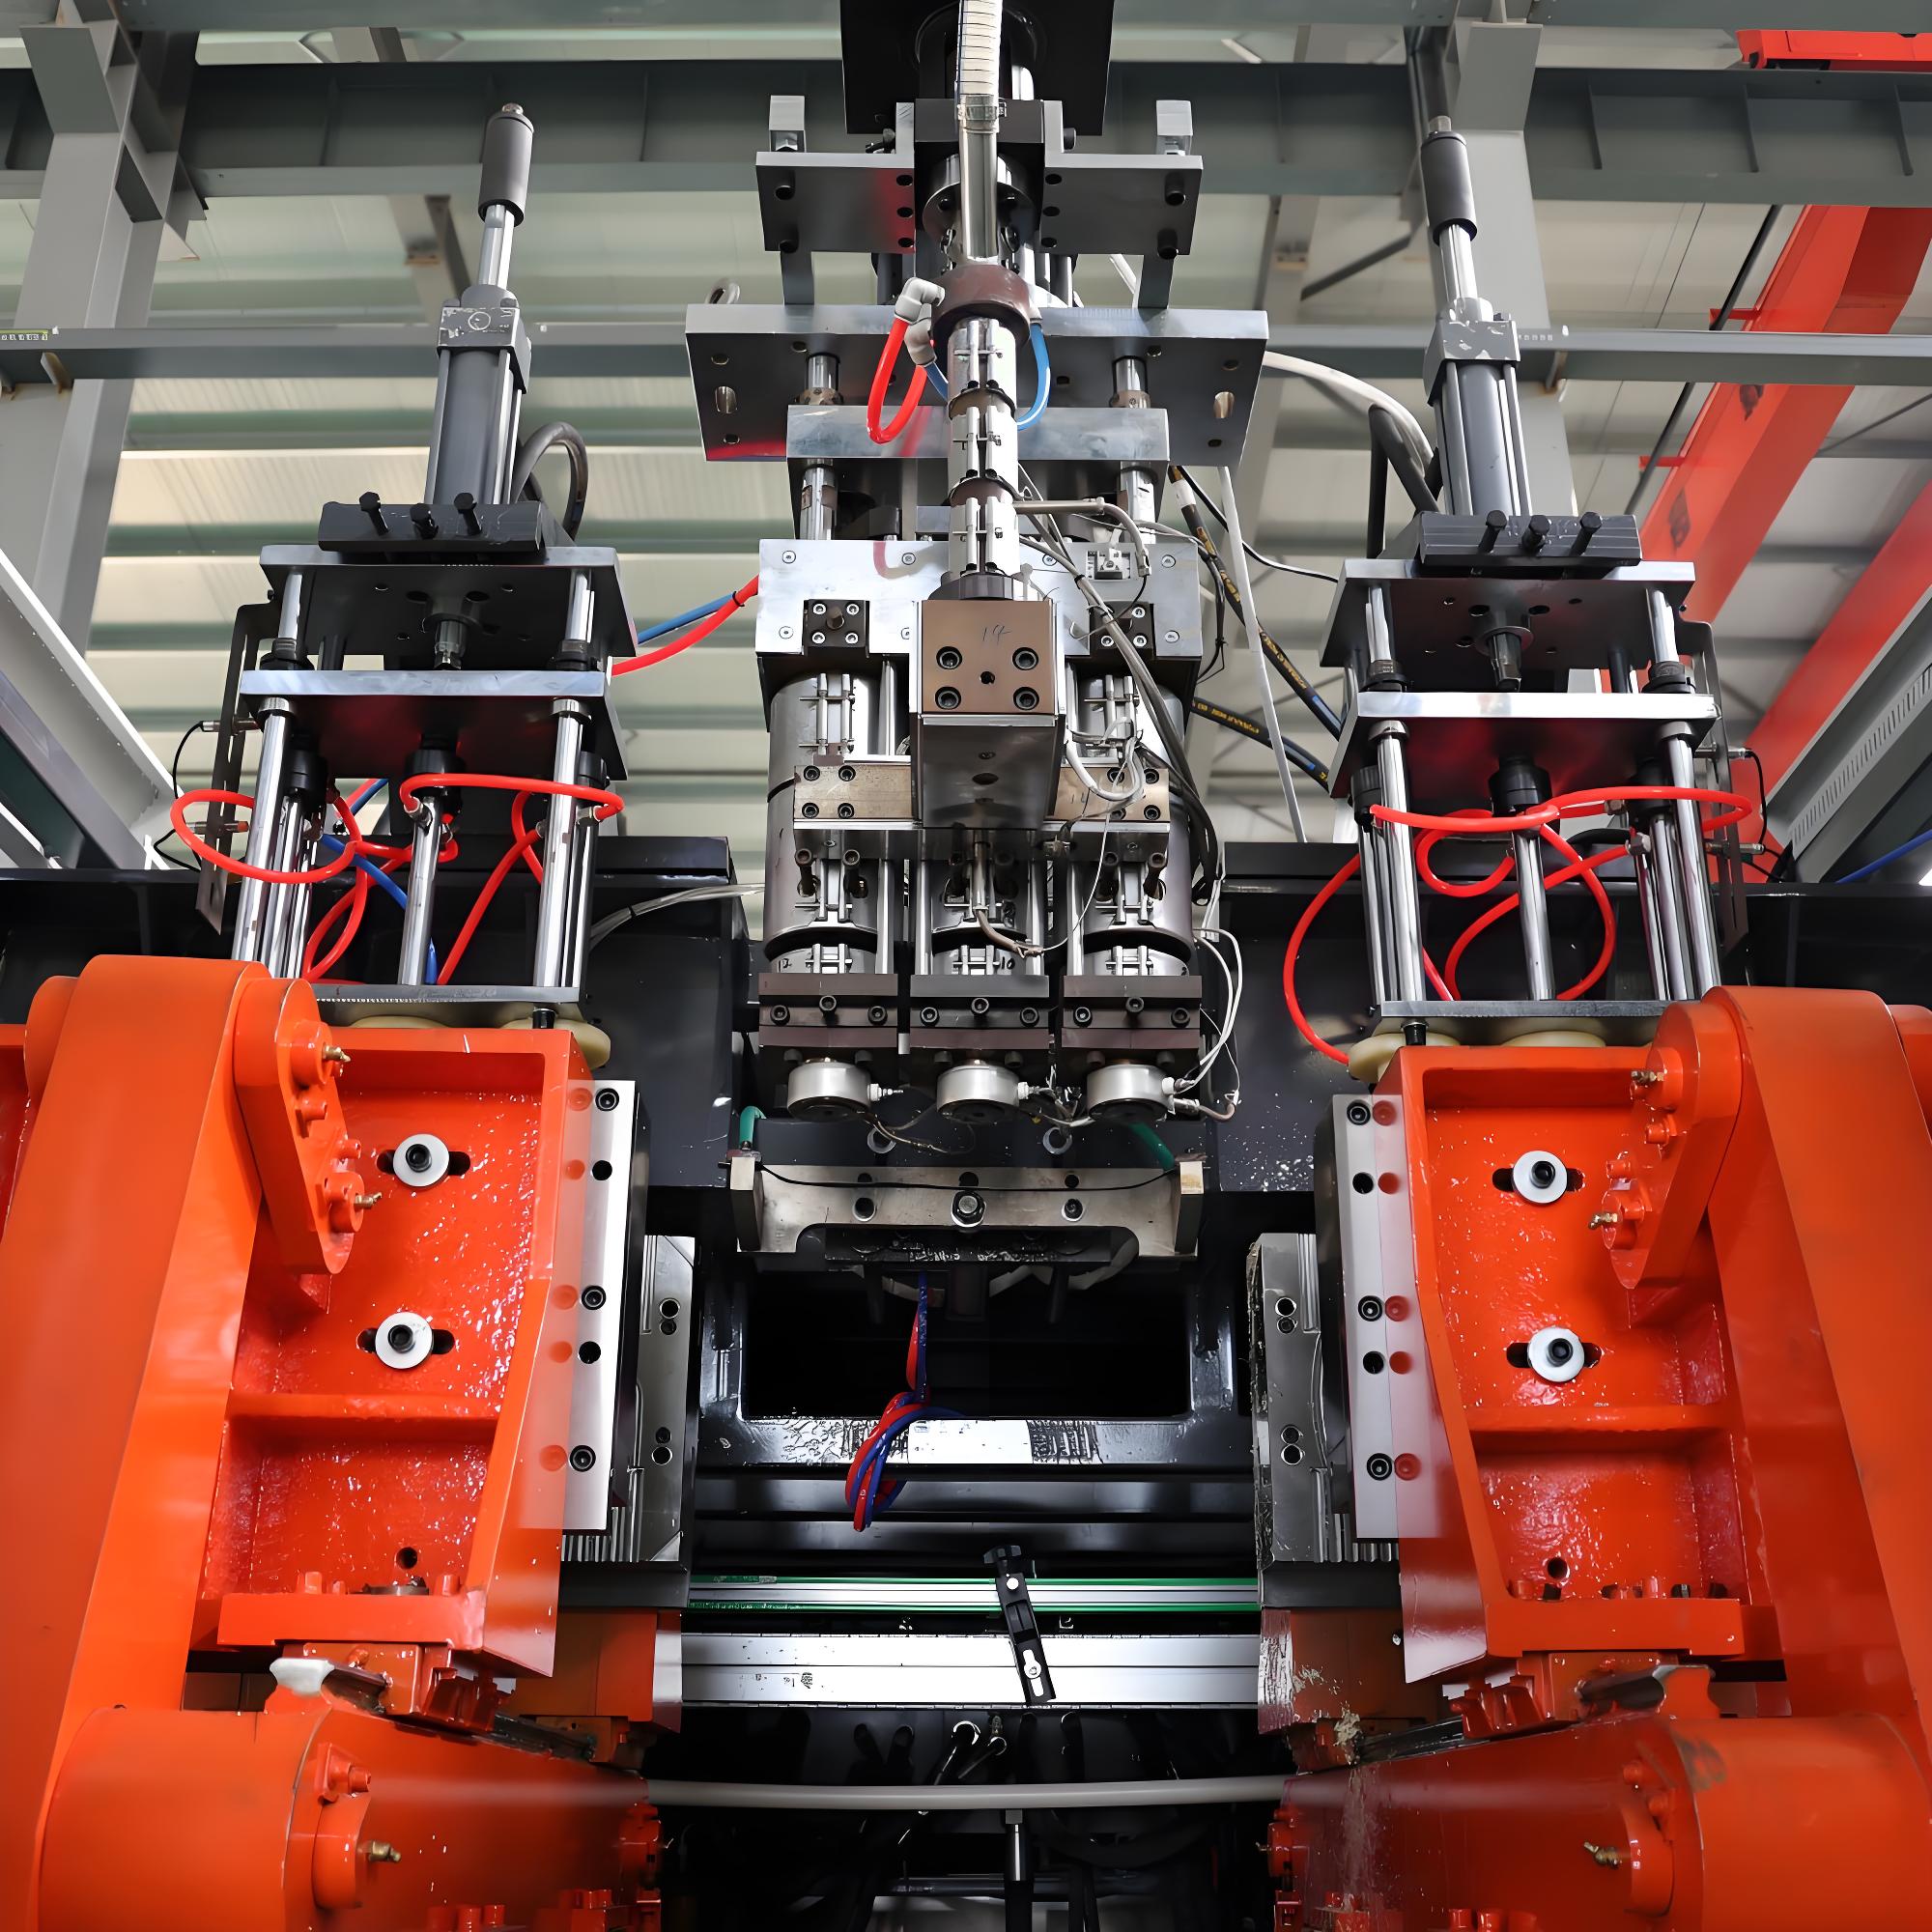
Apollo, a Wanplas factory, has built Máy gia công đùn phuns for more than 20 years from its 8,000 square meter plant in Zhangjiagang near Shanghai, with over 4,000 machines running in more than 90 countries. In that field experience, the single biggest controllable cost on an EBM line is not the resin and not the power, but the scrap rate driven by recurring product defects. A blow molding line that ships at 96 percent first-pass yield returns dramatically more margin than a line stuck at 82 percent, even when both run the same resin and the same cycle time. This guide exists to help plant engineers, tooling technicians, and production managers turn defect symptoms into root causes quickly, using a repeatable structure rather than guesswork.
Phối ép hơi (blow molding) là một quá trình trong đó ống đậm đặc của vật liệu cao su, được gọi là parison, được đưa ra từ đầu ép, bị cản giữa hai khung chứa, được khung nẹp và phun ra bằng không khí đến khi nó phù hợp với khoang khuôn. Phần mỏng lõi hoàn thành được thoát ra sau khi lạnh dần. Mỗi giai đoạn, từ khử nước cho cao su thông qua việc làm mềm bằng trục, điều chỉnh nhiệt độ đầu, lập trình parison, nẹp, phun và lạnh, có thể gây ra các rối loạn hiển nhiên hoặc chức năng. Do chuỗi quá trình khá dài, một dấu hiệu đơn lẻ như một lớp mỏng hoặc một vết nứt dưới đáy có thể bị dẫn đến các nguyên nhân từ nguyên liệu, máy, khung, quá trình hay môi trường xung quanh. Nghệ thuật xác định và sửa lỗi (troubleshooting) là để tách các lớp đó thay vì đổi ba tham số một lúc và hy vọng.
Mẫu bài học này đề cập đến từng lỗi thường gặp với cấu trúc gồm 5 phần: mô tả hiện tượng, các đặc điểm hiển thị trên bộ thành phẩm, các nguyên nhân cơ bản được chia thành các nhóm theo nguyên liệu, quy trình, khuôn, thiết bị và môi trường, các biện pháp khắc phục lần lượt theo thứ tự từ nhanh nhất đến nặng nhọc nhất, và các bước phòng ngừa để ngăn lỗi này trở lại. Kiểu mẫu này cho phép các nhân viên trong nhóm vận hành xây dựng mô hình suy nghĩ chung và giảm thiểu chu kỳ học tập cho những công nhân mới. Cấu trúc này không áp dụng cho từng loại máy, nhưng các mô-đun sản phẩm sau đó trong hướng dẫn này sẽ chỉ ra nơi đâu trong các dòng ABLB, ABLD và toàn bộ dòng điện Apollo bạn có được sự kiểm soát chặt chẽ hơn về các tham số quan trọng nhất.
Trước khi thay đổi bất kỳ tham số nào, hãy khóa cả quá trình hiện tại như một điểm tham khảo, ghi lại các giá trị thực tế và thay đổi một biến một lần với các đo lường rõ ràng trước và sau. Kiểm tra có thể đơn giản như là các giá trị đo lường của máy đo dày bằng từ tính ở những vị trí mỏng hoặc số lượng kết quả của bài kiểm tra rơi nhưng phải được ghi vào sổ. Sổ tư vấn giải quyết các vấn đề ghi lại ngày tháng, mệnh đề vật liệu, máy, hố khoan, thay đổi tham số và kết quả đo được là hệ thống chất lượng rẻ nhất mà một nhà máy EBM có thể vận hành, và nó là nền tảng của các điểm kiểm soát quy trình thống kê được mô tả gần cuối hướng dẫn này.
Kế hoạch đánh giá thống nhất.
Mỗi lỗi trong hướng dẫn này được phân tích thông qua một góc nhìn duy nhất, tức là cùng một logic được áp dụng, bất kể bạn sử dụng một chai dung dịch 500 mililít hay một thùng chứa vừa-lượng giữa có dung tích 1.000 lít. Gương này có năm lớp, và thứ tự điều tra có ý nghĩa vì cách sửa trị rẻ nhất luôn được thử trước tiên.
Layer 1: vật liệu
Các vấn đề về vật liệu bao gồm tốc độ chảy của phần bị sai, tỉ lệ tái xay quá cao, độ ẩm trong nhựa, hạt bị nhiễm trùng hoặc bị hỏng và sự phân tán màu không đồng đều của hỗn hợp mộc màu. Vật liệu là lớp rẻ nhất để kiểm tra vì bạn có thể lấy mẫu và kiểm tra bên ngoài, và bạn có thể xác nhận nhiều điều khi xem xét bản ghi lô hàng vào trước khi tiếp cận máy.
Layer 2: quá trình
Chu trình bao gồm nhiệt độ thân bằng và đầu cán, tốc độ xoắn, lực đẩy lùi, các điểm chương trình công tác, áp lực hút và thời gian hoạt động của van hút, thời gian làm lạnh và tốc độ bấu nắm. Chu trình là nguồn gây sai lệch phổ biến nhất do nó thay đổi theo nhiệt độ môi trường, lô nhựa và điều chỉnh của người vận hành, và đây là nơi các lỗ hổng nhanh được tìm thấy.
Giá tầng thứ ba: dải cán nặn
Các vấn đề trong máy tạo khuôn bao gồm các dao cắt đã mòn, bề mặt lồi bị hỏng, đường ống làm mát bị tắc, cây phun không đối xứng và hệ thống giải nhiệt kém. Một vấn đề trong máy tạo khuôn thường ổn định hơn là biến động, có nghĩa là cùng một khuôn lỗi liên tục trong khi khuôn con của nó vẫn hoạt động tốt.
Layer four: equipment
Động cơ bao gồm ống nạp và mạ vít của máy đẻ, độ trùng chính của đầu đẻ, hiệu suất bộ tích áp, chính xác lực cạ và ổn định thủy lực hoặc động cơ servo. Các lỗi của thiết bị thường biểu hiện là sự chảy chậm trên tất cả các khe đẻ hoặc là các thay đổi đột ngột sau một sự kiện bảo dưỡng.
Layer five: environment
Môi trường bao gồm nhiệt độ và độ ẩm trong cửa hàng, luồng khí qua khuôn mẫu, nhiệt độ và chất lượng nước làm mát, và sự sạch sẽ của không khí áp suất cao. Môi trường là điều dễ quên nhưng thường là nguyên nhân gây ra nhão khuôn và lỗi bề mặt trong các gara sản xuất theo mùa.
Sử dụng 5 lớp này như một danh sách kiểm tra, không phải là thứ tự cấp bậc. Đối với lỗi xuất hiện do những nguyên nhân khác nhau, hãy bắt đầu từ quá trình và thiết bị; đối với lỗi xuất hiện chỉ sau khi thay đổi vật liệu, hãy bắt đầu từ vật liệu; đối với lỗi xuất hiện chỉ ở một lỗ, hãy bắt đầu từ khuôn mẫu. Bảng quy trình sắp xếp sau trong hướng dẫn này sẽ biến logic đó thành 3 câu hỏi nhanh chóng.
Cao độ dày của tường không đều
Khoảng cáchickness của dày vô định của tường là lỗi phổ biến và tốn kém nhất trong gia công phun ép, vì nó làm giảm chất lượng both hình thức và hiệu suất vào cùng một lúc. Một bộ phận có thể trông chấp nhận được nhưng thất bại trong bài kiểm tra rơi vì một bên vai có dày, hoặc nó có thể trông xấu vì một bên nặng trong khi bên kia nhẹ. Kênh biến đổi được đo bằng thước dày màn điện hoặc bằng phương pháp cắt và cân, và phạm vi cho phép phụ thuộc vào tiêu chuẩn sản phẩm.
Các tính năng hình ảnh
Phần mô tả một mặt dày và mỏng, mặt đáy nặng trong khi mặt trên thon, hay các vùng mỏng tập trung ở góc và vai. Trong chai trong suốt, bạn có thể nhìn thấy sự khác biệt trực tiếp; trong các phần mờ, bạn chỉ có thể phát hiện điều này bằng cách đo cân hoặc cắt. Mặt dày cũng tạo ra các dấu ấn phình lên và thời gian nguội lâu hơn, khiến năng suất thấp hơn.
Các nguyên nhân sâu (root causes) theo các lớp:
Máy liệu: Tốc độ chảy của chất lỏng quá cao so với trọng lượng bộ phận khiến nhựa kém đều khi chịu trọng lực của nó. Quy trình: Chương trình dày độ nhựa thành có quá ít điểm hoặc thời gian sai, do đó ống dày nơi có độ dày nên là mỏng. Công cụ: Bụi lạnh làm một bên bị đóng băng trong khi phía còn lại vẫn duy trì sự giãn nở. Thiết bị: Kích thước chênh lệch khoảng cách và vùng nhiệt độ trên đầu khuôn vượt quá ± 2 độ C khiến rìa có sự thay đổi. Môi trường: Bán khói làm một bên nhiệt độ nhựa thành giảm trước khi nở.
Các hành động khắc phục có mức độ
Cả hai cách: dùng các điểm để lưu lại thông số máy móc, hoặc chỉ định thang độ các biến để kịp thời nhận biết vấn đề. Chỉ định thang độ các biến giúp bạn khởi động nhanh hơn, kết hợp hiệu quả hơn các hành động điều chỉnh và có cơ sở luận luận minh bạch hơn. Giả sử lỗi oai lệch có thể được cho là một biến có thang độ -10 đến +10, bạn có thể thuận tiện nhận ra và suy luận.
Tránh được
Đảm bảo trống phôi ấn ở trong khoang khuôn. Từ máy, xác nhận trung tâm vị trí và tính đồng tâm vị trí với dụng cụ cảm ứng ở 4 vị trí hoặc nhiều hơn. Kiểm tra cân bằng nhiệt vùng đầu khuôn trong phạm vi +/- 2 độ C bằng một cảm biến đã được chuẩn hóa. Giảm nhăn phôi bằng cách hạ nhiệt độ đầu khuôn hoặc tăng độ cứng dập.
| Triệu chứng | Layer có khả năng xuất hiện cao nhất | Khiêu chiến đầu tiên | Xác minh bằng |
|---|---|---|---|
| Một bên mỏng, bên kia dày | Thiết bị hoặc quá trình. | Kích thước kẽ giữa cán và khuôn, kiểm tra chương trình công tác; | Kính đo dày từ tính |
| Đòn dưới dày, trên nhẹ | Process (sag) | Giảm nhiệt độ đầu máy, tăng độ cao ở dưới cùng | Kiểm tra đối xứng làm mát bằng cách đo nhiệt độ nước ở mỗi đường vào và đường ra. |
| Góc mỏng, không qua thử nghiệm rơi | Chế tạo khuôn hoặc quá trình | Tăng độ dầy chương trình địa phương, kiểm tra lỗ trống | Kiểm tra độ rơi |
| Lướt qua một chuyển đổi | Thiết bị hoặc môi trường. | Kiểm tra sự lệch chỗ của khu vực đầu cán, tường che; | Lịch nhiệt độ khu vực |
Phóng đại và quay chun
Nghiền liệu liệu và cân trọng lượng
Các tính năng hình ảnh
Phần đồ vật nặng ở phía dưới và mỏng ở phía trên, hoặc một bên luôn duy trì khác biệt với bên kia ngay cả khi bạn hòa chỉnh máy đẻ. Vật thể xoay có thể biểu hiện là biến dạng bề mặt xoay tự do, khi phần nặng chuyển vòng quanh vật thể giữa các lần nguội.
Các nguyên nhân sâu (root causes) theo các lớp:
Nguyên nhân cơ bản là độ sượng và số đo dòng dập quá nhỏ. Thực tế, quy trình vì ảnh hưởng quá lớn tới chất lượng rồi, nên trong phần này chúng tôi sẽ đề cập những biện pháp khắc phục và giảm thiểu. Hãy kiểm tra định dạng các đường cách đó vào khuôn tối ưu.
Các hành động khắc phục có mức độ
Giảm nhiệt độ chảy trong đầu máy từ 5 đến 10 độ C và quan sát sự rơi. Nếu phẩm nhựa cho phép, hãy chọn một loại chất chảy có tần suất nhỏ hơn hoặc làm pha trộn để nâng cao độ bền của chất thủy tinh. Tăng tốc giã tỏa để cho phép nhựa xuất xưởng ở trong máy ít hơn. Điều chỉnh tỷ lệ thoát của bộ pha nạp để đảm bảo nhựa xuất xưởng rời khỏi mô hình với tốc độ kiểm soát. Bảo vệ khu vực xuất xưởng khỏi dòng khí bằng một màn ngăn hoặc rèm đơn giản.
Tránh được
Hãy giữ một cửa sổ nhiệt độ chuyển đổi cho từng loại vật liệu, và ghi chú nhiệt độ môi trường để ngăn chặn sự thả lỏng theo mùa. Đối với các bộ phận lớn, hãy lựa chọn thiết kế và chương trình cho bích có khả năng tăng độ dày ở phần trên để cân bằng sự thả lỏng.
| Điều kiện | Nguyên nhân | Xử lý |
|---|---|---|
| Dính mặt đáy, mỏng mặt trên. | Phần phiên biến dạng do nhiệt hay chỉ số MFR; | Tiết giảm nhiệt độ đầu, giảm MFR |
| Phần bên trọng phía quay | Tính năng thiết kế khóa trống thân phôi với các điểm tưởng tượng nằm ở cổng trống khuôn. Lưu ý các "cánh tít" và "mang trống" của khuôn phôi: phần trên của các tít sẽ không được mã hóa và phần dưới của các mang sẽ không bao gồm phần định dài dây tệp. Khi về tới các cổng tiếp nhận khuôn, bạn sẽ thêm đằng sau các điểm tít 1, 2, 3, 4 ... và ngược lại các điểm mang 1 ... | Đường dẫn ra khối mẫu, giảm tốc độ thoát |
| Xác nhận các điều kiện: rõ ràng, đi theo được các giá trị lường cải tiến, và có đủ các đường và chiều dầy trong quy trình. Kiểm tra các phép toán và các chế độ thiết kế. Kiểm tra và xác nhận hệ thống kiểm soát vận hành các bộ phận trong khoáng phôi truyền tải cùng các điều kiện và quy trình làm mát. Ngay cả trước khi hoàn tất công đoạn làm mát, hãy cài các thông số điều độ để kiểm tra và có thể điều chỉnh theo yêu cầu. Kiểm tra máy móc nghiền thêm, đặc biệt là máy quay nghiền. Làm khóa trống khuôn thân phôi, cài độ cứng và tốc độ truyền động cho phù hợp, và đổi chính xác độ dài dây trong tệp. Chú ý đến độ cứng quyết định độ dài dây (trong GD226 và GD20X), tăng độ cứng, cài lại quá trình - nghĩa là để nâng cao độ cứng bằng cách cài ghép. | bóp nặng tùy thời gian | Tăng tốc độ mở ra |
Sự hỏng do va chạm và sự nứt phía dưới
Điểm cắt là nơi hai nửa khuôn ép phần mẫu đóng lại vào phần gốc và ở đường tách, sắt nó vào nhựa và cắt bỏ lớp xỉn. Điểm cắt tốt tạo ra phần dưới tinh sạch và bền; điểm cắt kém lại cho một vết nối yếu dễ bị vỡ dưới khi vặn hoặc vung. Thiết bị này rất quan trọng cho chai chứa chất lỏng.
Các tính năng hình ảnh
Mặt dán đáy trông thô, không đều hoặc xơ. Một vết nứt xuất hiện ở vị trí ghép sau khi lấp đầy hoặc trong quá trình kiểm tra rơi. Nút LED không được cắt gọt sạch sẽ và rời ra, hoặc vị trí ghép bị tràn trong quá trình thử áp suất.
Các nguyên nhân sâu (root causes) theo các lớp:
Hóa chất: sáp có độ loãng yếu hoặc quá nhiều tái phân tách để tạo ra các mối hàn yếu. Quá trình: khu vực trăm không đủ nóng để nóng chảy, hoặc tốc độ cài đặt sai nên mối hàn hình thành dưới áp lực thấp. Pháo: khoảng cách của cạnh càng thái trăm ra ngoài cửa sổ từ 0,05 đến 0,1 milimet, hoặc dao hàn đã bị mài mòn và tròn. Thiết bị: bảo vệ cài đặt cài đặt áp suất thấp quá thấp cho phép máy ép mở ra một chút khi xúc lửa.
Các hành động khắc phục có mức độ
Cách đo đầu tiên là đo khoảng cách ở cạnh dao bằng tấm cảm; nên là khoảng 0,05 đến 0,1 milimet trong khoảng. Xay mòn hoặc thay thế các dao bị mòn. Tăng độ cao nhiệt ở khu vực bấu nắm một chút để vật liệu liên kết lại, nhưng không cao đến nỗi khiến vết cháy bay ra. Kiểm tra tốc độ bấu nắm và bảo vệ áp suất thấp để khuôn đạt được công suất tối đa trước khi vết nối khô. Giảm tỷ lệ xay mòn nếu các đường ruột trông có vết nứt.
Tránh được
Tích hợp khoảng cách và độ mòn của dao vào hồ sơ bảo trì, và lập kế hoạch sửa chữa dao theo số lần bắn thay vì theo lỗi. Cần giữ một khoảng nhiệt độ tối thiểu cho từng vật liệu trong công thức.
| Triệu chứng | Layer nguyên nhân | Action |
|---|---|---|
| Porous seam | Chế tạo khuôn hoặc quá trình | Cưa xay lại, tăng nhiệt độ đâm |
| Đảm bảo các điều kiện của một cổng trống khuôn trong quá trình truyền tải khuôn phôi: bất kỳ nhăn nào giữa đường cắt và đường tiếp nhận khuôn đều có thể gây ra một phôi bị nghiêng. | Vật liệu hoặc khuôn | Giảm tiến độ tái chế, kiểm tra khoảng cách từ 0,05 đến 0,1 mm |
| Flash không bị cắt | Hệ thống khuôn | Giũa thô hoặc thay chổi dao |
Mảng lò xo phát và răng quá nhiều.
Flash là các phần thừa nhựa được ép ra khỏi đường phân cách và bị cắt bỏ. Một số phần flash là thông thường, nhưng khi nó trở nên dày, nó sẽ lãng phí chất nhựa, làm tăng tải cho máy cắt và có thể gây tắc nghẽn cho máy ép. Các phần flash dày là dấu hiệu cho thấy việc khoan và đối chiếu không chính xác.
Các tính năng hình ảnh
Một lớp vát dày ở đường phân cách, khí hơi cản trở việc cắt góc, hoặc vết mép ở cạnh sản phẩm hoàn thiện. Trong trường hợp nghiêm trọng, thùng phay không thể đóng kín hoàn toàn và sản phẩm sẽ xuất hiện một bước nhô ra ở điểm nối.
Các nguyên nhân sâu (root causes) theo các lớp:
Vật liệu: tia chảy có độ nhớt rất thấp dễ dàng đi vào đường phân cách. Quá trình: áp suất thổi quá cao ở vị trí còng, hoặc mẫu bị đặt không trung tâm, khiến một nửa phần chịu nhiều vật liệu hơn. Khuôn: bề mặt đường phân cách bị mòn hoặc độ phẳng kém khiến tia chảy bị rò rỉ. Thiết bị: lực còng không đủ cho khu vực dự kiến, hoặc một thanh còng không nằm theo đường thẳng.
Các hành động khắc phục có mức độ
Trường hợp hồ quang: hãy chắc chắn các điều kiện và các chế độ ống gió, cài cho phù hợp các thông số theo các quy định, kiểm tra và theo dõi tính ổn định. Khi chúng ta đối mặt với nạn phá hoại, hãy kiểm tra các cổng, đường tiếp nhận và đường cắt khuôn. Trong nhà máy mới, điều này thường được trông thấy ngay sau khi chuyển từ nhà máy cũ, vì các nguyên nhân như vậy dường như làm tăng mạnh độ cứng. Vì lý do tiếp theo, thử nghiệm mẫu có thể cực kỳ hữu ích: chúng tôi dám chắc rằng các nhà chế tạo có thể sớm nhận thấy nguyên nhân hiệu quả và có thể khắc phục ngay vấn đề.
Tránh được
Tạo quy tắc cân máy cho từng mẫu và lưu trữ trong công thức. Tiếp tục kiểm tra độ phẳng dọc theo đường tách và tiến hành kiểm tra sau khi thay đổi mẫu.
Surface Defects
Những sai sót về bề mặt là những điều dễ nhận thấy nhất đối với khách hàng và đa dạng nhất. Từ bề mặt bóng thô giống da cá đến các đường chảy, vỏ cam, độ bóng thấp và sự phân tán kém của phấn màu chủ đạo. Trong số đó, đa số là những vấn đề về ngoại hình nhưng một số khác, như các đường chảy trồi lên nặng nề, cho thấy tình trạng kết nối yếu.
Da cá mập (vỡ vỡ)
Da cá mập là sự nhếch cơ khí thô nhẹ trên bề mặt parison do dòng vật liệu nóng chảy không ổn định tại vị trí vách nghiền. Động hiện khi tốc độ chảy quá cao trong khe nghiền hoặc khi nhiệt độ vật liệu nóng chảy quá thấp. Giảm tốc độ dòng vật liệu hoặc tăng nhiệt độ vật liệu nóng chảy, và kiểm tra kết quả hoàn thiện của vị trí vách nghiền.
Đường dẫn dòng chảy
Các đường trượt là các vết li ti từ sản phẩm nóng lỏng có lớp đặc trưng từ nguyên liệu chưa kết hợp, thường do đầu sản xuất quá lạnh hoặc do khuôn bị nhiễm mài mòn. Tăng độ nóng đầu chút và vệ sinh bề mặt khuôn. Họ cũng có thể xuất phát từ nguyên liệu tái chế, nóng chảy với tốc độ khác nhau.
Trứng quế và độ bóng thấp.
Thành mảng mủ (orange peel) là lớp bề mặt sẫm từ việc truyền nhiệt kém giữa bề mặt khuôn và lỗ thô hoặc quá lạnh. Khả năng nhẵn mịn thấp xuất phát từ bề mặt khuôn bị mòn hoặc bị nhiễm bẩn, từ nước ẩm hoặc khí bị kẹt. Xả sạch mặt trong lỗ, nâng nhiệt độ khuôn trong cửa, và cải thiện hoạt động giải nóng.
Dispersant masterbatch màu
Khi phân tán không được tốt, sẽ gây ra những vết sần hoặc vết trắng vì có những phần nhựa không được nhuộm. Nguyên nhân thường gặp là việc bổ sung lượng nguyên liệu chủng masterbatch dưới phạm vi khống chế hoặc thời gian trộn quá ngắn. Hãy bổ sung lượng nguyên liệu chủng masterbatch trong khoảng từ 1 đến 4 phần trăm tùy thuộc vào tông màu mục tiêu. Hãy kéo dài thời gian trộn trong thiết bị xay trộn, và kiểm tra xem liệu vỏ chủng masterbatch có phù hợp với nhựa gốc hay không. Nếu nồng độ độ ẩm khiến cho các hạt nhựa kết hợp lại thành các clump, hãy khử độ ẩm cho nhựa gốc.
| Surface Defect | Nguyên nhân chính | Action |
|---|---|---|
| Shark skin | Viên nứt khi thổi nóng ở khuôn dập | Tăng tốc độ, tăng nhiệt độ cắt |
| Đường dẫn dòng chảy | Mặt buli lạnh hoặc khuôn bị bẩn | Tăng nhiệt độ đầu khuôn, sạch khuôn |
| Dấu vết vỏ cam | Phèn lạnh hoặc trầm. | Tăng nhiệt độ khuôn, đánh bóng lỗ |
| Các vạch màu | Mê độ mạch nhão kém chất lượng | Kiểm tra lực khóa trống khuôn chính theo diện tích ô trống lần lượt được gán trong cổng khuôn. Thiết lập các chế độ phụ của vòng khuôn và khối, kiểm tra những điều đã cài và chiếu sáng cho các cổng khuôn phụ của mô hình cài đặt. Sau khi kịp thời, xác nhận khóa trống khuôn giữa hai buồng phôi. Tăng xa khuôn lại đối với sự cấp phát, theo dõi và đo lường. |
Lưới hơi và vết trắng bờ
Các cái bọt là các lỗ rỗng bên trong hoặc bên ngoài do khí bị giữ lại hoặc các chất dễ bay hơi; các vết ngang bạc là các dấu vết trên bề mặt do các chất dễ bay hơi đó tạo ra khi chúng mở rộng theo đường dẫn dòng. Cả hai điều này đều cho thấy có một điều gì đó trong hỗn hợp đang thoái hơi hoặc khí bị giữ lại bên trong.
Các tính năng hình ảnh
Những bọt nhỏ tròn dưới bề mặt, một mảng sáng bóng ở mặt bộ phận, hoặc một khu vực yếu giòn ở đường vết. Trong phiếu thuốc trong suốt, các bọt hoàn toàn có thể thấy được.
Các nguyên nhân sâu (root causes) theo các lớp:
Nguyên liệu: độ ẩm trong chất kết dính, đặc biệt là các loại có tính hấp thu cao, biến thành hơi nước; tỉ lệ tái chế quá cao sẽ giữ lại không khí và các khí thoát. Công đoạn: việc thoát khí không đảm bảo và nhiệt độ nóng chảy quá cao làm suy giảm chất lượng và tạo khí. Đồ vật: trục cưa không có khu vực thoát hiệu quả ô nhiễm không thể loại bỏ các khí dễ bay hơi. Môi trường: sự lưu trữ ẩm sẽ làm tăng độ ẩm thu nhận.
Các hành động khắc phục có mức độ
Khóa loãng chất resin đến mức độ ẩm được chỉ định trước khi sử dụng và xác nhận thiết bị sấy hoạt động. Giảm tỷ lệ tái nghiền và đảm bảo rằng chất tái nghiền được sạch sẽ và kích thước thích hợp. Giảm nhiệt độ nấu nếu chất loãng đang bị phân hủy. Sử dụng ốc nhỏ có phần thoát khí hoặc ốc nhỏ có thanh hút chân không khi vật liệu yêu cầu như vậy. Tăng cường việc thoát khí cho khuôn sản phẩm để không khí bị mắc kẹt thoát ra.
Tránh được
Đặt tỷ lệ tái chế tối đa cho từng sản phẩm và một thông số khô bắt buộc cho từng loại nguyên liệu. Dữ liệu log nhiệt độ đọng ống lưu nhiệt và thời gian lưu trữ để phát hiện các vấn đề liên quan tới lượng nước trước khi thử nghiệm.
Điểm đen và sự kết tủa
Các đốm màu đen là khiếu nại về chất lượng phổ biến nhất đối với lọ có màu sáng và trong suốt, bởi chúng rất dễ thấy và cho thấy sự ô nhiễm. Thông thường, chúng là các chất nhựa bị bào mòn trùng vào bề mặt kim loại nóng, và rơi ra trong hỗn hợp nóng.
Các tính năng hình ảnh
Một số chấm đen hoặc nâu nhỏ xuất hiện trên bề mặt hoặc trong tường, đôi khi có mùi carbon. Những chấm này xuất hiện ngẫu nhiên trên các lỗ hổng và phát triển sau khi máy vận hành lâu không có hoạt động hoặc sau khi ngưng hoạt động.
Các nguyên nhân sâu (root causes) theo các lớp:
Vật liệu: nhựa phân hủy khi đạt nhiệt độ đã định. Quá trình: nhiệt độ nóng quá cao để đạt thời gian lưu trú. Thiết bị: vật liệu tích tụ trong bình hoặc đầu máy ép, vít lưu trú trong thời gian dừng và những vùng chết trong đầu máy nơi chất trầm tích. Môi trường: hoạt động tắt máy trong thời gian dài ở nhiệt độ cao mà không được thanh lọc.
Các hành động khắc phục có mức độ
Hãy chạy một loại chất thu hồi qua nòng và các bộ phận liên quan vào mỗi lần thay đổi vật liệu và sau mỗi lần tạm ngừng hoạt động lâu dài. Đặt lịch để tách và làm sạch nòng ở một khoảng thời gian cố định dựa trên loại nhựa và màu sắc. Giảm nhiệt độ ngồi chờ hoặc sử dụng chất thu hồi liên tục trong khi tạm nghỉ. thay thế các phần ốc vít hoặc nòng bị mòn, tạo ra các khu vực tắc nghẽn. Đừng để máy hoạt động ở nhiệt độ cao, không có vật liệu trong suốt thời gian dài.
Tránh được
Hãy xác định một quy trình tạo dung dịch loại bỏ và một kế hoạch vệ sinh đầu. Bố trí thời gian ở lại tối đa và nhiệt độ làm việc tạm thời trong công thức để các nhân viên không có thể làm quá nóng trong giai đoạn đợi.
Điểm trắng và chất lỏng không nguội
Các phần trắng và gel chưa cháy là các hạt rắn hoặc bán rắn của chất nhựa chưa gia công trong phần hoàn thiện. Nó khác với các tia đen bởi vì chúng chưa nung chảy, không bị cháy và chúng đôi khi chỉ là các cục trôi và có thể thấy.
Các tính năng hình ảnh
Các cục trắng sữa hoặc xốp trong tường, các mảng dày, hoặc các điểm yếu bị nứt dưới áp lực. Điều này thường xảy ra khi nghiền lại hoặc khi pha trộn mảnh trám kém.
Các nguyên nhân sâu (root causes) theo các lớp:
Nguyên liệu: hỗn hợp có khả năng tương thích kém hoặc chất tái chế có kích thước lớn. Công đoạn: quá trình plastic hóa không đủ do tốc độ trục chuyển thấp, áp suất trở lại thấp hoặc thời gian lưu trữ quá ngắn. Đồ vật: trục cưa có tỷ lệ nén không phù hợp với nguyên liệu hoặc L/D quá thấp, hay trục cưa bị mòn không thể truyền dòng và nghiền tán. Môi trường: đường nạp nguyên liệu mát sẽ làm chậm quá trình nóng chảy.
Các hành động khắc phục có mức độ
Tăng tốc độ của phích cắm và áp lực lùi để cải thiện độ giãn và trộn, trong giới hạn nhiệt độ chảy. Xác nhận tỷ số nén của phích cắm và L/D phù hợp với vật liệu; tỷ số nén cao có thể giúp hỗn hợp trở nên chắc chắn hơn. Cắt mịn nguyên liệu thành kích thước đều nhau và trộn chúng kỹ lưỡng. Nếu gel vẫn còn trên một vật liệu cứng, hãy xem xét sử dụng phích cắm được thiết kế cho hợp chất đó.
Tránh được
Tiếp tục bảng tham khảo phôi-không khí để sử dụng phôi thích hợp cho từng loại nhựa. Lưu trữ chất lượng làm plastic tại sản phẩm đầu tiên và sau khi thay đổi bất kỳ loại nguyên liệu nào.
Sụt giảm và biến dạng
Shrinkage là một phần nhỏ hơn khi nó nguội và tinh thể; biến dạng là một phần bị biến dạng độ thẩm thấu. Cả hai đều có liên quan đến khử nhiệt và tính chất tinh thể của vật liệu, và nó xuất hiện sau khi phần kim loại rời khỏi vỏ.
Các tính năng hình ảnh
Phần nhỏ hơn khoang, cổ tròn, base hẹp xuống, hoặc thân cong. Một phần có thể vượt thử nghiệm thả và thất bại trong đo 24 giờ sau khi sự nở lại tiếp tục xảy ra.
Các nguyên nhân sâu (root causes) theo các lớp:
Chất liệu: những phụ phẩm có độ thanh giữa cao bong ra nhiều và biến dạng nhiều. Cấu trúc sản xuất: thời gian làm mát quá ngắn, nhiệt độ nước tạo khuôn không đồng đều qua các kênh, hoặc việc tách khuôn trong khi còn quá nóng. Khuôn: các đường làm mát bị tắc hoặc không cân bằng, hoặc một lỗ rỗng chứa áp lực. Tính chất môi trường: nhiệt độ nước làm mát thay đổi theo mùa.
Các hành động khắc phục có mức độ
kéo dài thời gian làm lạnh và xác định chiếc bút phơi dưới nhiệt độ đặt. Kiểm tra nhiệt độ vào và ra lò ở mỗi kênh và cân đối chúng. Cho các vật liệu hạt rắn, cho phép khoảng thời gian sau khi thu nhỏ lên đến 24 giờ trước khi đo và gói kết quả cuối cùng. Chọn lịch làm sạch các kênh làm lạnh để giữ sự truyền nhiệt ổn định.
Tránh được
Xác định thời gian làm nguội và nhiệt độ buông mép cho từng loại vật liệu và khóa chúng. Rửa các đường ống làm nguội định kỳ và theo dõi nhiệt độ nước bằng một thiết bị ghi tần số.
Số lượng và khối lượng vượt ra ngoài đinh độ
Điều khiển khối lượng và khối lượng quyết định lượng chất nhựa bạn sử dụng và liệu phần đó có tuân thủ tiêu chuẩn ngập và xếp. Một phần dày hơn một gram trên một triệu bộ có thể là một chi phí giấu kín lớn.
Các tính năng hình ảnh
Trọng lượng của chi tiết dịch chuyển lên hoặc xuống, đường biên giới thay đổi, hoặc chi tiết sẽ không phù hợp với khóa đóng của nó. Sự dịch chuyển thường là chậm nhưng có thể thay đổi đột ngột sau khi thay đổi lô vật liệu.
Các nguyên nhân sâu (root causes) theo các lớp:
Nguyên liệu: sự khác biệt về mật độ của từng lô nhựa thay đổi trọng lượng cho cùng một thể tích. Thu hoạch: trọng lượng miringuet không được kiểm soát, hoặc việc cân đo không ổn định. Thiết bị: phần đo có xung, hoặc phản hồi cân hàm không được sử dụng. Môi trường: nhiệt độ xung quanh thay đổi mật độ nhựa nóng.
Các hành động khắc phục có mức độ
Chuyển sang kiểm soát trọng lượng mà bộ cân chuyển đổi có thể tự động ngoài ngưỡng đã đặt và bảo đảm đều đặn với hệ thống phản hồi cân nặng khi có sẵn. Xác nhận ổn định trong việc đọc chiều dài của vít bằng cách cân thử và cải thiện chương trình khi mật độ thay đổi. Không nên để nhiệt độ lạnh được giữ ổn định ở gần máy.
Tránh được
Đánh giá điểm kiểm soát quá trình thống kê theo trọng lượng thành phẩm với các giới hạn kiểm soát, và phản ứng trước các xu hướng trước khi vượt quá phạm vi kiểm soát.
Hư hỏng ống và cổ
Vòm và mạch là bề mặt bôi trơn chức năng của một chai, do đó các khiếm khuyết ở đây dẫn đến hiện tượng rò rỉ và việc đóng kín bị từ chối ngay cả khi thân chai trông hoàn hảo.
Các tính năng hình ảnh
Áo theo dõi thiếu hoàn thiện hoặc bị phẳng, cổ tròn, lõi có vết rạn, hoặc đầu đinh ngắn. Phần có thể không tiếp được bóng đậy.
Các nguyên nhân sâu (root causes) theo các lớp:
Vật liệu: cường độ gián lưỡng thấp nên không thể giữ được hình dạng của mối. Quy trình: đầu chèn bị lệch tâm, thời gian cắt cổ ngược, hoặc không có sự quấn đầy đủ ở phần cuối. Kính khuôn: phần cắm cổ đã mòn, đầu chèn bị lệch hướng, hoặc luồng không khí thu không đủ ở mối. Thiết bị: sự sai lệch của còng làm thay đổi hình dạng cổ.
Các hành động khắc phục có mức độ
Đặt cỗ cán đùn ở trung tâm và xác định nó nằm song song với cổ. Kiểm tra thời điểm cắt cổ để tạo ra đường chỉ xương hoàn chỉnh. Kiểm tra và sửa chữa phụ kiện cổ. Tăng áp suất lồng tạm thời khi làm xong nếu đường chỉ quá ngắn. Xác định đúng vị trí của cặp côn để tránh cổ hình oval.
Tránh được
Hãy thêm các chỉ số múa tại đầu vào trong quá trình kiểm tra trong phần đầu tiên và định kỳ, và bảo lưu sự phù hợp của kim bắn vào công thức.
Thoát hơi và hỏng bền áp suất
Rò rỉ và sự thất bại của áp suất là các kiểm tra chức năng cuối cùng. Một phần có vẻ tốt nhưng vẫn rò rỉ qua một lớp mỏng, mối hàn yếu hoặc liên kết nhiều lớp yếu.
Các tính năng hình ảnh
Phần không thành công trong thử nước hoặc áp lực không khí, chảy ra từ mí hoặc nền, hoặc sụp đổ dưới tải. Các lỗi thường nằm ở mí dưới hoặc ở vai hạn chế.
Các nguyên nhân sâu (root causes) theo các lớp:
Nguyên liệu: mối hàn yếu do tái chế hoặc độ đặc bền thấp của nhựa nóng. Thu hoạch: điểm có tường mỏng, áp lực thổi sai, hoặc mối hàn kẹo kém. Phôi đúc: biện pháp cắt phụt bị mòn hoặc bị chặn. Thiết bị: khối lượng nắm kín thấp tại đường hàn. Một thử nghiệm kiểm tra kín khí tiêu chuẩn được thực hiện ở áp suất từ 0,05 đến 0,15 MPa, và các phần cần duy trì đó mà không có sự rò rỉ hoặc xả.
Các hành động khắc phục có mức độ
Tìm điểm mỏng bằng máy đo độ dày và điều chỉnh chương trình làm đồng. Xây dựng lại mối được dán bằng các hành động đóng chặt từ phần trước. Thực hiện thử kiểm tra được kín ở khoảng 0,05-0 ,15 MPa đối với một mẫu và theo dõi những lỗi phát sinh đến các lỗ làm ra chúng. Đối với các bộ phận có nhiều lớp, phải xác nhận độ liên kết giữa các lớp.
Tránh được
Kiểm tra kín khí ở mức 0,05 đến 0,15 MPa với tỷ lệ 100% hoặc kiểm tra thống kê cho mỗi sản phẩm, và xác định tỷ lệ thất bại theo lỗ.
Các hư hỏng đặc biệt của phương pháp co-tha công suất nhiều lớp
Sự co xát đa lớp thêm lớp ngăn cách như EVOH bên trong lớp cấu trúc để kéo dài thời gian sử dụng. Các lớp bổ sung tạo ra các lỗi mà các bộ phận một lớp không bao giờ xuất hiện, và chúng đòi hỏi kiểm soát nhiệt độ chặt chẽ hơn.
Độ dẻo lớp giảm đi
Tách lớp là hiện tượng lớp tiếp giáp nhau, thể hiện bằng cách peeling ở mép cắt hoặc do một đường biên nào đó xấu. Nguyên nhân là do sự liên kết giữa các lớp kém, mật độ liên kết không đúng, hoặc các cạnh tiếp giáp bị nhiễm bẩn. Sử dụng lớp liên kết hoặc lớp bện đúng và giữ lớp tiếp giáp sạch.
Sai lệch độ dày lớp
Độ dày của lớp mỗi lớp biến đổi khi các đầu ra máy ép độc lập không cân bằng. Hãy giám sát tỷ lệ các lớp bằng một viền trích các lớp và một máy đo độ dày, và điều chỉnh lượng đo của mỗi máy ép.
Kênh màng EVOH bất thường
EVOH dành nhiều cho độ ẩm và có một khoảng điều chỉnh chế tạo hẹp. Nếu nhiệt độ cao quá mức nó bị phân hủy; nếu thấp quá mức nó bị phá hủy và rào ngăn bị hư hỏng. Hãy giữ EVOH trong khoảng nhiệt độ của nó và bảo vệ nó khỏi độ ẩm trước khi ép.
Kích cỡ nhiệt độ của lớp kết hợp
Bao lớp dán phải đủ nóng để dính vững chắc nhưng không nên quá nóng để thay đổi bộ phận ngăn cách. Xác định cửa sổ nhiệt độ lớp dán theo cấu trúc và khóa nó trong công thức, vì cửa sổ quá nhỏ là nguyên nhân chính khiến lớp ngăn cách thất bại không đều.
| Defect | Nguyên nhân | Điều phối |
|---|---|---|
| Xuất hiện lớp phủ | Đính kết kém dính | Lớp dây cài đặt đúng, giao diện sạch sẽ |
| Ganh tịt lớp | Máy ép không cân bằng | Kiểm tra cắt, kiểm soát đo lường |
| EVOH break | Vi phạm cửa sổ (Vi phạm cửa sổ (Window violation)) | Lock EVOH temperature window |
Phương pháp soi và tính lượng
Bạn không thể cải thiện những gì mà bạn không đo đạc. Một chương trình chất lượng EBM hiện đại kết hợp kiểm tra trực tuyến nhanh chóng với kiểm tra định kỳ tại phòng thí nghiệm, nhằm xác định sai sót và khẳng định việc sửa chữa.
Kính đo dày từ tính
Cần gạt độ dày từ tính có thể đọc độ dày của mặt phẳng trong một giây đồng thời đo ở nhiều điểm. Đây là công cụ đầu tiên được dùng để khảo sát các điểm không đều và điểm mỏng và nên được sử dụng cho từng phần đầu tiên.
Phương pháp cắt và cân
Cắt phần ở một góc xác định, cân một thanh, và tính toán bức tường trung bình. Điều này có thể chứng minh cỡ đo và xác định phân bố chính xác hơn so với đọc chỉ số tại một điểm duy nhất.
Test thả và tải ngang
Kiểm tra vỡ thả chứng minh chịu lực cao khi đạt được độ cao và nhiệt độ theo yêu cầu; thử nghiệm tải thẳng đứng chứng minh độ bền xếp đồ trên cùng. Cả hai đều có thể là đúng hoặc sai và nên được giám sát theo khoang.
OTR và WVTR
Cho sản phẩm ngăn, đo tỷ lệ truyền oxy và tỷ lệ truyền gas khiêm hấp để xác nhận khả năng hoạt động của lớp EVOH hoặc lớp ngăn. Đây là các kiểm tra trong phòng thí nghiệm được thực hiện trên mẫu với tần suất gắn với cấu trúc lớp.
Quét CT và máy chụp ảnh màu khác nhau
Computed tomography (CT) hoặc tấm cắt ngang cho thấy các lỗ trống nội bộ, chất lượng liên kết và cấu trúc lớp mà không ảnh hưởng đến giá trị phân tích. Sự khác biệt màu sắc, được báo cáo bằng tiêu chí delta E, xác định sự thay đổi tông màu do sự thay đổi masterbatch, giúp các tuyên bố về thẩm mỹ trở nên khách quan.
| Phương pháp: | Các biện pháp | Sử dụng cho mục đích gì |
|---|---|---|
| Kính đo dày từ tính | Bố trí đường dọc theo một điểm cụ thể | Bề mặt tường không đồng đều, có vùng mỏng |
| Kiểm tra đối xứng làm mát bằng cách đo nhiệt độ nước ở mỗi đường vào và đường ra. | Phần tường trung bình | Kiểm tra phân phối |
| Vỡ vữa và tải thẳng đứng | Gia tốc, độ dày | Diện dưới cùng, cấu trúc |
| OTR, WVTR | Tỷ suất rào cản (Tỷ suất rào cản (Barrier rate)) | Multi-layer barrier |
| CT hoặc mảnh, delt E | Nội bộ, màu sắc | Biến dạng, luồng bóng dáng |
Chương trình biểu đồ phân loại lỗi
Khi xuất hiện hư hỏng trên dây chuyền, trả lời ba câu hỏi theo thứ tự. Họ nhanh chóng phân tách nguyên nhân và dừng các thay đổi các tham số ngẫu nhiên.
Câu hỏi thứ nhất: lỗ duy nhất hay tất cả các lỗ?
Nếu chỉ có một khoang nào đó bị đổ vữa, trước tiên kiểm tra máy nghiền: dao đã mòn, khiến lò hâm nóng bị nghẽn, khớp trục cửa xả lệch so với nơi cần thiết, hoặc khoang vỡ hỏng. Nếu tất cả các khoang đều thất bại cùng một lúc, nguyên nhân nằm ở vật liệu, quá trình, thiết bị hoặc môi trường, chứ không phải là máy nghiền.
Câu hỏi thứ hai: xuất hiện sau một thay đổi về chất
Nếu lỗi bắt đầu ngay sau khi thay đổi vật liệu, hỗn hợp chủ đạo hay tái nghiền, thì bắt đầu với các thông số về chế độ vệ sinh, tốc độ chảy khi nóng, số liệu về đàn hồi và biến dạng, độ dày vật liệu, chất liên kết, và khả năng phù hợp. Xác nhận thông tin về cuộn vật liệu mới trước khi tiếp cận máy.
Câu hỏi 3: sai số và cường độ nhiều hay ít
Nếu sự sai lệch xảy ra chậm trên một lần thử nghiệm, nghi ngờ việc bị mòn của thiết bị, sai lệch trong khu vực quan sát, hoặc độ lệch của môi trường xung quanh. Nếu thay đổi đột ngột, nghi ngờ sự thay đổi giới hạn quy trình, một sự cố bảo dưỡng, hoặc thay thế bộ phận trong khi ngừng hoạt động.
| Branch | Câu trả lời 2 | Đầu tiên cần kiểm tra |
|---|---|---|
| Điều khiển đơn vị thay vì kết hợp nhiều đơn vị | Đồng cavitation | Hệ thống khuôn |
| Điều khiển đơn vị thay vì kết hợp nhiều đơn vị | Các lỗ rỗng | Máy móc, phương pháp, thiết bị |
| Sau khi thay đổi | Có | Cuộn vật liệu: |
| Drift vs step | Cao lưu thủy (Drift) | Equipment, environment |
| Drift vs step | Bước 1 | Mức định dạng, duy trì |
Dòng máy Apollo dành cho sản xuất nhạy cảm với lỗi
Động cơ thích hợp giảm nguyên nhân chính của các lỗi tại nguồn. Công ty Apollo, nhà máy Wanplas, sản xuất mười loạt với hơn tám mươi mẫu và ba nhóm dưới đây bao phủ phạm vi khối lượng mà hầu hết các nhà máy có nguy cơ phát sinh lỗi cần. Các con số chính xác cho từng mô hình thay đổi tùy theo cấu hình và sẽ được xác nhận khi đặt đơn hàng; bảng dưới đây liệt kê các nhóm khối lượng thực tế và kiến trúc kiểm soát các lỗi đã đề cập ở trên.
Dòng sản xuất ABLB, có dung tích từ 200 ml đến 20 lít
Dòng ABLB là dòng nén tán phun gia nhiệt tiêu chuẩn cho thùng chứa từ 200 mililit (ml) đến 20 lít, với tám loại máy trong dòng. Nó cung cấp lập trình parison chính xác và kiểm soát nhiệt độ đầu ổn định, giúp ngăn ngừa các hiện tượng mép không đồng đều và dẻo bong ra. Nó xử lý PE, PP, PVC, PA, PC, ABS, PS, EVA, TPU và PETG.
| Đặc trưng | Dòng ABLB (mức độ phổ thông) | Lưu ý: |
|---|---|---|
| Khoảng thể tích bình | 0.2 to 20 L | Dải ô đánh giá thực tế |
| Các loại máy trong một sản phẩm | 8 | Số lượng định dạng thực tế |
| Lực kẹp | Phạm vi hạng theo máy móc, được xác nhận theo từng đơn hàng | Đặt đối diện với khu vực dự kiến để kiểm soát xung đột ánh sáng |
| Đường kính trục vít | Phạm vi hạng theo máy móc, được xác nhận theo từng đơn hàng | Đúng với đầu ra và vật liệu |
| L/D ratio | Phạm vi hạng theo máy móc, được xác nhận theo từng đơn hàng | Đẩy lùi chất lượng hóa plastic |
| Installed power | Phạm vi hạng theo máy móc, được xác nhận theo từng đơn hàng | Tùy thuộc vào tùy chọn |
| Xuất phẩm | Theo kiểu mẫu và số khe | Nhà máy kiểm tra trước khi kiểm tra: |
Dòng ABLD, từ 20 lít đến
Dòng ABLD là dòng được thiết kế chịu tải nặng dành cho các thùng chứa lớn và các bộ phận công nghiệp từ 20 lít đến 1500 lít, với 3 kiểu máy. Kiểu thiết kế của bộ đệm và mối giữ kín tập trung vào các thách thức về lỏng và giảm áp của các loại máy có kích thước rất lớn, nơi việc kiểm soát vách là khó nhất.
| Đặc trưng | ABLD Series (typical class range) | Lưu ý: |
|---|---|---|
| Khoảng thể tích bình | 20 đến 1500 l | Dải ô đánh giá thực tế |
| Các loại máy trong một sản phẩm | 3 | Số lượng định dạng thực tế |
| Lực kẹp | Phạm vi hạng theo máy móc, được xác nhận theo từng đơn hàng | Điều khiển tung nhanh các vật liệu lớn |
| Đường kính trục vít | Phạm vi hạng theo máy móc, được xác nhận theo từng đơn hàng | Khối lượng lớn hơn cho năng suất cao |
| L/D ratio | Phạm vi hạng theo máy móc, được xác nhận theo từng đơn hàng | Đáng tin cậy trong quá trình làm mềm |
| Installed power | Phạm vi hạng theo máy móc, được xác nhận theo từng đơn hàng | Tùy thuộc vào tùy chọn |
| Xuất phẩm | Theo kiểu mẫu và số khe | Nhà máy kiểm tra trước khi kiểm tra: |
Dòng điện hoàn toàn, từ 200 milliliter đến 20 lít
Dòng máy hoàn toàn điện bao gồm từ 200 mililít đến 20 lít mà không có hệ thống động lực thủy lực. Máy cầm và truyền điện mang lại chuyển động chắc chắn, ít rung, giúp giảm chập chờn và tăng sự đồng đều của tường, phù hợp với các nhà máy có yêu cầu môi trường nghiêm ngặt. Tổng công suất sản xuất hàng năm của Apollo là khoảng 100 bộ trên các dòng máy, và có hơn 4.000 bộ được sử dụng ở hơn 90 quốc gia.
| Đặc trưng | Dòng sản phẩm điện hoàn toàn (ám chỉ khoảng cách lớp tiêu chuẩn) | Lưu ý: |
|---|---|---|
| Khoảng thể tích bình | 0.2 to 20 L | Dải ô đánh giá thực tế |
| Đầu CD-ROM | Tất cả hoạt động điện, không có hệ thống thủy lực: | Low vibration, clean |
| Lực kẹp | Phạm vi hạng theo máy móc, được xác nhận theo từng đơn hàng | Năng lực một lần đổ (Năng lực một lần đổ (Repeatable tonnage)) |
| Đường kính trục vít | Phạm vi hạng theo máy móc, được xác nhận theo từng đơn hàng | 500 lít |
| L/D ratio | Phạm vi hạng theo máy móc, được xác nhận theo từng đơn hàng | Cài đặt plasticy |
| Installed power | Phạm vi hạng theo máy móc, được xác nhận theo từng đơn hàng | Có khả năng tiết kiệm năng lượng |
| Xuất phẩm | Theo kiểu mẫu và số khe | Nhà máy kiểm tra trước khi kiểm tra: |
Các ngành công nghiệp và sản phẩm cuối cùng
Máy Apollo phục vụ các ngành sản xuất thực phẩm và đồ uống, hóa chất hàng ngày, ngành công nghiệp hóa chất, vật liệu xây dựng, y tế và dược phẩm, sản xuất các loại xe, giao thông, và thị trường văn hóa và thể thao. Mỗi sản phẩm cuối cùng có ưu tiên riêng về lỗi, chính vì lý do này mà cùng một máy được điều chỉnh khác nhau cho từng ứng dụng.
- Thực phẩm và đồ uống: các bình chứa nước, dầu thực phẩm và dầu nêm, nơi các lớp màn chắn kín và vô mùi là điều vô cùng quan trọng, vì vậy chất lượng màn chắn và các lớp dẫn dẫn đầu.
- Các loại dung dịch hàng ngày: chất tẩy rửa, xà phòng và chai làm sạch, nơi nhám độ và sự đồng nhất màu sắc là các lỗi mà khách hàng có thể quan sát thấy.
- Ngành hóa học: bình và thùng chứa chữa đỏ hung hăng khi sự đồng đều của thành và tính chống hóa chất là yếu tố quan trọng nhất.
- Vật liệu xây dựng: các phần tử dạng dải và dạng lõi, nơi năng lực ổn định kích thước và kiểm soát khuỵu cong làm chủ đạo.
- Y tế và dược phẩm: các chai có môi trường vệ sinh nghiêm ngặt, nơi các viên đen và khả năng làm sạch được từ chối trước khi thực hiện:
- Phù hợp với nguyên liệu
- Văn hóa và thể thao: các quả bóng, độ nổi và các thiết bị trên trời đất mà mức cân bằng và an toàn được ảnh hưởng bởi sự cân bằng trên tường. Vai trò đầu tiên của khắc phục sự cố là ngăn chặn sự hư hại khách quan bởi các chính sách, thủ tục và công cụ do các cơ quan điều hành trật tự thực hiện, ngăn chính sách, thủ tục và công cụ bên chế tạo khắc phục sự cố.
Xe ô tô và vận tải: đường ống, hồ chứa và thùng chứa khi sức chịu lực và độ cứng chịu ảnh hưởng được xác minh qua thử nghiệm.
Yêu cầu cho bảng chọn mô hình
Sử dụng biểu đồ này để liên kết một yêu cầu sản xuất với một dòng Apollo thực sự. Đây là điểm khởi đầu; nhà máy sẽ xác nhận chính xác mẫu và vít sau khi xem xét bản vẽ, vật liệu và mục tiêu đầu ra của bạn.
| Yêu cầu | Sàn đĩa khuyến khích sử dụng | Tại sao |
|---|---|---|
| Chai dung tích từ 0,2 đến 20 lít, công dụng phổ biến | Dòng ABLB | Đủ tiêu chuẩn, được kiểm nghiệm, có 8 loại |
| Từ 0,2 đến 20 L, môi trường sạch: | Fully electric series | Không cần hệ thống thủy lực, ít rung động hơn |
| Đối với thực phẩm và các sản phẩm tiếp xúc với cơ thể được quy định, các tiêu chuẩn tương ứng như FDA, EU 10/2011 và ISO được áp dụng theo nhu cầu của sản phẩm và thị trường; xác nhận chứng nhận cụ thể cho nơi đến của bạn với nhà máy trước khi đưa sản phẩm vào lưu thông. | Dòng ABLD | Mắt kẹp tích trữ nặng |
| Bao bì thực phẩm hoặc y tế | ABLB hoặc ABLD với co-extrusion | Chế độ EVOH nhiều lớp |
| Kiểm soát vách mỏng, tốc độ cao | Fully electric series | Phản ứng động có thể lặp lại, ít rung lắc |
| PVC hoặc chất kết dính kỹ thuật cao | Dòng ABLB | Phù hợp với nhiều loại vật liệu: |
Dùng đúng định dạng này: "1. " trên mỗi dòng, không có gì khác.
Lỗi rẻ nhất là nó không bao giờ bắt đầu. Hai hệ thống biến việc tìm lỗi từ việc chữa cháy thành quản lý: bảo trì dự phòng và cửa sổ quá trình được khóa.
Statistical process control points
Hãy đưa các điểm kiểm soát về trọng lượng, phần tường mỏng, kích thước cổ, và kết quả kiểm tra nứt. Xếp chúng theo các lỗ và phản ứng theo xu hướng, không chỉ xét các trường hợp vượt ra ngoài phạm vi quy định. Các bảng biểu đơn giản về trọng lượng có thể phát hiện hiện tượng lệch chuẩn, ngay trước khi xảy ra thải rác.
Kiểm tra vật liệu đầu tiên
Mỗi chu trình sản xuất bắt đầu bằng kiểm tra mẫu đầu tiên: máy đo độ dày ở các điểm xác định, thử thả, kiểm tra bề mặt bằng mắt, và máy đo cổ chai. Không có chu trình nào bắt đầu mà không có thông tin kiểm tra mẫu đầu tiên được ghi rõ. Điều này chính là cách loại bỏ hầu hết các lỗi nhiễu.
Khóa tham số và quyền hạn
Các công thức được xác nhận sẽ được đặt tên, tạo phiên bản và khóa. Các operator có thể gọi một công thức nhưng không thể thay đổi các điểm tham chiếu trừ khi có mật khẩu của một nhà quản lý. Điều này ngăn ngừa việc thay đổi nhỏ và chậm, trong đó 10 chỉnh sửa nhỏ trong tháng làm cho cửa sổ không còn phù hợp. Wanplas, như thương hiệu chính, áp dụng cùng một tiêu chuẩn chất lượng trên các nhà máy chuyên dụng của nó.
Bảo trì định kỳ
Các công việc dựa trên lịch trình thắng các công việc dựa trên phân loại: làm sạch đầu ngạnh, lắp mới chiếc dao theo số lượng đi qua, làm sạch kê cho đường ống làm mát, kiểm tra độ mài mòn of tuốc-bin và bình và thủ tục chất bỏ khi thay đổi. Lưu ghi chú trong máy để ca làm việc tiếp theo tiếp nhận lịch sử.
Dịch vụ và hỗ trợ
Apollo, nhà máy của Wanplas, cung cấp cho máy của họ một chương trình dịch vụ được xây dựng cho hoạt động sản xuất liên tục. Mỗi máy sẽ được kiểm tra và kiểm định tại nhà máy trước khi đóng gói và vận chuyển, và những kỹ sư sẽ đến hiện trường để cài đặt và kiểm tra hoạt động để quá trình đầu tiên phù hợp với khoảng thời gian đã xác minh. Chính sách của tập đoàn Wanplas bao gồm 500 USD tiền phụ tùng miễn phí mỗi năm, giúp duy trì máy mà không gây ra xung đột lớn về ngân sách dự phòng. Hỗ trợ bổ sung bao gồm tùy chỉnh khuôn mẫu và điện áp, theo dõi sử dụng sau khởi động, các cuộc thăm viếng không thường xuyên của khách hàng và bảo hành tiêu chuẩn chất lượng với hoàn trả, cộng với bồi thường 10% nếu chất lượng không đạt tiêu chí phù hợp.
Bảo trì phòng ngừa và cài đặt khóa cửa quá trình
Các câu hỏi thường gặp
Tại sao bình nhựa nung sạn có dày mỏng không đều?
Mẻ độ dày mặt tường thường là do chương trình đo độ dày nâu không chính xác, trục rời lỗ tạo khe sai lệch, vận hành khu vực nhiệt độ đầu quá mức plus hoặc minus 2 độ C, lỏng đi của nâu, hoặc làm lạnh khuôn kẹp không đối xứng. Hãy ngắt lại chương trình đo độ dày nâu, trung điểm lò xo lỗ tạo, và cân bằng làm lạnh khuôn kính trước, sau đó kiểm tra với chiếc máy đo độ dày từ liên kết với các điểm mỏng và nặng bằng chiếc cảm ứng điện từ.
Những nguyên nhân nào dẫn đến phình xệ và di chuyển của phầm nhựa trong quá trình ép forming?
Trục chùng của mẫu xuất phát từ độ cứng kẽm thấp, tốc độ chảy kẽm quá cao, đầu nung quá nóng, nhà xưởng chậm hoặc chất tích tích trữ nhanh. Độ lệch sẽ tăng lên do ảnh hưởng của gió trong khu vực mẫu. Giảm nhiệt độ nhúng, giảm tốc độ chảy kẽm, tăng tốc độ cắt, và bảo vệ đường dây mẫu khỏi dòng khí.
Cách khắc phục sự cố pinch-off và vách dưới bị ra vân?
Kiểm tra khoảng cách của cạnh dao thắt chặt, nó nên nằm trong khoảng từ 0,05 đến 0,1 milimet, kiểm tra dao để kiểm tra lỗi mòn, xác minh tốc độ khóa và bảo vệ áp thấp, và xác nhận nhiệt độ khu vực thắt chặt. Dao mòn hoặc bị kẽ có thể tạo ra vết sơn yếu và vết nứt dưới, vì vậy hãy xay hoặc thay thế dao và tăng nhiệt độ thắt chặt trong phạm vi cho phép.
Tại sao flash của tôi trên máy EBM quá dày?
Các điểm cháy gây mịn (flash) có thể xảy ra do lực nắm chưa đủ cho khu vực dự kiến, độ phẳng của đường phân cách kém, bề mặt phôi đã hỏng hoặc vị trí đặt phôi không chính xác. Kiểm tra khối lượng của thiết bị nắm, tái tinh luyện đường phân cách, gắn vòng kìm vào vị trí trung tâm và giảm nhẹ áp suất thổi nếu điểm cháy chỉ xuất hiện khi áp suất cao.
Làm thế nào để ngăn ngừa các vết đen và sự carbon hóa trong các bộ phận được phun ép?
Những vết đen xuất hiện do chất liệu tích tụ trong bình hoặc đầu máy, cạp sống trong giai đoạn dừng, chất kết dính bị nh作者 hóa. Các bạn nên sử dụng các chất bước nhất khi thay đổi máy và sau khi máy dừng hoạt động trong thời gian dài, lên kế hoạch bảo trì vệ sinh thường xuyên và tránh để máy làm việc ở nhiệt độ cao trong thời gian dài, như vậy chất liệu chất kết dính có thể lung lay ra nhựa sôi.
Máy Apollo nào tôi nên chọn cho một thùng chứa cụ thể?
Đối với các thùng chứa từ 200 mililít đến 20 lít, hãy chọn dòng ABLB hoặc dòng hoàn toàn bằng điện; cho các bộ phận công nghiệp lớn từ 20 đến 1500 lít, hãy chọn dòng ABLD. Xác định dung tích, chất liệu và năng suất theo bảng chọn trong hướng dẫn này và xác nhận mẫu chính xác với nhà máy bằng bản vẽ và chất liệu nhựa của bạn.
Nhiệt độ áp suất bao nhiêu nên test kiểm tra nén cho bình nhựa nung sạn?
Một thử nghiệm độ kín khí tiêu chuẩn sẽ được thực hiện ở áp suất từ 0,05 đến 0,15 MPa, tùy thuộc vào vách đáy của bộ phận và thiết kế. Bạn có thể thực hiện thử nghiệm mẫu hoặc thử nghiệm 100% ở áp suất đó, tìm kiếm tất cả đâu có lỗ hỏng và liên kết các sự cố với lớp vách mỏng hoặc các đinh cuốn dây lõi yếu bằng cách sử dụng máy đo độ dày và các kiểm tra liên kết được mô tả ở trên.
Kết luận
Các lỗi trong ép forming rất hiếm khi là bí ẩn khi bạn áp dụng cùng một cấu trúc cho chúng: miêu tả hiện tượng, đọc tính chất trực quan, chia điểm gốc giữa vật liệu, quy trình, thùng, thiết bị, và môi trường, thực hiện các hành động khắc phục nhanh nhất trước, và xác lập các bước dự phòng. Dựng lựa chọn yếu tố trong hướng dẫn này, bắt đầu từ lớp tường không đều và phình xệ thành phần, đi qua sự đứt khớp, đánh lửa, bề ngoài, vết đường ống, các vết đen, gel, nứt, lệch trọng lượng, cổ, phát sinh nhầy, và lỗi đa lớp, cung cấp một nguồn tham khảo hữu ích cho bất kỳ nhà máy ép forming nào.
Apollo, nhà máy Wanplas, sản xuất các dòng ABLB, ABLD và chữa thoát nón hoàn toàn bằng điện, cho phép kiểm soát chính xác kích thước gia công, nhiệt độ đầu máy ổn định và chuyển động vặn kẹp có thể lặp lại sau các chỉnh sửa, với hơn 20 năm kinh nghiệm, nhà máy có diện tích 8.000 m2 và hơn 4.000 máy hoạt động tại hơn 90 quốc gia. Nếu bạn đang đối mặt với lỗi thường xuyên hoặc đang lên kế hoạch thiết kế bao mới, hãy gửi bản vẽ sản phẩm, chất liệu gốc và mục tiêu nhà máy cho một cấu hình được thiết kế riêng, thiết lập một cuộc kiểm tra tại nhà máy hoặc yêu cầu thử nghiệm mẫu trên đường dây thực tế. Đội ngũ sẽ phân tích bộ phận của bạn, đề xuất mô hình và cửa sổ quy trình thích hợp, và giúp bạn biến rác thành thành phẩm.