
Por que a solução de problemas de defeitos define a rentabilidade do EBM
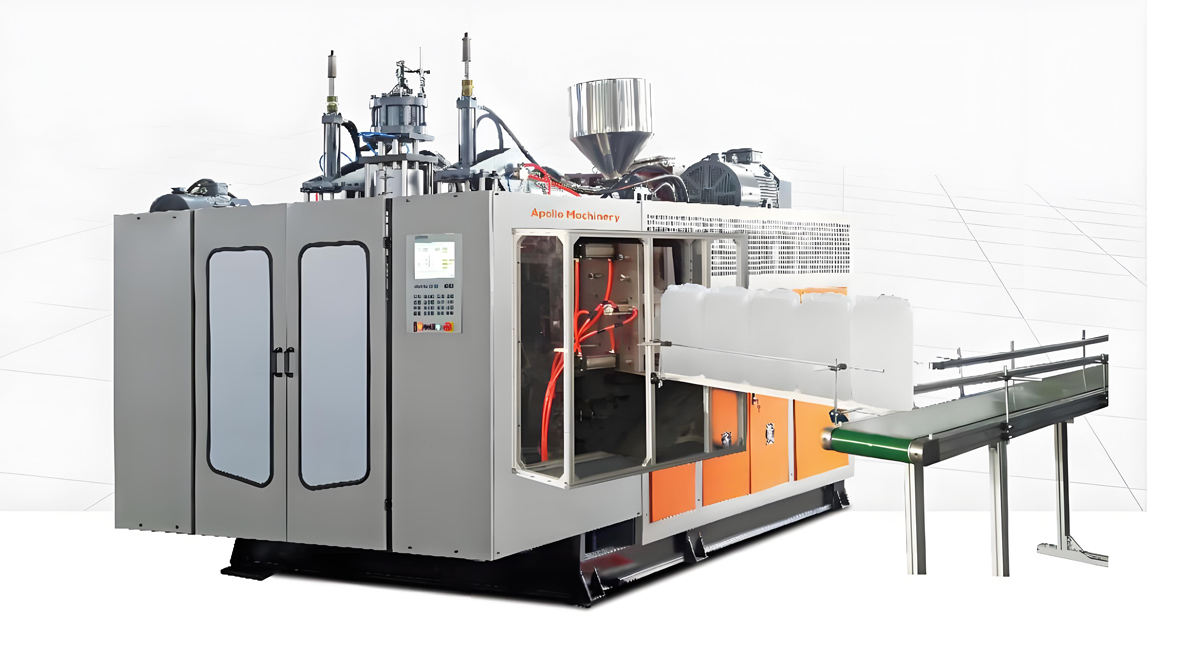
Apollo, a Wanplas factory, has built Máquina de moldagem por sopro e extrusão: A Zhangjiagang Apollo Machinery Co., Ltd. (Grup WANPLAS), localizada na cidade de Zhangjiagang, que fica convenientemente próxima à maior cidade da China, Shanghai. Nossa empresa ocupa uma área des for more than 20 years from its 8,000 square meter plant in Zhangjiagang near Shanghai, with over 4,000 machines running in more than 90 countries. In that field experience, the single biggest controllable cost on an EBM line is not the resin and not the power, but the scrap rate driven by recurring product defects. A blow molding line that ships at 96 percent first-pass yield returns dramatically more margin than a line stuck at 82 percent, even when both run the same resin and the same cycle time. This guide exists to help plant engineers, tooling technicians, and production managers turn defect symptoms into root causes quickly, using a repeatable structure rather than guesswork.
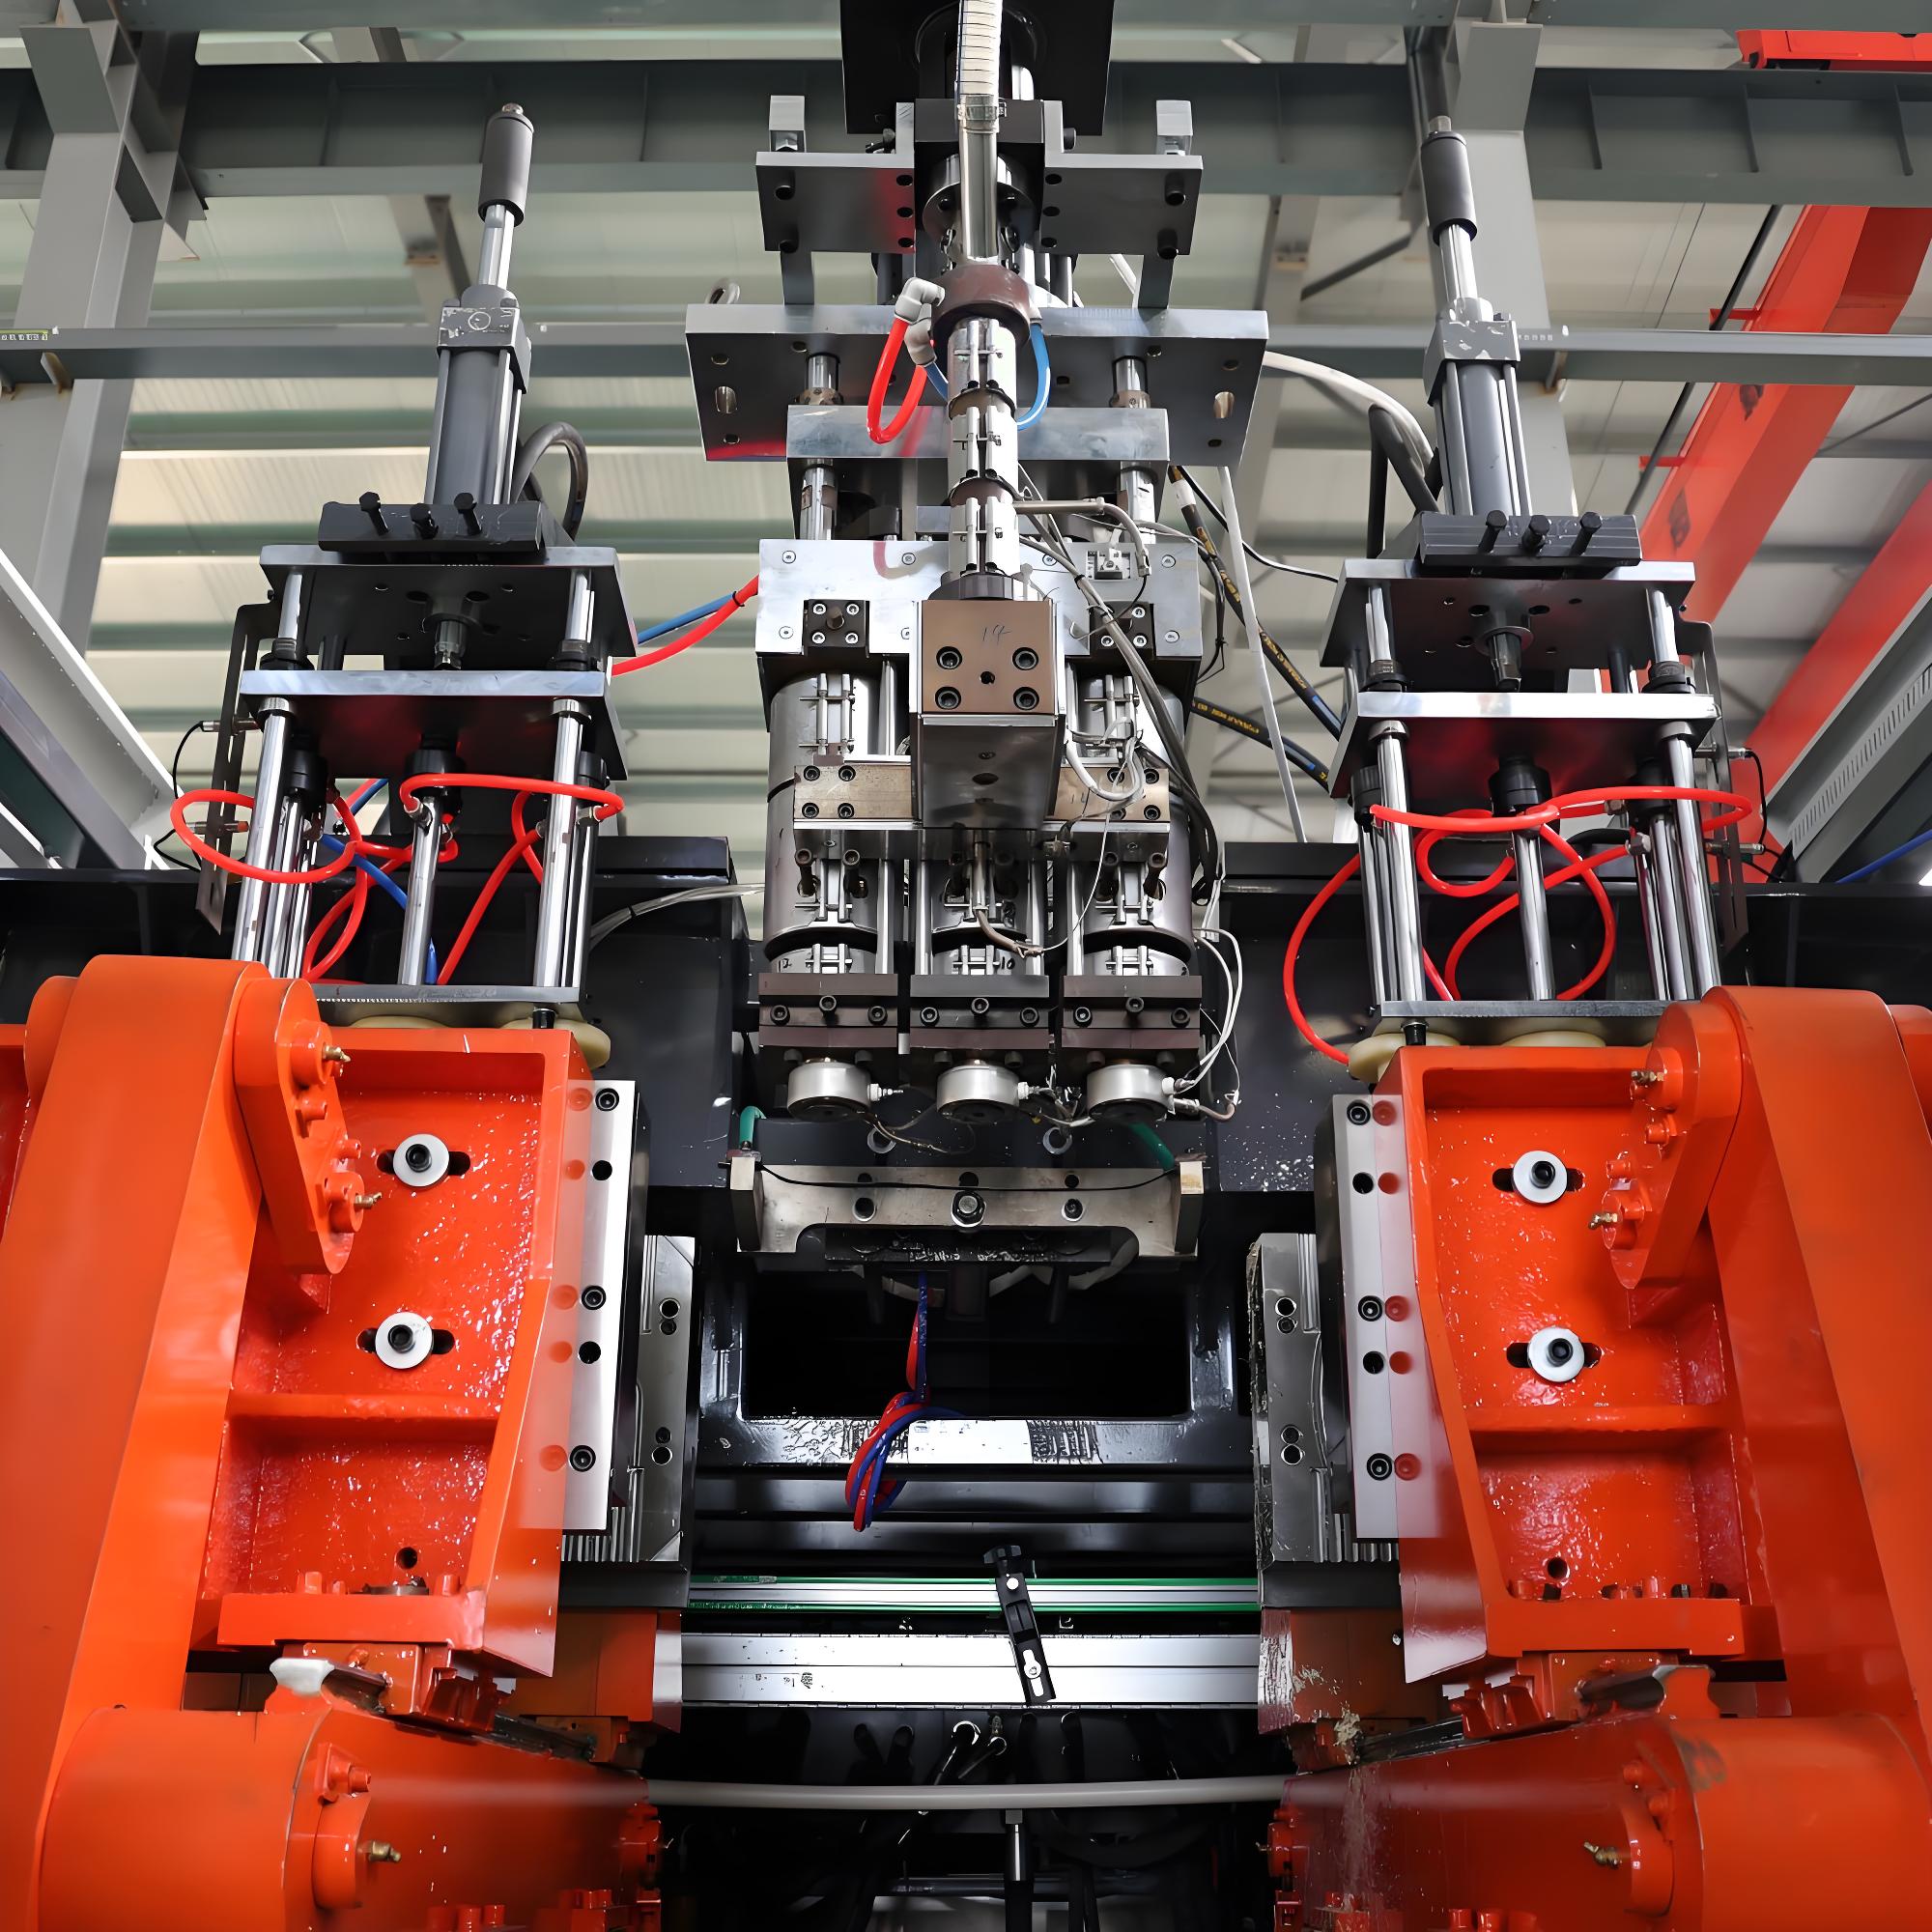
A extrusão de moldagem por sopro é um processo em que um tubo líquido de plástico, chamado de parison, é extrudido a partir da cabeça de matriz, capturado entre duas metades da matriz, acoplado e inflado com ar comprimido até se adaptar à cavidade da matriz. A peça final é ejectada após o resfriamento. Cada etapa, desde a secagem da resina até a plasticização da escada, o controle da temperatura do cabeça, a programação do parison, o acoplamento, o sopro e o resfriamento, pode introduzir um defeito visível ou funcional. Como a cadeia de processos é longa, um único sinal, como uma parede fina ou uma rachadura na base, pode ser remontado ao material, à máquina, à matriz, ao processo ou ao ambiente. A disciplina da depuração é separar estas outras camadas, em vez de alterar três parâmetros de cada vez e esperar.
Primeiro, re-zeroe e re-profunde o programador de parison com pontos suficientes para corresponder à forma da cavidade; a maioria dos controladores modernos da Apollo suporta muitos pontos de programa, portanto, use-os em vez de uma curva grossa de quatro pontos. Em segundo lugar, centre a separação do molde e verifique a concentricidade com um medidor de prova em quatro ou mais posições. Em terceiro lugar, equilibre as zonas de temperatura da cabeça até 2 graus Celsius e verifique com um sensor calibrado. Em quarto lugar, reduza o estiramento do parison, reduzindo a temperatura da cabeça ou aumentando a resistência do derretimento. Em quinto lugar, verifique a simetria do resfriamento do molde, medindo a temperatura da água na entrada e na saída.
Antes de alterar qualquer parâmetro, bloqueie o processo atual como referência, registre os valores reais e altere uma variável por vez com uma medição clara antes e depois. A medição pode ser tão simples quanto a leitura de um medidor de espessura magnético no ponto mais fino ou a contagem de um teste de queda, mas deve ser registrada. Um diário de resolução de problemas que captura a data, lote de material, máquina, cavidade, alteração do parâmetro e o resultado medido é o sistema de qualidade mais barato que uma fábrica de EBM pode executar e é a base dos pontos de controle do processo estatístico descritos no final deste guia.
O Quadro Unificado de Diagnóstico.
Cada defeito neste guia é analisado usando um único prisma, de modo que a mesma lógica se aplica seja para uma garrafa de detergente de 500 mililitros ou para um recipiente de grande capacidade intermediário de 1 000 litros. O prisma tem cinco camadas, e a ordem de investigação é importante porque a correção mais barata deve ser tentada primeiro.
Camada 1: material
São questões relativas ao material, incluindo o caudal de fusão errado para a peça, a proporção excessiva de reciclagem, a humidade na resina, os pellets contaminados ou degradados e a baixa dispersão do masterbatch. O material é a camada mais barata de verificar, pois é possível arrancar uma amostra e verificá-la off-line, e é possível confirmar muitas coisas ao analisar o registo do lote recebido, antes de tocar na máquina.
Nível dois: processo
O processo inclui as temperaturas do tambor e da cabeça, a velocidade da rosca, a pressão negativa, os pontos do programa de paramento, a pressão e a sincronização da injeção, o tempo de resfriamento e a velocidade da fixação. O processo é a fonte mais comum de derivação, pois varia com a temperatura ambiente, a quantidade de resina e os ajustes do operador, e é neste ponto que se encontram a maior parte das vantagens.
Camada três: moldo
Os problemas dos moldes incluem facas desgastadas, superfícies de cavidades danificadas, canais de resfriamento bloqueados, pinos de ejectamento desalinhados e uma baixa ventilação. Um problema de molde geralmente é estável em vez de variável, o que significa que a mesma cavidade falha de forma consistente, enquanto uma cavidade irmã fica limpa.
Layer four: equipment
O equipamento abrange o desgaste do tambor e da hélice da extrusora, a concentricidade do cabeçote da matriz, o desempenho do acumulador, a precisão da força de fixação e a estabilidade hidráulica ou servo. Os defeitos do equipamento costumam ser manifestados como uma deriva lenta em todas as cavidades ou como alterações graduais após um evento de manutenção.
Layer five: environment
Ambiente significa temperatura e umidade da oficina, correntes de ar através do produto em fase de preparação, temperatura e qualidade da água de resfriamento e limpeza do ar comprimido. O ambiente é fácil de esquecer, mas é uma causa frequente de desvanecimento do produto em fase de preparação e de defeitos na superfície, nas instalações de produção sazonais.
Utilize as cinco camadas como uma lista de verificação, não uma hierarquia. Para um defeito móvel, comece pelo processo e pelo equipamento; para um defeito que surge apenas após uma alteração no material, comece pelo material; para um defeito que surge apenas em uma cavidade, comece pelo molde. O fluxograma de triagem mais adiante neste guia transforma essa lógica em três perguntas rápidas.
Espessura irregular da parede
A espessura desigual da parede é o defeito mais comum e mais caro na moldagem por sopro por extrusão, pois degrada tanto a aparência como o desempenho ao mesmo tempo. Uma peça pode parecer aceitável, mas falhar no teste de queda porque um ombro é fino, ou pode parecer feia porque um lado é pesado enquanto o outro é leve. A variação da parede é medida por um medidor de espessura magnético ou pelo método de fatiamento e cálculo do peso, e a margem permitida depende do padrão do produto.
Recursos visuais
A peça mostra uma parte grossa e fina, um fundo pesado enquanto o topo é fino, ou pontos finos localizados nos cantos e no ombro. Em garrafas transparentes, vê-se a diferença diretamente; em peças opacas, é possível identificar por meio do peso ou corte. Um lado pesado também produz marcas de porosidade e maior tempo de resfriamento, o que reduz a produção.
Causas principais por camada.
Material: uma taxa de fluxo da fusão que seja muito alta para o peso da peça permite que o parison se estenda de maneira desigual sob o seu próprio peso. Processo: o programa de espessura do parison tem muito poucos pontos ou um cronogramação errada, o tubo fica mais grosso do que deveria. Moldo: o resfriamento assimétrico faz com que um lado se congele enquanto o outro continua estirando. Equipamento: a eccentricidade do espaçamento da matriz e a desvio da zona de temperatura do cabeçote de mais ou menos 2 graus Celsius alteram a parede local. Ambiente: as corrente de ar refrigeram um lado do parison antes da fixação.
Ações correctivas classificadas
Bloqueie o programa de parison aprovado como uma receita com nome, protegido com níveis de permissão do operador e verifique novamente a distribuição da parede na primeira peça de cada produção. Uma verificação semanal de concentricidade na cabeça do molde evita a crepitação lenta.
Prevenção
Cortes e peso
| Sintoma | Camada mais provável | Primeiro ação | Verificar com |
|---|---|---|---|
| Um lado fino, o outro grosso | Equipamento ou processo. | Distância entre rolo e matriz, verifique o programa de paramento. | Medidor de espessura magnético |
| Fundo pesado, topo fino | Process (sag) | Reduzir a temperatura da cabeça, elevar o perfil no topo | O estiramento do parison é o alongamento do tubo extrudado sob gravidade antes da fechamento do molde, e a oscilação do parison é o movimento lateral desse tubo. Ambos distorcem a distribuição da parede que você programou e são o motivo por que um programa perfeito pode ainda produzir uma peça defeituosa. O estiramento aumenta com o tempo, portanto, uma extrusão longa para uma peça grande estende mais que uma extrusão curta para uma peça pequena. |
| Ponte fino, falha na prova de queda | Moldo ou processo | Aumente a espessura do programa local, verifique a cavidade | Tesão de queda |
| Drifting sobre uma mudança | Equipamento ou ambiente. | Verifique a diferença da zona de cabeça, desvantagens da máscara. | Diário de temperatura da zona |
Balanço de disparo e balanço
Material: baixa resistência de derretimento e uma taxa de fluxo de derretimento que é demasiado alta fazem o parison se alongar e alongar. Processo: uma cabeça superaquecida reduz a viscosidade, a extrusão lenta oferece ao parison mais tempo para estender, e um descarregamento do acumulador muito rápido o alonga. Equipamento: um programa do acumulador desgastado ou de tamanho errado. Ambiente: correntes de ar ao longo do caminho do parison empurram o tubo para o lado; isso é comum perto de portas abertas ou ventiladores.
Recursos visuais
A peça é pesada na parte inferior e fina na parte superior, ou um dos lados é consistentemente diferente do outro, mesmo após o centro do matriz. O trincado mostra-se como uma variação da parede rotativa, onde o lado pesado gira em torno da peça entre as inserções.
Causas principais por camada.
Ocação no trabalho
Ações correctivas classificadas
Reduzir a temperatura da fusão na cabeça em 5 a 10 graus Celsius e observar o desvanecimento. Se a resina permitir, escolha uma classificação de vazão de fusão mais baixa ou mistura para aumentar a resistência da fusão. Aumente a velocidade de extrusão para que o produto em fase de preparação fique menos tempo pendurado. Ajuste a taxa de descarga do acumulador para que o produto em fase de preparação saia do moldo a uma velocidade controlada. Proteja a área do produto em fase de preparação contra correntes de ar, com uma simples placa ou cortina.
Prevenção
Mantenha uma janela de temperatura de derretimento validada por material e registre a temperatura ambiente para detectar o desvio sazonal de forma precoce. Para peças grandes, prefira um design de matriz e programa que engrosse a parte superior da peça para compensar o desvio.
| Condição | Causa | Corrigir |
|---|---|---|
| Fundo pesado e topo fino. | Seguro contra calor ou MFR. | Temperatura do cabeçote inferior, valor MFR mais baixo |
| Lado pesado giratório | Pior em extrusão longa | Caminho transparente do parison, descarga lenta |
| Crackeamento em queda | Desvanecimento dependente do tempo | Aumentar a velocidade de extrusão |
Falha de encerramento e rachaduras na parte inferior
O desligamento é onde as duas metades do molde espremem a parison fechada na base e na linha de separação, soldando o plástico e cortando o flashe. Um bom desligamento resulta em uma base limpa e forte; um mau deixa uma junção fraca que racha durante o encheimento ou o impacto de queda. Este defeito é crítico quanto à segurança para garrafas que mantêm líquidos.
Recursos visuais
A costura inferior parece fin, porosa ou fibrosa. Uma fisura aparece na costura após o preenchimento ou durante o teste de queda. O flash não é cortado com limpo e desprende-se, ou a costura apresenta uma fuga sob o teste de pressão.
Causas principais por camada.
Material: uma resina com baixa força de fundição ou excesso de fragmentação proporciona soldas fracas. Processo: a zona de afinamento está muito fria para que a fusão ocorra ou a velocidade da pinça está errada, o que faz com que a solda forme-se sob pressão baixa. Molde: o espaçamento da lâmina de cortar está fora da janela de 0,05 a 0,1 milímetro, ou a lâmina está desgastada e arredondada. Equipamento: a proteção de fechamento de baixa pressão configurada em nível muito baixo permite que o molde se abra ligeiramente durante a soldagem.
Ações correctivas classificadas
Primeiro, meda a distância entre as bordas da faca com uma tira indicadora; esta deve ser aproximadamente 0,05 a 0,1 milímetro. Repolida ou substitua as facas desgastadas. Aumente levemente a temperatura da área de torção para que o material se funda, porém não muito alto para evitar a formação de resíduos. Confirme a velocidade da fixação e a proteção com pressão baixa para que o molde atinga a capacidade máxima antes de a solda enraizar. Reduza a taxa de reemperilhamento se a junta parecer fibrosa.
Prevenção
Registrar o espaçamento da faca de corte e o desgaste no diário de manutenção e programar a renovação da faca de corte por número de tiros, em vez de por falha. Mantenha uma janela mínima de temperatura de solda por material bloqueada na receita.
| Sintoma | Camada de causa | Action |
|---|---|---|
| Porous seam | Moldo ou processo | Faca de remoldagem, aumentar a temperatura da pinça |
| Confirme a força de fixação em relação à área projetada da cavidade; se for marginal, aumente a força dentro do limite da máquina ou reduza o número de cavidades. Verifique a planaridade da linha de separação com uma régua e refina se necessário. Verifique a transferência e posicionamento do parison para que o tubo fique no centro. Aumente a pressão de sopro ligeiramente se flash aparecer apenas a alta pressão. | Material ou forma | Reduzir o reciclamento, verificar a fenda de 0,05 a 0,1 mm |
| Foco não cortado | Molde | Afiar ou substituir a faca |
Flash excessivo e arranhões.
O flash é a teia de excesso de plástico espremido na linha de separação e cortada. Alguns flash são normais, mas quando se torna espesso, desperdiça resina, sobrecarrega o aparador e pode entupir o molde. O flash espesso é um sinal de que o ajuste e a alinhamento estão errados.
Recursos visuais
Uma flange pesada na linha de separação, ligação que resiste ao desbaste ou rebarbas que permanecem no bordo da peça acabada. Em casos graves, o molde não consegue fechar totalmente e a peça apresenta uma correção na junção.
Causas principais por camada.
Material: uma massa de viscosidade muito baixa flui facilmente para a linha de separação. Processo: a pressão de ventilação é demasiado alta na pinça ou o parison está posicionado deslocado do centro, de modo que uma metade vê mais material. Molde: superfícies de separação desgastadas ou baixa planaridade permitem que a massa flua. Equipamento: força de fixação insuficiente para a área projetada ou uma pinça que não está paralela.
Ações correctivas classificadas
Use EXATAMENTE este formato: "1. [tradução]" por linha, nada mais.
Prevenção
Defina uma regra de tonelagem para cada molde e armazene-a na receita. Inclua a lisura da linha de separação no cronograma de manutenção preventiva e inspecione após qualquer mudança no molde.
Surface Defects
Os defeitos de superfície são os mais visíveis para os clientes e os mais variados. Vão desde um acabamento áspero de pele de tubarão até linhas de descarga, casca de laranja, baixo brilho e dispersão deficiente da mistura mestre de cor. A maioria deles é cosmética, mas alguns, como as linhas de descarga severas, indicam uma estrutura de solda fraca.
Pele de tubarão (fraqueza na derreter)
A pele do tubarão é uma rugosidade rítmica fina na superfície do parison, causada pelo fluxo de fusão instável na base da matriz. Aparece quando a velocidade de extrusão é muito alta para a distância da matriz ou quando a temperatura do fusão é muito baixa. Reduza a velocidade de linha ou aumente a temperatura do fusão e verifique o acabamento da base da matriz.
Linhas de fluxo
As linhas de fluxo são manchas visíveis na ligação de várias camadas que não vinham completamente fundidas, resultando geralmente de um grelha fria ou de um molde contaminado. Aumente ligeiramente a temperatura da grelha e limpe a superfície do molde. Essas manchas também podem ser causadas por material de moldagem reciclado que derrete num ritmo diferente.
Casca de laranja e baixo brilho.
Coco de laranja é uma superfície com dentinhos provenientes de uma transferência de calor inadequada entre o molde e a superfície ou de uma cavidade muito fria. Um baixo brilho vem de uma superfície do molde opaca ou contaminada e de umidade ou gás preso. Polir a cavidade, aumentar a temperatura do molde durante o processo e melhorar a ventilação.
Mastro de cor
Uma dispersão inadequada se manifesta como manchas ou traços de resina não tingida. A causa mais comum é a adição de um masterbatch de cor abaixo do intervalo efetivo ou um tempo de mistura muito curto. Utilizar uma adição de masterbatch de 1 a 4%, dependendo da tonalidade pretendida, aumentar o tempo de mistura no granulador e confirmar que o veículo do masterbatch combina-se com a resina de base. Secar a resina de base se a umidade causar aglomerados.
| Surface Defect | Causa primária | Action |
|---|---|---|
| Shark skin | Fracasso do malha da matriz. | Diminuir a velocidade, aumentar a temperatura de derretimento |
| Linhas de fluxo | Cabeça fria ou matriz suja | Aumente a temperatura da cabeça, limpe o matriz |
| Borracha da laranja | Molde frio ou sem vida. | Aumente a temperatura do molde, polindo a cavidade. |
| Manchas de cor (dispersão) | Mistura de masterbatch inadequada. | Confirme a força de fixação contra a área da cavidade projetada; se for margem, aumente-a no limite da máquina ou reduza o número de cavidades. Verifique a planaridade da linha de separação com um reto e relete, se necessário. Verifique a transferência e a posicionamento do parison para que o tubo aterrisse no centro. Reduza levemente a pressão de sopro se aparecer apenas flash a altas pressões. |
Bolhas e manchas de prata
As bolhas são vazios internos ou superficiais decorrentes de gás ou voláteis presos; as estrias de prata são as marcas na superfície que essas substâncias deixam à medida que se expandem ao longo do caminho de fluxo. Ambas indicam que algo na massa está evaporando ou que ar está preso.
Recursos visuais
Pequenas bolhas redondas por baixo da superfície, um padrão de ebulição prateado na face da peça ou uma área fraca e quebradiça na pista. Em garrafas transparentes, as bolhas são claramente visíveis.
Causas principais por camada.
Material: a humidade na resina, especialmente as grades higroscópicas, se transforma em vapor; uma proporção de moagem muito alta retém ar e compósitos voláteis. Processo: uma ventilação inadequada e uma temperatura de fusão muito elevada causam degradação e gás. Equipamento: uma roda sem uma seção de ventilação a vácuo efetiva não pode remover os compósitos voláteis. Ambiente: um armazenamento húmido aumenta a absorção de umidade.
Ações correctivas classificadas
Secar a resina até o nível de umidade especificado antes do uso e confirmar se o secador está funcionando. Abaixe a relação de regrind e verifique se este está limpo e com os tamanhos adequados. Reduza a temperatura de fundição se a resina estiver degradando. Utilize um parafuso com seção de ventilação ou um parafuso de ventilação por vácuo quando o material o requer. Melhorar a ventilação do molde para que o ar aprisionado possa sair.
Prevenção
Defina uma relação máxima de reciclagem por produto e uma especificação de secagem obrigatória para cada material. Registre o ponto de condensação do secador e o tempo de permanência para detectar problemas de umidade antes do início da produção.
Manchas pretas e carbonização
Manchas pretas são a queixa mais comum dos clientes sobre garrafas claras e de cores claras, porque são óbvias e sugerem contaminação. Quase sempre são resina degradada presa a uma superfície de metal quente e que se desprende a medida que se funde.
Recursos visuais
Pequenos pontos negros ou marrons na superfície ou emborcados na parede, às vezes com um cheiro a carbono. Eles aparecem aleatoriamente nas cavidades e crescem após um longo período de inatividade ou após uma parada.
Causas principais por camada.
Material: resina que se degrada à temperatura estabelecida. Processo: temperatura de fusão muito alta para o tempo de permanência. Equipamento: acumulação de material no barrel ou na cabeça do matriz, tempo de permanência da engrenagem durante uma parada e pontos mortos na cabeça, onde o fusão se estagna. Ambiente: tempo inativo a longo prazo a alta temperatura sem purgar.
Ações correctivas classificadas
Execute uma purga na câmara e na cabeça a cada alteração de material e após uma paragem prolongada. Programar a desmontagem e a limpeza da cabeça com um intervalo fixo baseado na resina e na cor. Reduzir a temperatura de espera ou fazer uma purga contínua durante quaisquer pausas. Trocar as secções de parafusos ou barragens desgastadas que criam zonas de estagnação. Nunca deixar a máquina quente e vazia por longos períodos.
Prevenção
Defina um procedimento de purga de compostos e um calendário de limpeza da cabeça. Bloqueie o tempo máximo de permanência e temperatura de inatividade na receita para que os operadores não possam superaquecer durante os períodos de espera.
Pontos brancos e géis não fundidos
Pontos brancos e géis não fundidos são partículas sólidas ou semi-sólidas de resina hipotampingada na peça final. Diferem das manchas pretas porque não estão fundidas, apenas queimadas, e muitas vezes aparecem como grumos leitosos ou translúcidos.
Recursos visuais
Nódulos brancos leitosos ou translúcidos na parede, manchas rugosas ou pontos fracos que se dividem sob pressão. São mais comuns quando a nova matéria prima ou uma mistura mestre de enchimento é mal misturada.
Causas principais por camada.
Material: uma mistura com má compatibilidade ou moagem reutilizada em excesso. Processo: insuficiente plasticização devido à baixa velocidade da roda, baixa pressão de retorno ou tempo de permanência muito curto. Equipamento: uma roda com a errada relação de compressão ou excessivamente baixa relação L/D para o material, ou rodas de roda desgastadas que não conseguem transportar e homogeneizar. Ambiente: uma garganta de alimentação fria causa lentificação.
Ações correctivas classificadas
Aumente a velocidade do parafuso e a pressão na retaguarda para melhorar o corte e a mistura, dentro do limite de temperatura de fundição. Verifique se a relação de compressão do parafuso e o L/D se ajustam ao material; uma relação de compressão mais elevada ajuda nas misturas resilientes. Tire a regrind para um tamanho consistente e misture bem. Se há geles persistentes em um material duro, consulte um parafuso projetado para aquela resina.
Prevenção
Mantenha uma matriz de parafusos e materiais, para que o parafuso adequado seja utilizado para cada família de resinas. Registre a qualidade de plasticização na primeira peça e após qualquer alteração no material.
Contração e deformação
A contração é a parte que torna-se menor à medida que se resfria e cristaliza; a torção é a parte que se distorce. Ambos estão vinculados ao resfriamento e ao comportamento de cristalização do material, e ambos aparecem depois que a peça sai do molde.
Recursos visuais
A peça é menor que a cavidade, o colo é oval, a base é côncava ou o corpo se curva. Uma peça pode passar na ejectação e falhar na medição 24 horas depois, uma vez que a contração continua.
Causas principais por camada.
Material: as matérias de alta cristalinidade encolhem mais e deformam-se mais. Processo: tempo de resfriamento muito curto, temperatura do molde não uniforme nos canais, ou demoldagem ainda que o molde seja muito quente. Molde: linhas de resfriamento bloqueadas ou desequilibradas, ou uma cavidade que retém tensões. Ambiente: temperatura do líquido de resfriamento que oscila de acordo com a época do ano.
Ações correctivas classificadas
Estender o tempo de resfriamento e confirmar que o produto sai do molde abaixo da temperatura programada. Medir as temperaturas de entrada e saída da água do molde em todos os canais e equilibrá-las. Para materiais cristalinos, permitir uma janela de pós-contracção de até 24 horas antes da medição final e do empacotamento. Limpar os canais de resfriamento em conformidade para manter estável a transferência de calor.
Prevenção
Defina o tempo de resfriamento e a temperatura de desmolde por material e bloqueie-os. Limpe os canais de resfriamento periodicamente e monitore a temperatura da água com um registrador de gráficos.
Volume e peso fora do tolerável
O controle de volume e peso determina o quantitativo de resina utilizado e se a peça atende às especificações de enchimento e pilha. Uma peça que seja um grama mais pesada em um milhão de unidades representa um grande custo oculto.
Recursos visuais
O peso da peça afunda ou sobe, a linha de enchimento varia ou a peça não se instala em sua fecho. A afundação geralmente é lenta, mas pode ocorrer depois de uma alteração de lote de material.
Causas principais por camada.
Material: variação de lote da densidade entre as lotes de resina altera o peso para o mesmo volume. Processo: peso do monopar não controlado, ou contagem de parafusos instável. Equipamento: uma seção de contagem que pulsa, ou um feedback da escala que não é utilizado. Ambiente: densidade da mistura a temperatura ambiente altera.
Ações correctivas classificadas
Implemente o controlo de peso do parisonamento com uma balança periódica e feche o ciclo com um sistema de feedback por pesagem, se disponível. Confirme a estabilidade na contagem dos parafusos, pesando shot após shot. Registre a densidade do lote de resina e ajuste o programa quando a densidade se alterar. Mantenha a temperatura ambiente estável perto da máquina.
Prevenção
Efetue um ponto de controle de processo estatístico sobre o peso da peça, com limites de controle, e reaja às tendências antes que eles excedam a tolerância.
Defeitos na roseta e no bico
O colo e a linha são a superfície funcional de selagem de uma garrafa, por isso, os defeitos aqui causam vazamentos e fechamentos recusados, mesmo quando o corpo parece perfeito.
Recursos visuais
O fio é incompleto ou aplatado, o colo é oval, a superfície está marcada pelo pin de impacto ou o fio é insuficiente. A peça pode não aceitar a tampinha.
Causas principais por camada.
Material: baixa resistência do fundido, que não pode manter a forma da rosca. Processo: pinos de sopro mal centrados, momento de corte da gola errado ou insuficiente inflação no final. Moldo: inserção de gola desgastada, pino de sopro desalinhado ou ventilação insuficiente na rosca. Equipamento: desalinhamento da trava que distorce a gola.
Ações correctivas classificadas
Centralizar o pino de sopro e confirmar se ele está perpendicular ao gargalo. Verificar o tempo de corte do gargalo para que a rosca se forme completamente. Inspecionar e reformar o inserto do gargalo. Aumentar a pressão de injeção por um breve período no final, se as rosas estiverem curtas. Verificar o alinhamento da prensa para evitar gargalos ovalados.
Prevenção
Inclua métricas de rosca no início da produção e em inspeções periódicas, bem como armazene o alinhamento de pinos de ar comprimido na receita.
Falha de resistência à fugas e à pressão
Vazamento e falha de pressão são o último teste funcional. Uma peça pode parecer perfeita e ainda assim vazar por uma parede fina, uma solda fraca ou uma ligação multi-stratos defeituosa.
Recursos visuais
A peça falha num teste de pressão de água ou ar, vaza da junta ou do fundo, ou se esgote sob carga. As falhas normalmente estão localizadas na junta inferior ou em uma parte fininha.
Causas principais por camada.
Material: solda fraca devido à reciclagem ou baixa resistência da mistura. Processo: ponto de parede fino, pressão de sopro errada ou solda de pressão fraca. Molde: introdução fraca de fechamento ou ventilação bloqueada. Equipamento: pequeno acolchoamento na costura. Um teste de estanquidade padrão é executado a 0,05 a 0,15 MPa, e as partes devem manter esse valor sem perda ou vazamento.
Ações correctivas classificadas
Localize o ponto fino com um medidor de espessura e defina o programa de parisonamento. Reconstrua a solda inferior, utilizando as ações de "abrandamento" do secção anterior. Realize o teste de estanquidade a 0,05 a 0,15 MPa numa amostra e trace as falhas à cavidade que as causou. Para peças multicamada, confirme a ligação entre as camadas.
Prevenção
Realize testes de estanquicidade a 0,05 a 0,15 MPa em um percentual de 100% ou verificação estatística por produto, e determine a taxa de falha por cavidade.
Defeitos específicos da extrusão multicamada
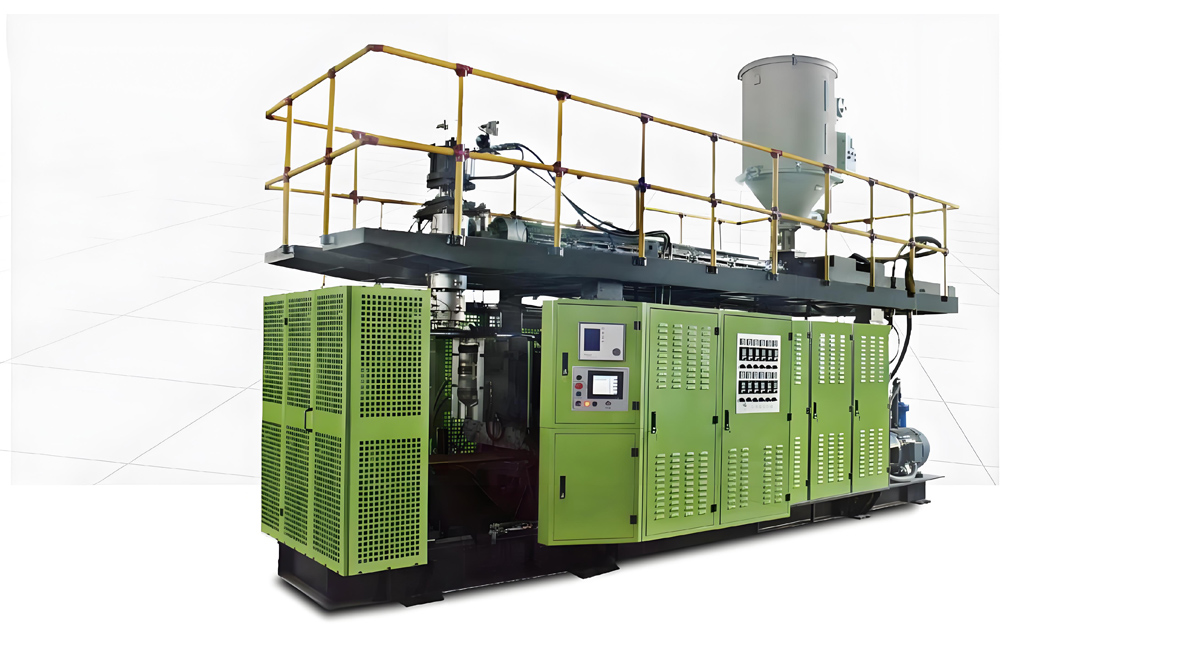
A coextrusão em várias camadas adiciona camadas de barreira, como a EVOH, dentro de uma camada estrutural, para prolongar a vida útil. As camadas extras criam defeitos que as peças de uma única camada nunca apresentam e exigem um controle mais rigoroso da temperatura.
Desmoldagem da camada
Delaminação é quando as camadas se separam, visível pela retirada dos cantos cortados ou por uma fronteira turva. Resulta de uma má adesão entre as camadas, de uma relação errada das camadas de ligação ou de uma interface contaminada. Utilize a camada de ligação ou do adesivo adequados e mantenha a interface limpa.
Desvios da espessura da camada
O espessamento de cada camada muda conforme as saídas individuais dos extratores não estão equilibradas. Monitore a relação de camadas com um corte do microscópio e uma medição de espessura, e ajuste a metragem de cada extrator.
Descontinuidade da barreira de EVOH
O EVOH é sensível à umidade e apresenta uma janela de processamento estreita. Se a temperatura é muito alta, ele degrada; se muito baixa, ele se quebra e a barreira é quebrada. Mantenha o EVOH dentro de sua janela de temperatura e proteja-o da umidade antes da extrusão.
Janela de temperatura da camada de amarração
A camada adesiva deve estar suficientemente quente para ligar os componentes, mas não tão quente que o repelente seja deslocado. Verifique a janela de temperatura da camada de ligamento por estrutura e bloqueá-la na receita, porque uma janela estreita é a principal causa da falha intermitente do repelente.
| Defect | Causa | Controle. |
|---|---|---|
| Delaminamento | Adesão do laço insuficiente | Camada de laço correta, interface limpa. |
| Deslocamento da camada | Extrusores anormais | Verificação da fenda, ajuste da medição |
| EVOH break | Violação de janela | Lock EVOH temperature window |
Métodos de inspeção e quantificação
Não é possível melhorar o que não é medido. Um programa moderno de qualidade EBM combina controlo rápido em linha com verificações laboratoriais periódicas que quantificam os defeitos e comprovam as correções.
Medidor de espessura magnético
Uma medidor de espessura magnética lê a espessura da parede na peça acabada em segundos em vários pontos. É a primeira ferramenta para a investigação de paredes irregulares e pontos finos e deve ser utilizada em cada primeira peça.
Método de separação e pesagem
Corte a peça num plano definido, pesando o corte resultante, e determine a perdiz média. Isto validia o medidor de espessura e quantifica a distribuição com maior precisão do que uma medição feita em um único ponto.
Teste de queda e carga vertical
O teste de queda demonstra a resistência ao impacto na altura e temperatura especificadas; o teste de carga vertical demonstra a resistência à pilha vertical. Ambos são passados ou reprovados e devem ser analisados por cavidade.
OTR e WVTR
Para produtos de barreira, medir a taxa de transmissão de oxigénio e a taxa de transmissão de vapor de água para confirmar o desempenho da EVOH ou da camada de barreira. Essas verificações de laboratório são feitas em uma freqüência de amostras ligada à estrutura da camada.
Exploração por computador tomográfico e diferença de cores
A tomografia computada ou uma seção transversal permite visualizar os vãos internos, a qualidade de solda e a estrutura das camadas, sem comprometer o valor da análise. A diferença de cor, expressa como delta E, quantifica a variação do tom resultante da variação do masterbatch, pelo que as afirmações cosméticas são objectivas.
| Method | Medidas | Uso para |
|---|---|---|
| Medidor de espessura magnético | Parede em determinado ponto. | Parede desigual, mancha fina |
| O estiramento do parison é o alongamento do tubo extrudado sob gravidade antes da fechamento do molde, e a oscilação do parison é o movimento lateral desse tubo. Ambos distorcem a distribuição da parede que você programou e são o motivo por que um programa perfeito pode ainda produzir uma peça defeituosa. O estiramento aumenta com o tempo, portanto, uma extrusão longa para uma peça grande estende mais que uma extrusão curta para uma peça pequena. | Perdiz média | Verificação de distribuição |
| Caída e carga vertical | Impacto, empilhamento | Fundo, estrutura |
| OTR, WVTR | Taxa de barreira | Multi-layer barrier |
| CT ou corte transversal, delta E | Interno, em cores | Vãos, derivação de sombra. |
Esquema de classificação de defeitos
Quando um defeito aparece na linha, responda a três perguntas no âmbito. Geralmente permitem uma rápida segmentação do espaço de origem e evitam alterações aleatórias de parâmetros.
Pergunta um: cavidade simples ou todas as cavidades
Se apenas uma cavidade falhar, consulte em primeiro lugar o molde: faca desgastada, resfriamento bloqueado, pin de impacto desalinhado ou cavidade danificada. Se todas as cavidades falharem, a causa é material, processo, equipamento ou ambiente, não o molde.
Pergunta dois: apareceu após uma mudança de material
Se o defeito começou logo após uma mudança de resina, masterbatch ou granulados, comece com o material: humidade, taxa de fluidez no estado fundido, lote de densidade ou compatibilidade. Verifique as especificações do novo lote antes de tocar na máquina.
Pergunta três: fases de mudança ao longo do tempo ou falhas repentinas
Se o defeito progredir lentamente ao longo de uma mudança de turno, suspeite de desgaste do equipamento, desvio da zona de cabeça ou derruba de temperatura ambiente. Se ocorrer uma mudança repentina, suspeite de alteração dos parâmetros de processo, de um acontecimento de manutenção ou de troca de peças durante uma paragem.
| Branch | Resposta | O primeiro lugar para procurar |
|---|---|---|
| Individual vs. Todos. | Cavidade simples | Molde |
| Individual vs. Todos. | Todas as cavidades | Material, processo, equipamentos |
| Após alteração | Sim | Lote de material |
| Drift vs step | Dérvica | Equipment, environment |
| Drift vs step | Passo | Ponto de compromisso, manutenção |
Série de máquinas Apollo para produção de alta exigência de defeitos
A máquina certa reduz as causas dos defeitos na fonte. A Apollo, uma fábrica da Wanplas, fabrica dez séries com mais de oitenta modelos, e os três abaixo cobrem o intervalo de volumes que as plantas mais sensíveis a defeitos precisam. Os números exatos por modelo variam de acordo com a configuração e são confirmados na ordem; a tabela lista as classes verdadeiras de volume e a arquitetura que controla os defeitos discutidos acima.
Série ABLB, de 200 mililitros a 20 litros
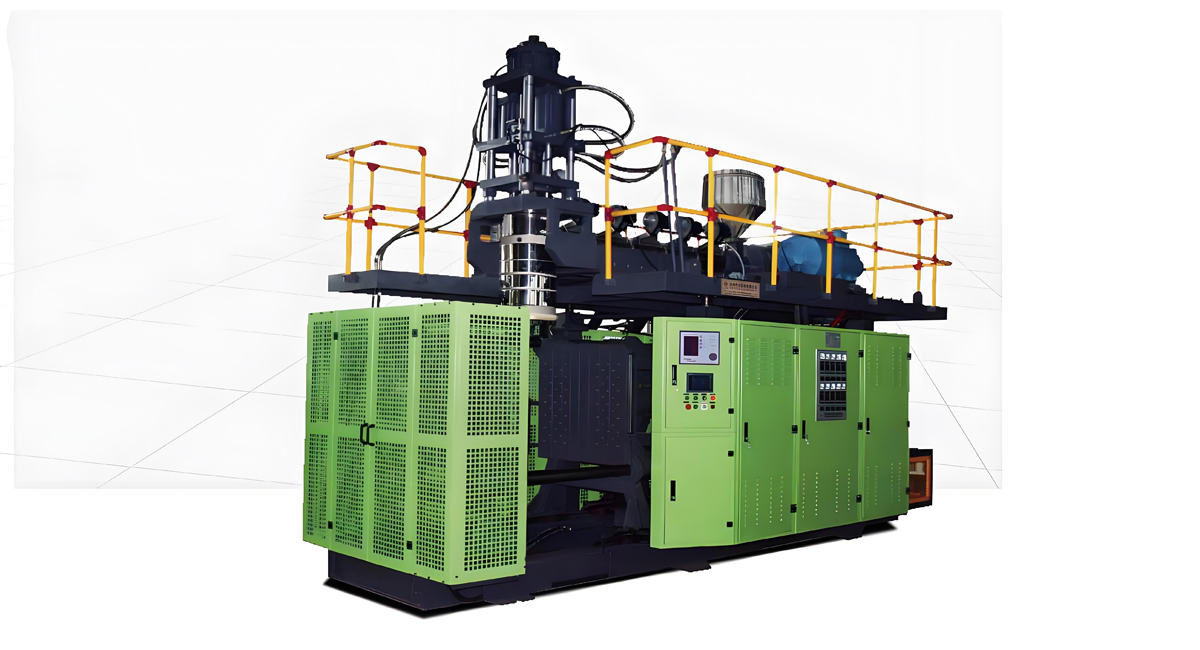
A série ABLB é a linha padrão de moldagem por sopro de extrusão para recipientes de 200 mililitros a 20 litros, contando com oito tipos de máquinas. Oferece programação precisa de parison e controle estável da temperatura da cabeça, o que combate directamente o desnível de paredes e o ponto de falha do parison. Processa PE, PP, PVC, PA, PC, ABS, PS, EVA, TPU e PETG.
| Especificação | Série ABLB (intervalo de classes típico) | Observação |
|---|---|---|
| Faixa de volume do recipiente | 0.2 to 20 L | Intervalo real de perfil |
| Tipos de máquina na família | 8 | Quantificação do perfil real |
| Força de fechamento | Intervalo de classes por modelo, confirmado por pedido | Definida contra a área projetada para controlar o flash |
| Diâmetro da rosca | Intervalo de classes por modelo, confirmado por pedido | Ajustado para a produção e ao material |
| L/D ratio | Intervalo de classes por modelo, confirmado por pedido | Contribui para a qualidade da plasticização |
| Potência instalada | Intervalo de classes por modelo, confirmado por pedido | Depende das opções |
| Saída lixo | Por modelo e número de cavidades | A fábrica valida o teste |
ABLD Series, 20 liter to 1500 liter
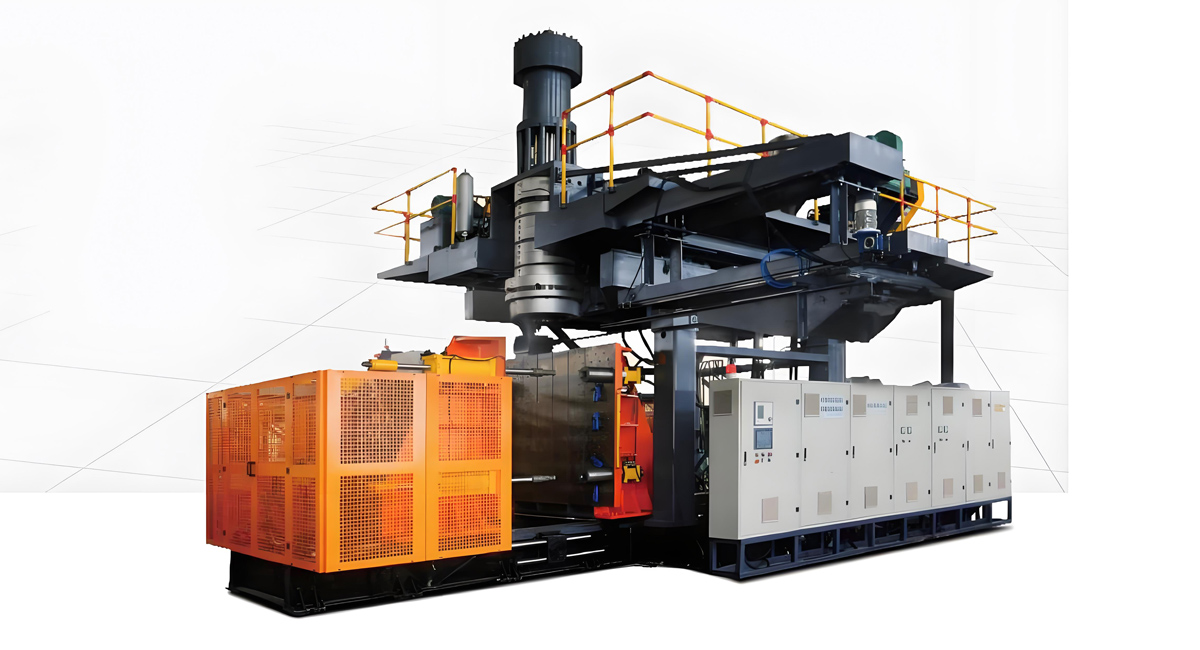
A série ABLD é a linha de alto desempenho para grandes recipientes e peças industriais, de 20 litros a 1500 litros, com três tipos de máquinas. Sua estrutura de acúmulo e fixação está projetada para resolver os desafios de ressaca e quebra nos componentes muito grandes, onde o controle de paredes é mais difícil.
| Especificação | ABLD Series (typical class range) | Observação |
|---|---|---|
| Faixa de volume do recipiente | 20 até 1500 L | Intervalo real de perfil |
| Tipos de máquina na família | 3 | Quantificação do perfil real |
| Força de fechamento | Intervalo de classes por modelo, confirmado por pedido | Controla flash de grandes partes |
| Diâmetro da rosca | Intervalo de classes por modelo, confirmado por pedido | Maior para alto rendimento |
| L/D ratio | Intervalo de classes por modelo, confirmado por pedido | Plasticização estável. |
| Potência instalada | Intervalo de classes por modelo, confirmado por pedido | Depende das opções |
| Saída lixo | Por modelo e número de cavidades | A fábrica valida o teste |
Série totalmente eletrônica, de 200 mililitros a 20 litros
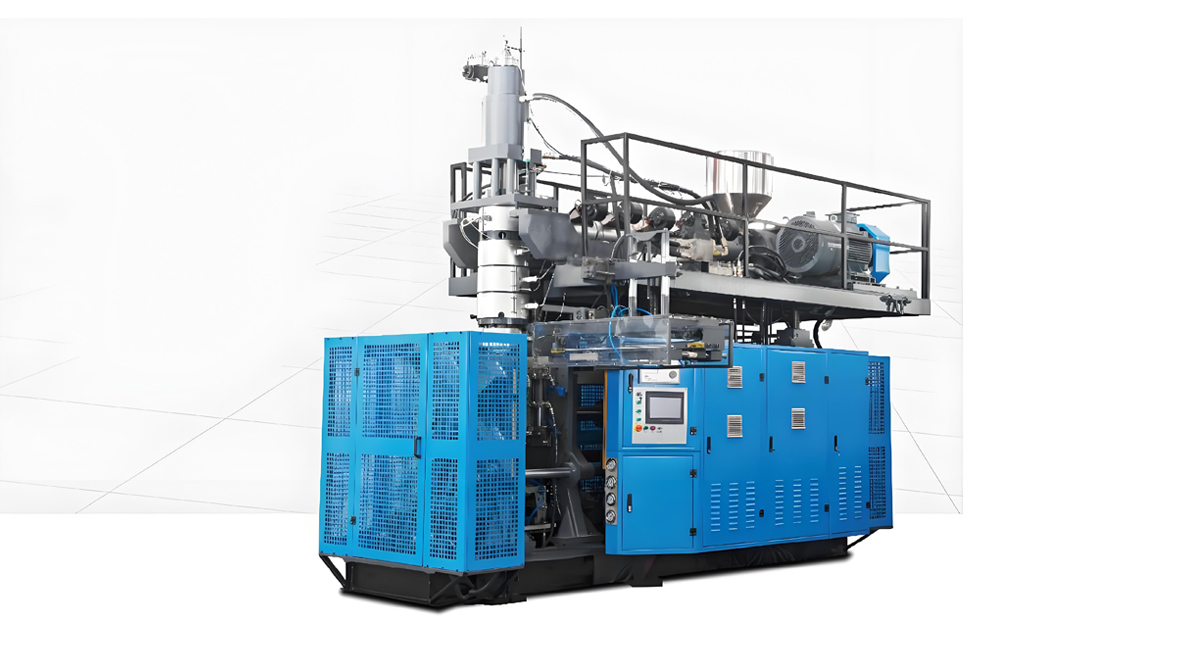
A série totalmente elétrica abrange valores de 200 mililitros a 20 litros, sem sistema hidráulico. A clampagem e o transferência elétricas proporcionam um movimento repetível, com pouca vibração, que reduz a oscilação e melhora a consistência da parede, tornando-a adequada para plantas com exigências ambientais rígidas. A capacidade de produção anual da Apollo é de cerca de 100 conjuntos nas suas linhas, e mais de 4.000 conjuntos são utilizados em mais de 90 países.
| Especificação | Série totalmente elétrica (intervalo de classificação típico) | Observação |
|---|---|---|
| Faixa de volume do recipiente | 0.2 to 20 L | Intervalo real de perfil |
| Eixo | Completamente elétrico, sem hidráulica | Low vibration, clean |
| Força de fechamento | Intervalo de classes por modelo, confirmado por pedido | Tonagem repetível |
| Diâmetro da rosca | Intervalo de classes por modelo, confirmado por pedido | Atinado ao material |
| L/D ratio | Intervalo de classes por modelo, confirmado por pedido | Controlo de plastificante |
| Potência instalada | Intervalo de classes por modelo, confirmado por pedido | Eficiente energéticamente |
| Saída lixo | Por modelo e número de cavidades | A fábrica valida o teste |
Indústrias de aplicações e Produtos Finais
As máquinas Apollo atendem aos mercados de alimentos e bebidas, produtos químicos para uso diário, indústria química, materiais de construção, médicos e farmacêuticos, produção automóvel, transporte e cultura e esportes. Cada produto final tem sua própria prioridade de defeito, sendo por isso que a mesma máquina é calibrada de forma diferente para cada aplicação.
- Alimentos e bebidas: recipientes para água, óleo comestível e molhos em que as paredes frias ao licor e sem cheiro são de primordial importância, fazendo com que a qualidade de fechamento e de barreira seja de primeira classe
- Produtos químicos diários: garrafas de detergente, champo e produtos de limpeza em que o brilho da superfície e a uniformidade da cor são os defeitos visíveis para o cliente.
- Indústria química: baldes e tambores corrosivos, onde a uniformidade das paredes e a resistência química são os mais importantes.
- Material de construção: perfis e componentes hojados, em que a estabilidade dimensional e o controle da ondulação predominam.
- Medicinal e farmacêutico: recipientes em condições de rigorosa higiene, em que manchas pretas e a limpeza são rejeitadas sem debate.
- Automóveis e transporte: canais, reservatórios e tambores em que a resistência à pressão e a resistência ao impacto são confirmados por testes.
- Cultura e esportes: bolas, flutuação e equipamentos em que a simetriade da parede afeta o equilíbrio e a segurança.
Para alimentos regulamentados e contato médico, são aplicadas normas pertinentes como a FDA, a UE 10/2011 e a ISO, conforme exigido pelo produto e pelo mercado; antes do lançamento, verifique a certificação específica para o seu destino com a fábrica.
Requisito para a tabela de seleção do modelo
Utilize esta tabela para associar um requisito de produção a uma série Apollo real. É um ponto de partida; a fábrica confirma o modelo e o parafuso exatos após examinar o seu desenho, o material e a meta de produção.
| Requisito | Série recomendada. | Porquê |
|---|---|---|
| Garrafa de 0,2 a 20 L, geral | Série ABLB | Estándar, comprovado, 8 tipos |
| 0,2 a 20 l, ambiente limpo | Fully electric series | Sem hidráulica, com baixo nível de vibração |
| Tambores ou tanques de 20 a 1500 litros | Série ABLD | Amortecedor de acumulador de alta resistência |
| Alimentos ou produtos médicos resistentes | ABLB ou ABLD, com coextrusão. | Opção de EVOH multiafeto |
| Controle rígido da parede, velocidade elevada | Fully electric series | Movimento repetível, menor oscilação |
| PVC ou resina de engenharia | Série ABLB | Ampla compatibilidade de material |
Manutenção preventiva e blocagem de períodos de processo
O defeito mais barato é aquele que nunca começa. Dois sistemas transformam o diagnóstico de problemas da monitorização de incêndios em controle: manutenção preventiva e uma janela de processo bloqueada.
Statistical process control points
Coloque os pontos de controle sobre o peso da peça, a espessura da parede em pontos mais finos, a dimensão do pescoço e o resultado do teste de fugas. Organize-os por cavidade e reporte tendências, não apenas o desempenho fora da tolerância exigida. Um simples gráfico de barras com peso indica desvios na dosagem das hastes dias antes de surgir o material rasurado.
Inspecção da primeira peça
Cada lote de produção começa com uma verificação da primeira peça: medidor de espessura em pontos definidos, teste de queda, superfície visual e medidor de garganta. Nenhum lote começa sem um registro da primeira peça assinado. Isto, sozinho, remove a maioria dos defeitos de deriva.
Bloqueio de parâmetros e permissão.
As receitas aprovadas têm nome, versão e são bloqueadas. Os operadores podem chamar uma receita, mas não podem alterar os valores de configuração sem uma senha de supervisão. Isto acaba com o creep, o processo lento em que dez pequenas alterações durante um mês obrigam a reiniciar o processo. Wanplas, como marca matriz, aplica o mesmo padrão de qualidade em todas as suas fábricas especializadas.
Manutenção programada
As tarefas baseadas no calendário superam as tarefas baseadas em desdobramento: limpeza do cabeçote, reafiação da faca, limpeza do canal de refrigeração, verificação do desgaste do parafuso e do cilindro e procedimento de purga a cada mudança. Guarde o registo na máquina para que a próxima equipe possua o histórico.
Serviço e Suporte
A Apollo, uma fábrica da Wanplas, suporta as suas máquinas com um programa de serviço criado para produção contínua. Cada máquina é inspecionada e testada na fábrica antes da expedição, e os engenheiros viajam ao local para a instalação e comissionamento, para que a primeira corrida corresponda à janela validada. A política do grupo Wanplas inclui peças gratuitas no valor de US$ 500 por ano, o que ajuda a manter uma linha de produção sem grandes incertezas orçamentárias. O apoio adicional cobre personalização do molde e da tensão, rastreamento do uso após o arranque, visitas irregulares dos clientes e uma garantia de padrão de qualidade com reembolso e compensação de dez por cento caso a qualidade não corresponda ao especificado aprovado.
Treinamento é fornecido sobre operação, manutenção e o quadro de resolução de problemas nesta guia, e o suporte de operação remota permite que a fábrica verifique os dados do controlador e forneça orientação sobre a derivação dos parâmetros à distância. A política de fábrica aberta dá boas-vindas a clientes que realizarem visitas, auditorias da fabricação e execução de uma amostra na linha real antes de se comprometer.
Perguntas Frequentes
Por que minha garrafa moldada por sopro apresenta espessura irregular da parede?
A espessura desigual da parede geralmente é causada por um programa de espessura de parização incorreto, echão da distância entre as moldes, desvio da temperatura da cabeça do molde além de mais ou menos 2 graus Celsius, enseiramento da parização ou resfriamento assimétrico do molde. Re-zero o programador de parização, centre a distância entre os moldes e balance o resfriamento do molde, primeiro verificando com um dispositivo de medição da espessura magnético nos pontos mais finos e mais pesados.
O que causa o saco de parison e o balanço durante o moldeamento por sopro?
O tranco no parison pode ser provocado por uma baixa resistência de derretimento, uma taxa de fluxo do material fundido demasiado elevada, uma cabeça excessivamente aquecida, extrusão lenta ou descarga rápida do acumulador. O tranco é amplificado por ventos na área do parison. Reduza a temperatura do material fundido, diminua a taxa de fluxo do material fundido, aumente a velocidade de extrusão e protegam o caminho do parison contra correntes de ar.
Como posso corrigir falhas de desconexão e rachaduras no fundo?
Verifique o espaçamento da borda da faca de desligamento, que deve ficar entre 0,05 e 0,1 milímetro, inspecione a faca em relação ao desgaste, verifique a velocidade do pino e a proteção a baixa pressão e confirme a temperatura da área de aperto. Facas desgastadas ou com espaçamento causam soldas fracas e rachaduras na parte inferior; por isso, rearanja ou substitua a faca e aumente a temperatura de aperto dentro do intervalo permitido.
Por que o meu flash é muito grosso numa máquina EBM?
Os pontos de corrimento localizados no vênete indicam uma força de fixação insuficiente para a área projetada, falta de lisura da linha de separação, superfícies de moagem desgastadas ou posicionamento deficiente do parison. Verifique o tonelagem da fixação, repole o curso da linha de separação, centre o transferência do parison e reduza ligeiramente a pressão de sopro, se o corrimento for observado apenas a pressão mais alta.
Como posso evitar manchas pretas e carbonização em peças moldadas por sopro?
As manchas pretas se originam na acumulação de material no cilindro e na cabeça, no residência da porca durante as paragens e na resina degradada. Use um composto de limpeza com cada mudança e após paragens prolongadas, programe uma limpeza de desmontagem da cabeça em um calendário fixo e evite o tempo inativo a alta temperatura para impedir que o plástico degradado se desfaça na fusão.
Qual máquina Apollo devo escolher para determinado recipiente?
Para containers de 200 mililitros a 20 litros, escolha a série ABLB ou totalmente elétrica; para grandes peças industriais de 20 a 1500 litros, escolha a série ABLD. Combine volume, material e produção à tabela de seleção descrita anteriormente nesta guia e confirme o modelo exato com a fábrica usando o desenho e o resino.
Qual a pressão de ar que deve ser usada no teste de escape em garrafas moldadas por sopro?
Um teste padrão de estanqueidade é realizado a 0,05 a 0,15 MPa, dependendo da parede e do desenho da peça. Teste uma amostra ou execute um teste de 100% com essa pressão, trace leve qualquer vazamento para a cavidade que o causou e vincule as falhas a paredes finas ou soldas fracas na parte inferior, utilizando o dispositivo de medição da espessura e verificações utilizando o procedimento descrito acima.
Conclusão
Os defeitos do molde por sopro raramente são misteriosos quando uma estrutura é aplicada a todos eles: descreva o fenômeno, leia a característica visual, divida a causa raiz por material, processo, molde, equipamento e ambiente, tome as medidas corretivas mais rápidas primeiro e bloqueie uma etapa preventiva. O catálogo de defeitos nesse guia, desde a parede desigual e o saco de parison até o êxito, o flash, a superfície, bolhas, manchas pretas, géis, ressecamento, declínio de peso, pescoço, vazamento e falhas multi-camadas, fornece uma referência pronta para uso em qualquer planta de moldeamento por sopro.
A fábrica Apollo, da Wanplas, constrói a série ABLB, ABLD e a extrusão totalmente elétrica do blow molding, que colocam o controle preciso do parison, a temperatura estável da cabeça e o movimento repetível do grabador por detrás dessas correções, com mais de 20 anos de experiência, uma fábrica de 8 000 metros quadrados e mais de 4 000 máquinas activas em mais de 90 países. Se estiver lutando contra um defeito recorrente ou planejando um novo recipiente, envie o desenho do produto, a resina e o objetivo de saída para uma configuração personalizada, programe uma auditoria da fábrica ou solicite um teste com um amostragem na linha real. A equipe analisará o seu componente, propõe o modelo certo e a janela do processo e ajuda a transformar o resíduo em rendimento.