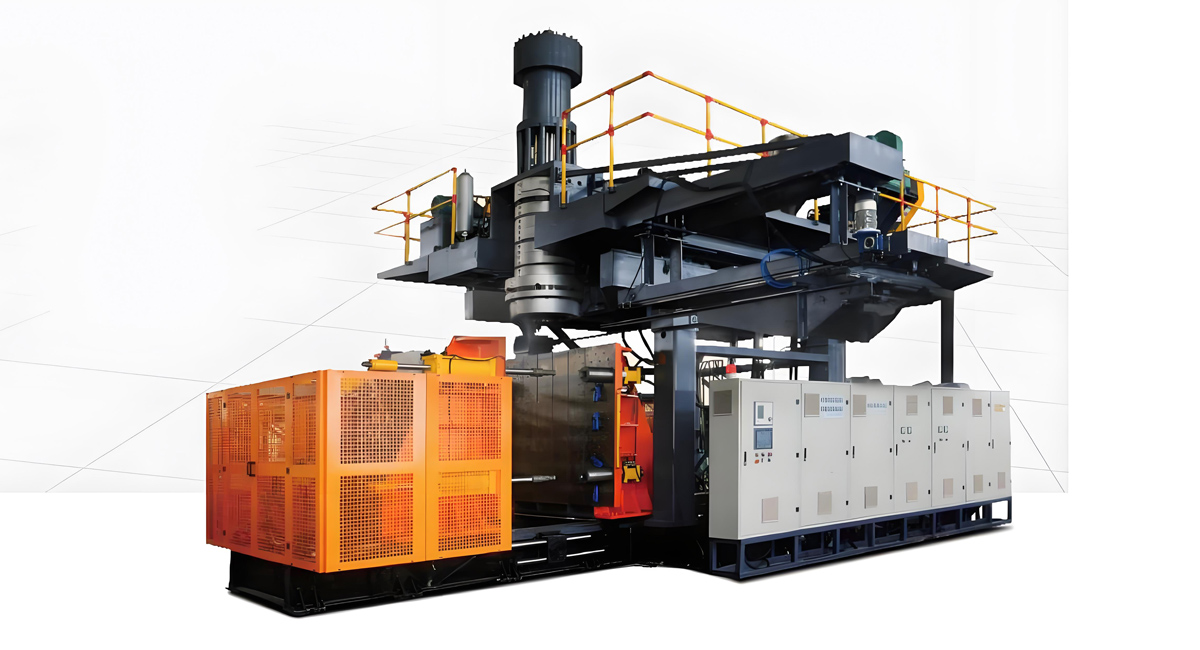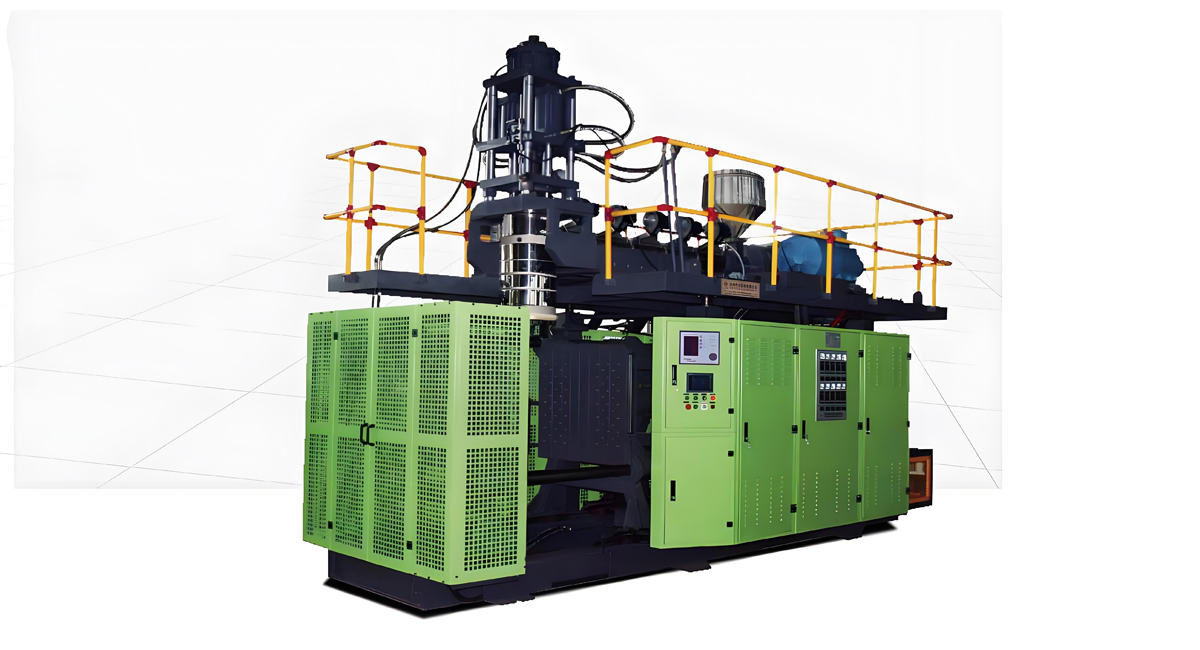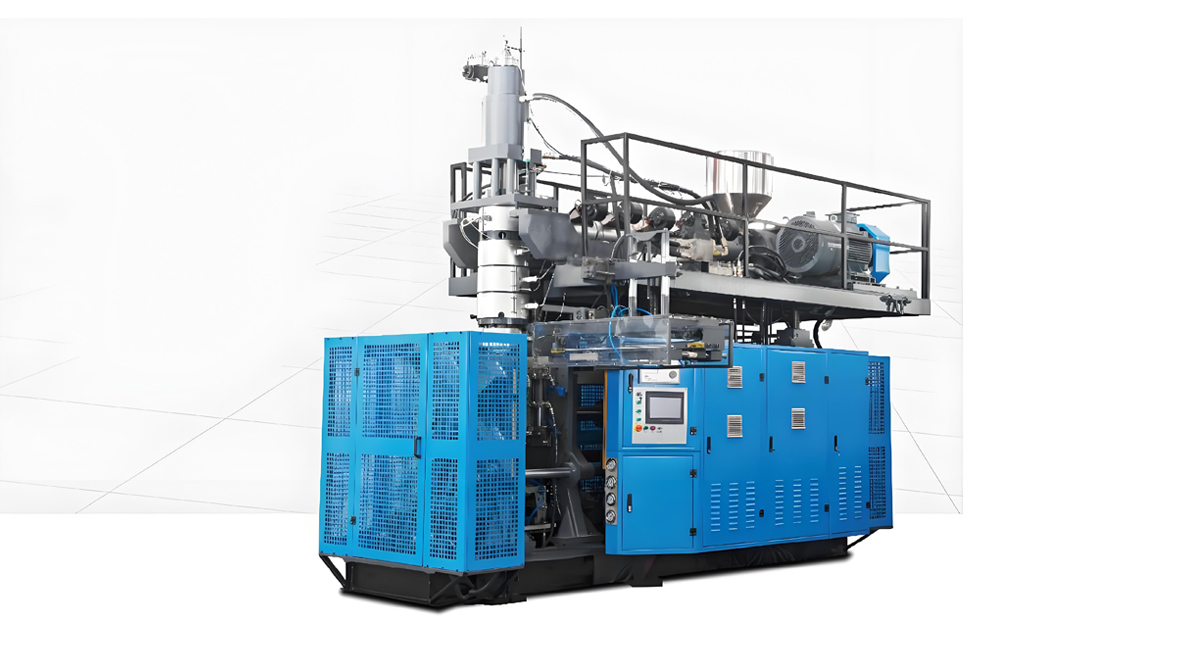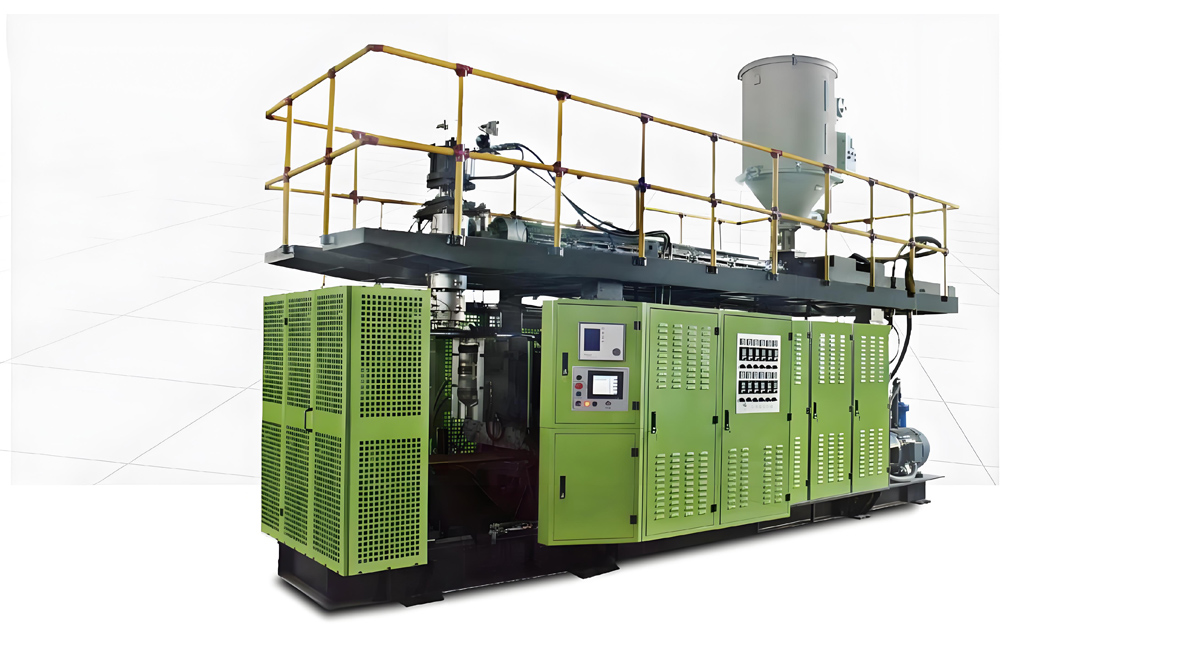

Choosing your first EBM machine is not a shopping decision, it is an engineering decision that happens to involve a purchase order. Extrusion blow molding is one of the most accessible entry points into plastic manufacturing because a single machine, one mold set and a handful of auxiliaries can turn resin pellets into a finished, sellable container in under twenty seconds. That accessibility is also the trap: the equipment looks similar across catalogs, the volume ranges overlap, and a specification that is wrong by one screw size or one clamping class will quietly cap your output for the next decade.
This guide walks a first-time producer through the complete decision chain in the order a working engineer would use it: target product, volume envelope, material, required output, machine architecture, tooling, auxiliaries, and finally the plant itself, which is the step most new entrants discover only after the crates arrive. Every recommendation here is written in specifications rather than slogans, because the numbers on the data sheet are what determine whether your line runs 300 or 900 containers per hour.
Apollo, a Wanplas factory located in Zhangjiagang near Shanghai, has built automatic extrusion blow molding machines for more than twenty years from an 8,000 square meter plant, with ten machine series covering over eighty models and more than 4,000 machines running in over 90 countries. That installed base spans exactly the situation this article describes: a first machine, a small team, a single product family, and the need to be profitable before the second machine is justified. The sections below combine that field experience with standard blow molding engineering practice so you can specify your first line with confidence.
The Seven-Step Decision Chain for Your First Machine
Every successful first EBM project follows the same sequence, and every failed one skipped a step. The chain runs target product, volume range, material, required output, machine architecture, tooling and auxiliaries, then plant and power. Each step constrains the next, which is why working backward from a machine catalog produces expensive mismatches.
The most common failure pattern looks like this: a new producer sees an attractive machine specification, orders it, and only afterward discovers that the container their customer wants has a handle, which needs a longer clamping stroke and a deflashing station, or that the required 1,200 pieces per hour is impossible with a two-cavity head at an 18 second cycle. Neither problem is a machine defect. Both are sequencing errors.
Here is what each link in the chain actually decides:
- Target product. Geometry, handle or no handle, neck finish, label area, top load requirement, and whether the container holds a regulated product. This decides mold complexity and deflashing needs.
- Volume range. The nominal capacity in milliliters or liters, plus the brimful volume. This decides the parison length, the die head size and the clamping stroke.
- Material. HDPE, PP, HMWHDPE, PETG or PVC. This decides screw geometry, compression ratio, barrel temperature profile and whether you need a drying system.
- Required output. Pieces per hour under realistic utilization, not theoretical peak. This decides cavity count and station count.
- Machine architecture. Single or double station, continuous extrusion or accumulator, hydraulic or fully electric. This decides the footprint, installed power and cycle behavior.
- Tooling and auxiliaries. Molds, chiller, compressor, granulator, loader, leak tester. This decides how much of your theoretical output you actually convert into sellable pieces.
- Plant and power. Three-phase supply capacity, cooling water flow, compressed air volume, floor area, ceiling height and floor loading. This decides your installation schedule.
Follow that order and the machine specification writes itself. The remainder of this guide expands each step with the numbers you need to fill in the blanks.
What an EBM Machine Actually Does and Why It Suits New Producers
Extrusion blow molding forms a hollow container by extruding a molten tube of plastic called a parison, closing a two-part mold around it, and inflating it with compressed air against the cooled cavity walls. The whole cycle is continuous, mechanically simple, and produces a finished container without any secondary forming step, which is why it is the lowest-complexity route into container manufacturing.
The cycle has six stages, and understanding them explains most of what appears on a specification sheet:
- Plasticizing. The single-screw extruder melts and homogenizes resin in the barrel. Screw diameter and L/D ratio set the plasticizing rate in kilograms per hour, which is the ceiling on everything downstream.
- Parison formation. Melt flows through the die head and exits between the die and mandrel as a hollow tube. A parison programmer varies the mandrel gap during extrusion so wall thickness is distributed where the container needs it.
- Clamping. The mold closes around the parison, pinching it shut at the bottom and at the neck. Clamping force must hold the mold shut against internal blowing pressure and must produce a clean pinch-off weld.
- Blowing. Compressed air at 0.6 to 1.0 MPa inflates the parison against the cavity. Air entry is through a blow pin at the neck or a blow needle in the body.
- Cooling. Circulating chilled water through the mold removes heat until the part is dimensionally stable. Cooling normally consumes 50 to 70 percent of the total cycle, which is why mold cooling design matters more than most first-time buyers expect.
- Ejection and deflashing. The mold opens, the part is removed, and flash from the pinch-off and tail is trimmed, either in-mold, on a separate deflashing unit, or manually on very small operations.
Three characteristics make this process attractive for a new business. First, tooling cost per container is low compared with injection processes, because a blow mold has no core, no runner system and no ejection mechanism. Second, the process handles a wide range of container geometries, including handled jerricans and asymmetric shapes that injection blow molding cannot produce. Third, process flash is fully recyclable in-line, so a beside-the-press granulator returns pinch-off waste directly to the hopper, which keeps effective material yield high.
The limitations are equally worth knowing before you commit. Neck finish accuracy is lower than injection blow molding, so cosmetic pharmaceutical vials and very tight thread tolerances belong to a different process. Wall thickness control depends on parison programming rather than a fixed cavity gap, which means operator skill and programmer resolution both influence part weight. And thick, heavy containers above roughly 30 L require accumulator head technology, which changes the machine class entirely.
Step 1: Lock the Product Envelope Before Anything Else
The single most useful document in an EBM project is a one-page product envelope that fixes container volume, height, maximum diameter, neck finish, target part weight and required output. Until those six numbers exist, no machine can be specified honestly, and any quotation you receive is a guess dressed as a proposal.
Start with brimful volume rather than nominal volume, because the mold cavity is built to brimful. A container labeled 1 L typically has a brimful volume of 1,050 to 1,120 ml depending on headspace requirements. Next, fix the maximum container height including the neck, because that plus the pinch-off tail determines the required parison length, and parison length determines the clamping stroke and the die head position.
Part weight deserves particular attention because it is your dominant recurring cost. A 1 L HDPE detergent bottle can be produced anywhere from 38 g to 62 g depending on wall thickness distribution, and the difference between those two numbers, repeated across a year of production, dwarfs almost every other operating variable. This is precisely why parison programming resolution is a specification worth paying for rather than a feature to trim.
The table below maps common first products to the machine architecture that fits them. Use it as a first filter, then confirm with a full specification review.
| Target Product | Typical Volume | Material | Recommended Architecture | Typical Cavities | Cycle Time |
|---|---|---|---|---|---|
| Cosmetic and personal care bottles | 100 ml to 500 ml | HDPE, PP | Double station, continuous extrusion | 4 to 6 | 8 to 14 s |
| Detergent and daily chemical bottles | 500 ml to 2 L | HDPE | Double station, continuous extrusion | 2 to 4 | 12 to 20 s |
| Edible oil and sauce bottles | 1 L to 5 L | HDPE, PP | Double station, continuous extrusion | 2 to 4 | 16 to 26 s |
| Lubricant and agrochemical jerricans | 4 L to 25 L | HDPE, HMWHDPE | Single station, continuous or accumulator | 1 to 2 | 35 to 75 s |
| Chemical drums with handles | 10 L to 30 L | HMWHDPE | Single station, accumulator head | 1 | 55 to 95 s |
| Automotive ducts and reservoirs | 0.5 L to 8 L | HDPE, PP, PA | Single or double station, programmed parison | 1 to 2 | 25 to 60 s |
| Toys and hollow leisure articles | 0.2 L to 20 L | HDPE, PP, PVC | Single station, long stroke | 1 to 2 | 30 to 80 s |
| Pharmaceutical and medical containers | 30 ml to 1 L | HDPE, PP, PETG | Double station with clean configuration | 4 to 8 | 9 to 16 s |
Note how the same volume can appear under two architectures. A 5 L container made in high volume for a stable customer justifies a double station with two cavities; the same 5 L container made in short runs across many variants may be better served by a single station with faster mold changes. Order structure, not just container size, drives the decision.
Finally, define required output in realistic terms. Take your monthly order quantity, divide by the number of working days, divide by planned shift hours, then divide by an overall equipment effectiveness figure of 0.70 to 0.80 for a new operation. The result is the pieces-per-hour target your machine must hit while running normally, not at its best.
Step 2: Choose the Material Before You Choose the Machine
Material selection determines screw geometry, compression ratio, barrel temperature profile, drying requirements and even mold steel choice, so it belongs before machine selection rather than after it. For a first machine, the pragmatic recommendation is unambiguous: start with blow molding grade HDPE, learn the process, and add materials once wall thickness distribution and scrap rate are stable.
Blow molding grades are distinguished from injection grades primarily by melt strength. An injection grade with a melt flow rate of 8 to 20 g/10 min will sag out of the die head before the mold closes. A blow molding grade with an MFR of 0.3 to 1.0 g/10 min at 190 degrees C and 2.16 kg holds the parison stable long enough for a controlled cycle. That single parameter separates a workable material from an unusable one, and it is the first question to ask any resin supplier.
| Material | Typical MFR | Melt Temperature Range | Screw Compression Ratio | Drying Needed | Best-Fit First Products |
|---|---|---|---|---|---|
| HDPE blow molding grade | 0.3 to 1.0 g/10 min (190 C / 2.16 kg) | 170 to 200 C | 2.5 to 3.2 to 1 | No | Detergent, edible oil, cosmetic bottles |
| HMWHDPE | 0.03 to 0.35 g/10 min (high load) | 180 to 210 C | 2.2 to 2.8 to 1 | No | Jerricans, chemical drums, thick-wall parts |
| PP homopolymer | 0.3 to 1.5 g/10 min (230 C / 2.16 kg) | 190 to 230 C | 3.0 to 4.0 to 1 | No | Hot-fill sauce bottles, clear containers |
| PP copolymer | 0.4 to 2.0 g/10 min (230 C / 2.16 kg) | 190 to 225 C | 3.0 to 3.8 to 1 | No | Impact-resistant bottles, cold-chain packaging |
| PETG | Viscosity-graded, blow molding grade | 190 to 230 C | 2.5 to 3.0 to 1 | Yes, 65 to 70 C for 4 to 6 h | Clear cosmetic and personal care bottles |
| Rigid PVC | K value 57 to 60 | 165 to 185 C | 2.0 to 2.5 to 1 | Light drying only | Clear chemical and cosmetic bottles |
| PC and PA (specialty) | Grade-specific | 230 to 280 C | 2.5 to 3.0 to 1 | Yes, dew point controlled | Technical and automotive components |
Three material properties deserve more attention than they usually receive from new entrants.
Environmental stress crack resistance (ESCR) governs whether a container survives contact with surfactants, bleach or agrochemicals over its shelf life. A detergent bottle molded from a low-ESCR grade can pass every dimensional check at the factory and crack in a warehouse three months later. For daily chemical and agrochemical packaging, specify a grade with documented ESCR performance and validate with the relevant test method rather than assuming that all HDPE behaves the same way.
Density and stiffness trade against impact resistance. Higher density HDPE around 0.955 to 0.960 g/cm3 gives better top load and allows thinner walls; lower density around 0.950 g/cm3 gives better drop performance. For stackable jerricans, top load wins; for containers shipped loose over rough roads, drop performance wins.
Regrind tolerance matters because you will run flash back through the machine. HDPE tolerates 25 to 40 percent regrind with minimal property loss when the material is kept clean and the granulator is properly screened. PVC and PETG are far less forgiving, both because of thermal history and because of contamination sensitivity. If your business plan depends on high regrind usage, that is another reason to start on HDPE.
Food contact and pharmaceutical applications add a compliance layer. Confirm that your resin grade and any masterbatch carry the appropriate food contact declarations for your market, whether that means FDA 21 CFR 177.1520 for polyolefins, EU 10/2011 for the European market, or GB 4806 series requirements. The machine does not certify the package; the material, the process hygiene and the finished article testing do.
Step 3: Machine Architecture, Single Station Versus Double Station
Machine architecture is the decision with the largest effect on output per hour, and it is settled by two independent choices: how many clamping stations serve the extruder, and whether the parison is extruded continuously or accumulated and shot. Get these right and a modest screw produces impressive output; get them wrong and a large machine idles while the mold cools.
Single station versus double station
A single-station machine has one clamping unit under one die head. The extruder produces parison, the mold closes, blows, cools, opens and ejects, and the extruder must either idle or continue extruding into waste while the mold is occupied. Cooling dominates the cycle, so a single station running a 1 L bottle with a 15 second cycle leaves the extruder underused for most of that period.
A double-station machine places two clamping units on a shuttle or on opposite sides of a single die head. While station A cools, station B receives the next parison. The extruder runs continuously, plasticizing capacity is fully converted into product, and effective output typically rises 60 to 90 percent over a single station with the same screw. For containers below roughly 10 L, this is almost always the correct architecture for a business that intends to run more than one shift.
The tradeoff is footprint, mechanical complexity and a modestly higher acquisition index. A double station requires more floor width, two mold sets if you want both stations running the same product, and more careful synchronization. For a first machine dedicated to one high-volume product, the productivity gain almost always justifies it.
Continuous extrusion versus accumulator head
Continuous extrusion means melt flows through the die head without interruption, producing a hanging parison at a steady rate. It suits containers up to roughly 30 L where parison sag is manageable within the cycle. It is mechanically simpler, has fewer wear parts, and delivers better melt homogeneity because there is no residence time in a storage chamber.
An accumulator head stores melt in a chamber and then pushes it out rapidly through the die when the shot is called. This is essential for heavy, thick-wall parts where a slowly extruded parison would sag and thin out before the mold closes. Accumulator technology is what makes large drums and heavy technical parts possible, but it adds complexity, purge requirements and a longer learning curve, and it is generally not where a first-time producer should start unless the target product demands it.
| Architecture | Best Container Range | Relative Output | Footprint | Operating Complexity | Acquisition Index | Best For |
|---|---|---|---|---|---|---|
| Single station, continuous | 200 ml to 30 L | Baseline | Compact | Low | Low | Short runs, many variants, large single parts |
| Double station, continuous | 100 ml to 10 L | 1.6 to 1.9 times baseline | Wide | Low to medium | Medium | High-volume bottles, two-shift operation |
| Single station, accumulator | 10 L to 30 L and above | 0.7 to 1.0 times baseline | Tall, needs headroom | Medium to high | High | Thick-wall drums, technical parts |
| Double station, servo-driven | 100 ml to 10 L | 1.7 to 2.0 times baseline | Wide | Medium | Medium to high | Energy-conscious continuous production |
| Fully electric, double station | 200 ml to 20 L | 1.7 to 2.0 times baseline | Wide, clean | Medium | High | Clean production areas, high-tariff regions |
One practical note on growth planning. If your first product is a 1 L bottle but your second target is a 5 L jerrican, do not buy a machine sized exactly to 1 L. Specify a machine whose clamping stroke and die head capacity reach the larger container, then run the smaller product on it with a multi-cavity head. Buying twice within eighteen months is far more expensive than buying one size up at the start.
Step 4: Drive Technology, Hydraulic Versus Servo Versus Fully Electric
Drive technology decides energy consumption, repeatability, noise and workshop cleanliness. All three architectures produce good containers; they differ in what they cost to run and how tightly they repeat cycle after cycle. For a first machine the honest answer is that the right choice depends on shift pattern and electricity tariff, not on prestige.
Conventional hydraulic machines use a fixed-displacement pump running continuously, with valves directing flow to clamping, carriage and blow pin movements. They are robust, simple to service almost anywhere in the world, and tolerant of basic maintenance skills. Their weakness is that the pump consumes energy even during cooling, when no movement is required, so a large share of installed power is dissipated as heat into the oil and then into the chiller.
Servo-hydraulic machines replace the fixed pump drive with a servo motor that varies speed on demand. Flow is produced only when a movement is called, which typically cuts energy consumption by 25 to 40 percent versus a conventional hydraulic layout, lowers oil temperature, reduces chiller load and cuts noise noticeably. The mechanical layout is otherwise familiar, so maintenance skills transfer directly.
Fully electric machines replace hydraulics entirely with servo motors and ball screws for clamping, carriage and blow pin motion. Energy consumption typically falls 35 to 55 percent versus a conventional hydraulic machine of the same class. There is no hydraulic oil, therefore no oil leakage risk near food or pharmaceutical products, no oil changes, and no oil cooling load. Positioning repeatability improves because a servo axis holds position to a fraction of a millimeter regardless of oil temperature, which stabilizes part weight across a shift.
| Criterion | Conventional Hydraulic | Servo-Hydraulic | Fully Electric |
|---|---|---|---|
| Relative energy consumption | Baseline 100 | 60 to 75 | 45 to 65 |
| Acquisition index | Low | Medium | High |
| Cycle repeatability | Good, drifts with oil temperature | Very good | Excellent |
| Part weight variation across a shift | Typically 1.5 to 3 percent | Typically 1 to 2 percent | Typically 0.5 to 1.5 percent |
| Noise level | Highest | Reduced | Lowest |
| Oil contamination risk | Present | Present | None |
| Chiller load from drive heat | High | Medium | Low |
| Maintenance skill needed | Basic mechanical and hydraulic | Mechanical plus drive setup | Electrical and servo diagnostics |
| Best shift pattern for payback | One shift, intermittent | One to two shifts | Two to three shifts |
A simple decision rule works well for first-time buyers. If you will run a single shift with irregular loading and your local electricity tariff is low, a conventional hydraulic machine keeps the entry index low and the maintenance simple. If you have a confirmed two-shift order book, or you supply customers who audit your workshop for cleanliness, the fully electric route repays its higher acquisition index through energy, scrap and consistency within a predictable number of months.
One caution about energy claims in general. Energy savings are always stated against a baseline, and baselines differ. Ask for the comparison basis: same container, same cycle, same material, measured in kilowatt-hours per kilogram of product or per thousand pieces. A saving quoted as a percentage without a stated baseline is marketing, not engineering. Measured energy per thousand pieces is the number that appears in your operating accounts.
Step 5: Die Heads and Cavity Count, How Many Do You Really Need
Cavity count is the most direct lever on output per hour, and also the most frequently over-specified item on a first machine. Every additional die head module adds plasticizing demand, clamping width, mold cost, cooling load and setup time. The correct number is the smallest one that meets your realistic hourly target with acceptable margin.
The arithmetic is straightforward. Pieces per hour equals 3,600 divided by cycle time in seconds, multiplied by cavity count, multiplied by your effectiveness factor. A four-cavity head running a 12 second cycle at 0.78 effectiveness produces 3,600 divided by 12, times 4, times 0.78, which is 936 pieces per hour. The same head at an 18 second cycle produces 624 pieces per hour. Cycle time, not cavity count alone, sets your capacity.
The second constraint is plasticizing. Multiply part weight plus flash weight by pieces per hour to get required throughput in kilograms per hour. A 45 g bottle carrying 18 g of flash consumes 63 g of melt per cavity per cycle. At 936 pieces per hour that is roughly 59 kg/h, which a 55 mm to 65 mm screw handles comfortably. Push to eight cavities at the same cycle and the requirement passes 110 kg/h, which moves you into a larger screw and a larger machine class.
| Cavity Count | Typical Container Size | Required Throughput Band | Typical Screw Diameter | Mold Cost Index | Setup and Changeover Effort |
|---|---|---|---|---|---|
| 1 cavity | 5 L to 30 L | 25 to 90 kg/h | 55 to 90 mm | 100 | Low |
| 2 cavities | 1 L to 5 L | 40 to 100 kg/h | 55 to 75 mm | 165 to 185 | Low to medium |
| 4 cavities | 250 ml to 2 L | 55 to 130 kg/h | 65 to 80 mm | 290 to 330 | Medium |
| 6 cavities | 100 ml to 1 L | 70 to 150 kg/h | 70 to 90 mm | 420 to 480 | Medium to high |
| 8 cavities | 30 ml to 500 ml | 80 to 170 kg/h | 75 to 90 mm | 550 to 620 | High |
Mold cost index in the table above is relative, with a single-cavity mold set as 100 points. Notice that cavity count does not scale mold cost linearly, because the mold base, cooling manifolds and mounting hardware are shared. It does, however, scale changeover effort and the consequence of a single cavity running out of specification: with eight cavities, one bad cavity means 12.5 percent of output is rejected or sorted.
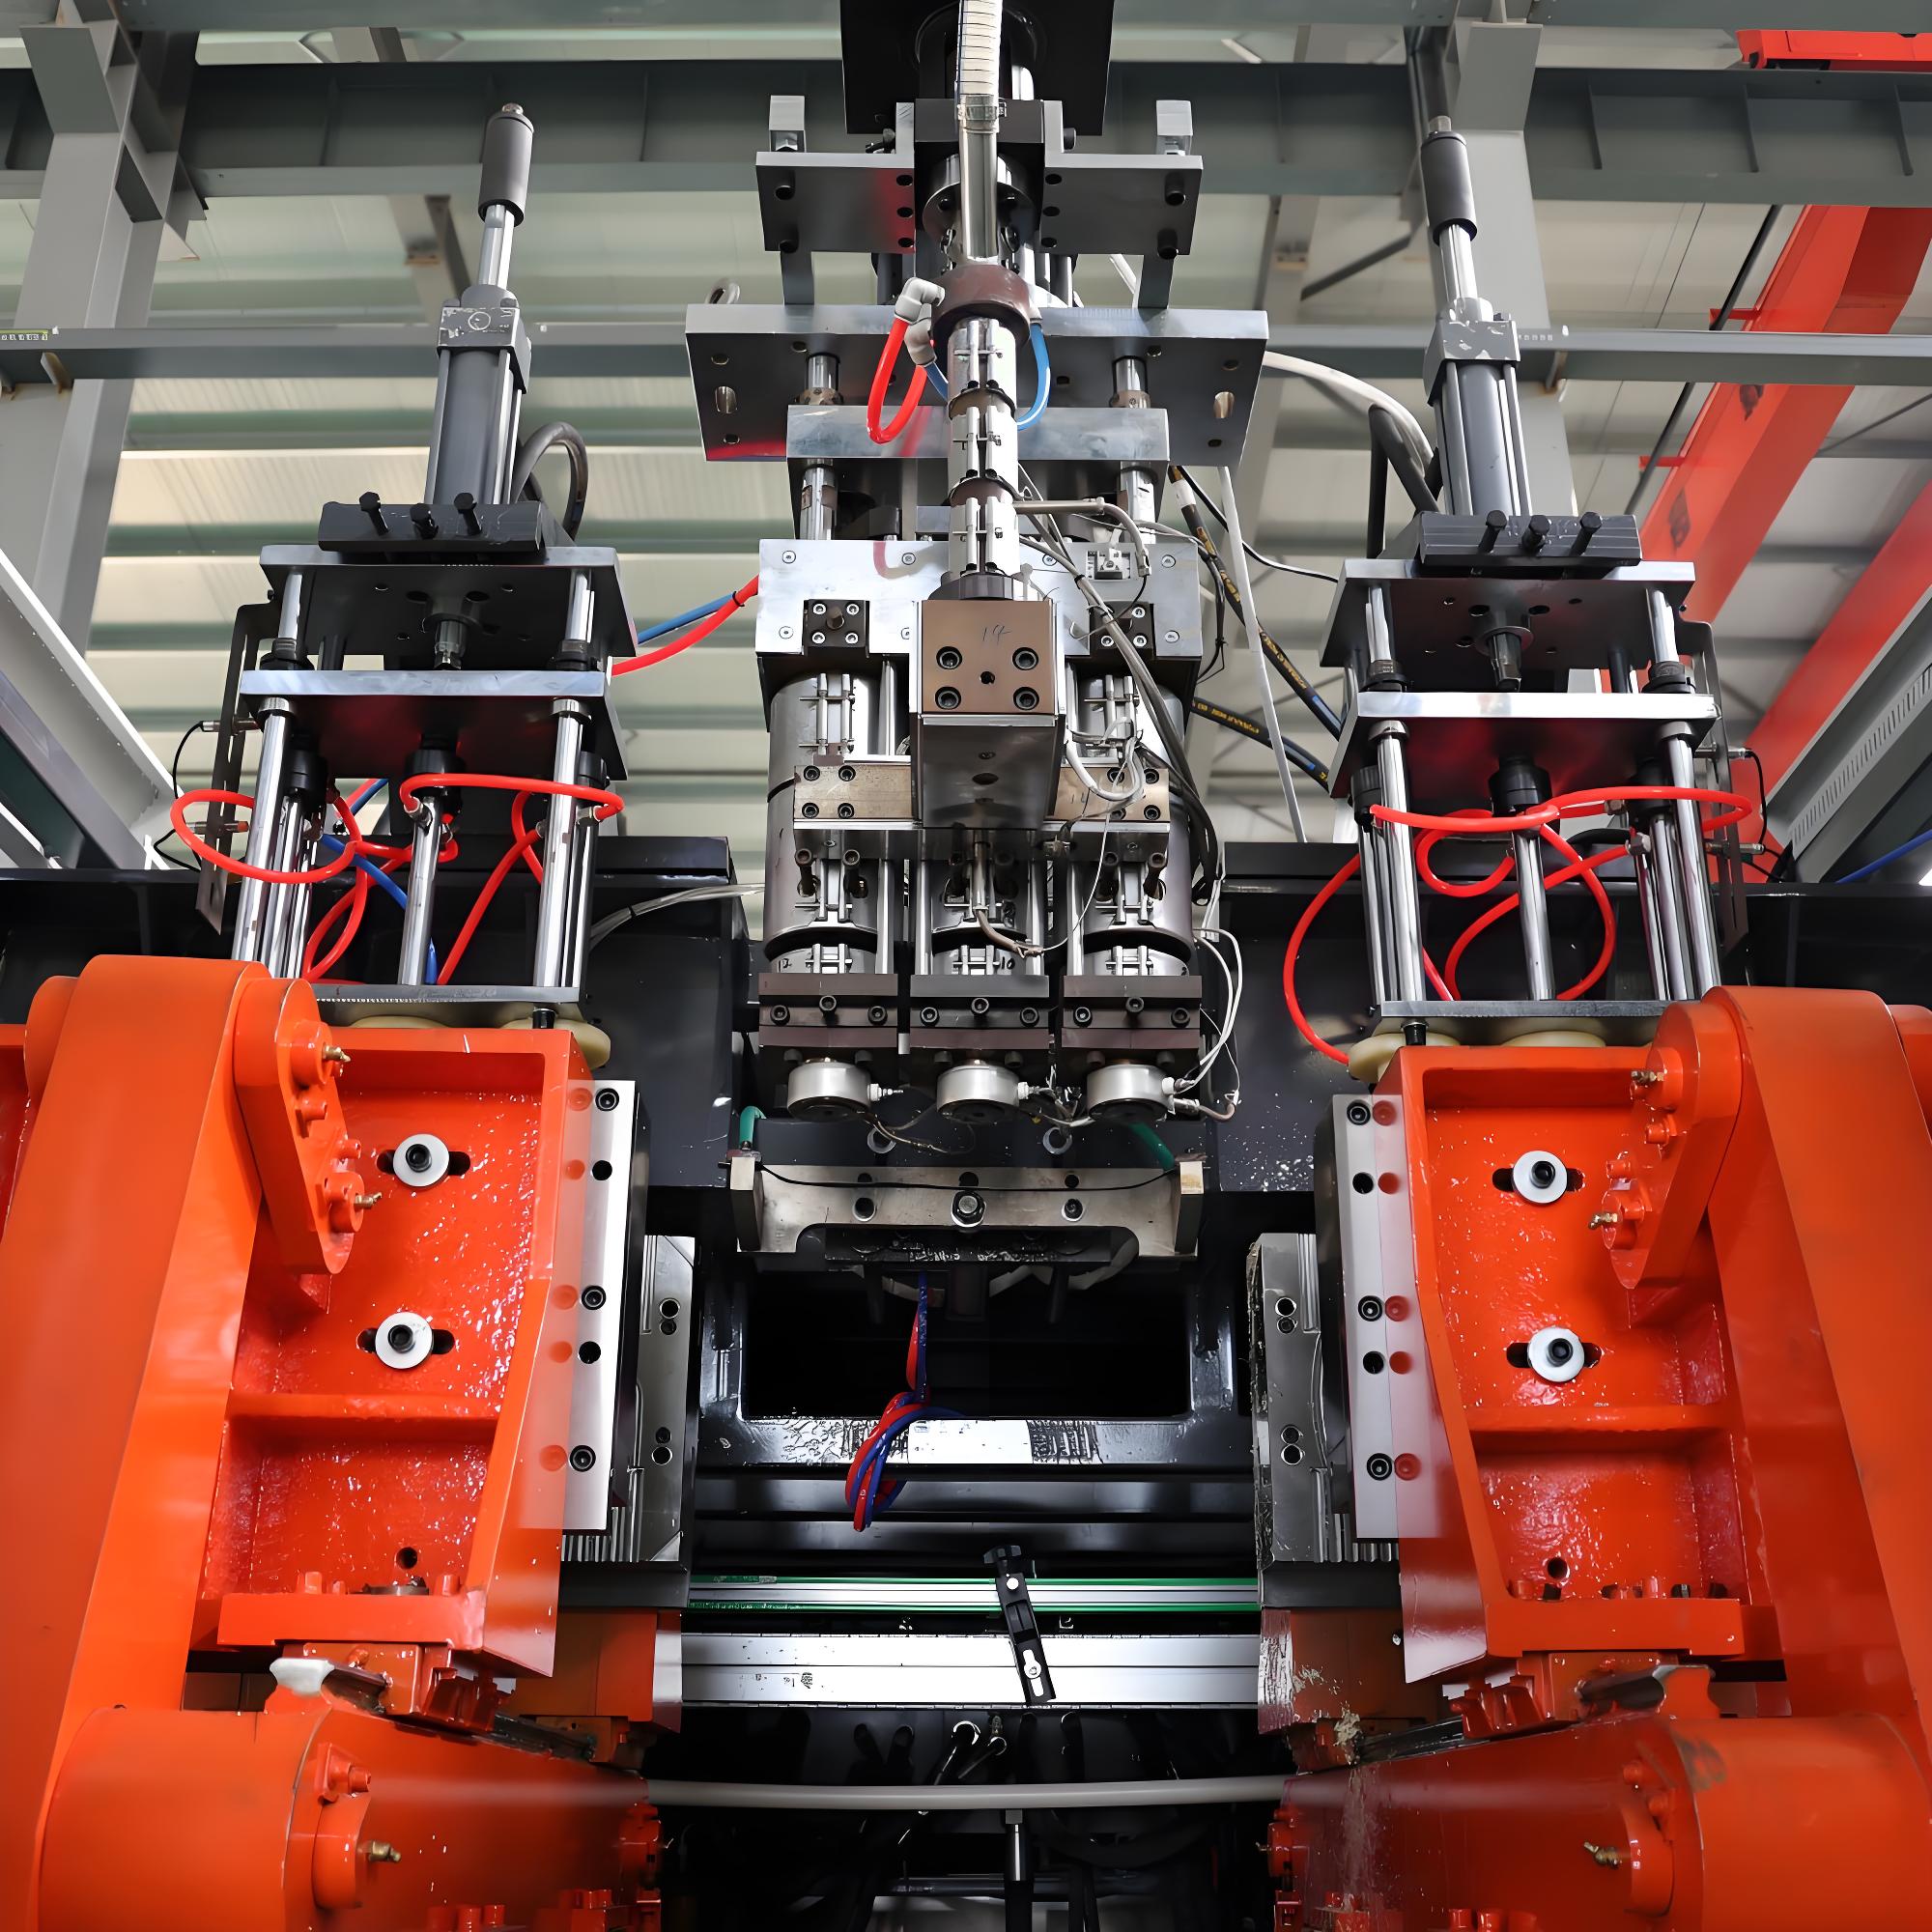
There is also a quality dimension. Balancing melt distribution across six or eight die head modules requires careful head design and disciplined temperature control; imbalance shows up as weight variation between cavities. For a first machine, two or four cavities is the sweet spot for most container businesses. It delivers meaningful output, keeps balancing straightforward, and leaves room to add a larger head later if demand justifies it.
A related question is whether to buy a spare die head or spare mandrel and die set at the time of order. The answer is usually yes for the sizes you expect to run most, because tooling ordered later arrives later, and a machine waiting for a die set is producing nothing. Tooling ordered with the machine also gets validated during the factory acceptance run, which converts a shipping item into a proven item.
Step 6: Reading the Specification Sheet Correctly
An EBM specification sheet contains perhaps forty numbers, of which about eight decide whether the machine fits your business. Learning to read those eight quickly is the most transferable skill in this entire process, because it lets you compare proposals on engineering grounds rather than on presentation quality.
Screw diameter and L/D ratio
Screw diameter sets maximum plasticizing rate. As a working guide for HDPE, a 45 mm screw delivers roughly 30 to 45 kg/h, a 55 mm screw 50 to 70 kg/h, a 65 mm screw 70 to 100 kg/h, a 75 mm screw 100 to 140 kg/h and a 90 mm screw 150 to 200 kg/h. Actual values depend on screw geometry, barrel temperature profile and material grade, so treat these as sizing bands rather than guarantees.
The L/D ratio, expressed as length divided by diameter, is typically 24 to 28 to 1 for blow molding. A longer L/D provides more melting length and better homogeneity, which matters when running regrind or color masterbatch. A shorter L/D reduces residence time, which matters for heat-sensitive materials such as PVC. If you plan to run 30 percent or more regrind, favor the longer end of the range.
Compression ratio and screw design
Compression ratio is the ratio of channel depth in the feed zone to the channel depth in the metering zone. HDPE runs well at 2.5 to 3.2 to 1; PP prefers 3.0 to 4.0 to 1; rigid PVC needs a low-shear design at 2.0 to 2.5 to 1 with no dead spots, because degraded PVC releases corrosive products that attack both barrel and screw. A general-purpose polyolefin screw handles PE and PP across the board, but running PVC on that same screw is a genuine mistake rather than a compromise.
Clamping force and clamping stroke
Clamping force must resist internal blowing pressure acting on the projected area of the part, with margin for a clean pinch-off. Entry machines for containers up to 5 L generally fall in the 3 to 12 ton band; machines for 10 L to 30 L containers sit in the 12 to 30 ton band. Clamping stroke, often overlooked, must accommodate container diameter plus mold opening clearance. A container that fits the force rating but not the stroke simply cannot be produced on that machine.
Installed power versus actual consumption
Installed power on an entry line ranges from about 15 kW for a compact single station up to 75 kW for a large multi-cavity double station including heaters, drive and integrated auxiliaries. Actual consumption is typically 45 to 65 percent of installed power in steady production, because barrel heaters cycle and drives load intermittently. Size your electrical supply on installed power with margin; estimate your energy behavior on measured consumption.
| Specification | Entry Range | Mid Range | What It Controls | Common Mistake |
|---|---|---|---|---|
| Screw diameter | 45 to 55 mm | 65 to 90 mm | Plasticizing rate, maximum output | Sizing for the current order, not next year |
| L/D ratio | 24 to 26 to 1 | 26 to 28 to 1 | Melt homogeneity, regrind tolerance | Ignoring it when planning regrind use |
| Compression ratio | 2.5 to 3.0 to 1 | 2.8 to 3.5 to 1 | Material compatibility, melt quality | One screw for polyolefins and PVC |
| Clamping force | 3 to 12 tons | 12 to 30 tons | Pinch-off quality, flash control | Confusing force with stroke |
| Clamping stroke | 150 to 300 mm | 300 to 600 mm | Maximum container diameter | Not checking it against handled containers |
| Die head modules | 1 to 2 | 4 to 6 | Pieces produced per cycle | Over-specifying cavities for the screw |
| Parison programming points | 24 to 32 | 64 to 100 | Wall distribution and part weight | Accepting the minimum offered |
| Installed power | 15 to 40 kW | 40 to 75 kW | Electrical supply sizing | Ordering supply at nameplate with no margin |
| Machine weight | 2.5 to 5 t | 5 to 12 t | Floor loading and rigging plan | No crane or forklift access planned |
One additional item is worth insisting on: a documented acceptance run at the factory using your resin and your mold, with recorded cycle time, part weight, weight variation between cavities and reject count over a continuous period. A specification sheet describes potential. A witnessed run describes reality, and it is far easier to correct a die head balance issue before shipment than after installation.
Apollo ABLB Series: The Standard Entry Point
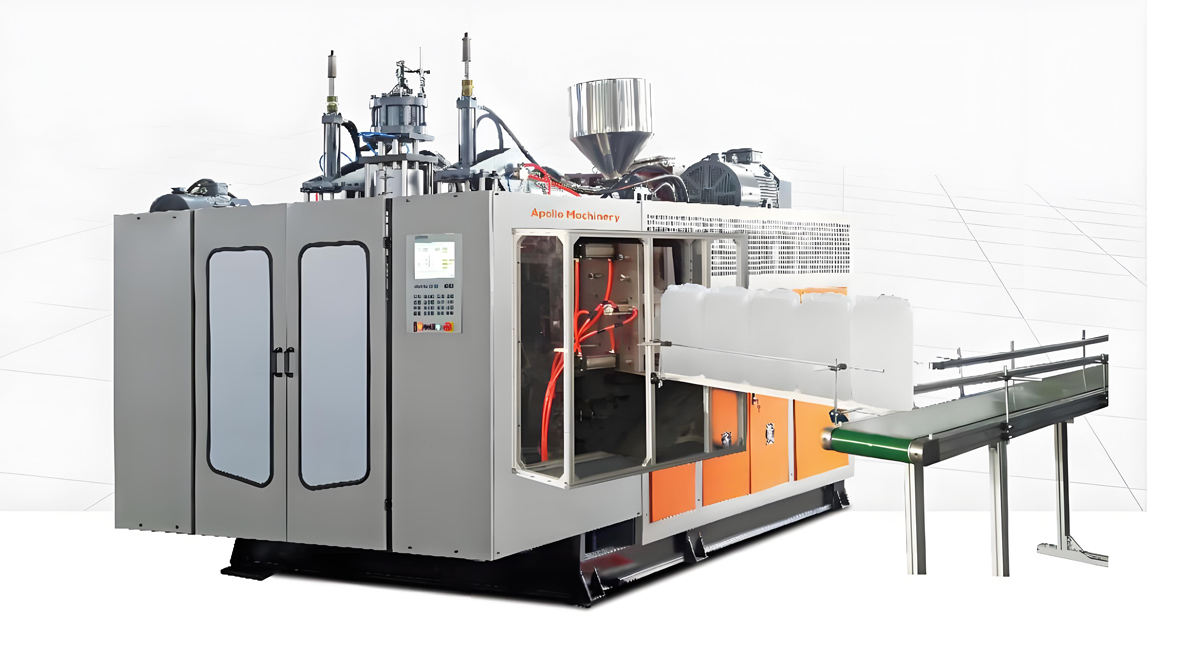
The Apollo ABLB series covers containers from 200 ML to 20 L across eight machine types, and it is the series most first-time producers end up specifying, because that volume band contains the overwhelming majority of commercially viable starter products. Apollo, a Wanplas factory, builds these as automatic extrusion blow molding machines configured around the customer container program rather than sold as fixed packages.
Within the series, ABLB 55 is the configuration built for the 2 L to 3 L range, which is the workhorse size for detergent, edible oil, lubricant and agricultural chemical packaging. It is a useful reference point because it sits exactly at the boundary where double-station architecture stops being optional for a business that wants meaningful throughput from a single machine.
The table below summarizes typical configuration bands within the ABLB series. Final specifications are confirmed per project, because screw, die head and clamping selections depend on container geometry, material and target cycle.
| ABLB Configuration Band | Container Volume | Typical Stations | Screw Diameter | L/D Ratio | Die Head Modules | Indicative Cycle |
|---|---|---|---|---|---|---|
| Small container configuration | 200 ML to 1 L | Double station | 50 to 65 mm | 24 to 28 to 1 | 2 to 6 | 8 to 16 s |
| ABLB 55 configuration | 2 L to 3 L | Single or double station | 55 to 70 mm | 24 to 28 to 1 | 1 to 4 | 16 to 26 s |
| Mid container configuration | 3 L to 5 L | Double station | 65 to 80 mm | 24 to 28 to 1 | 1 to 2 | 22 to 34 s |
| Jerrican configuration | 5 L to 10 L | Single station | 70 to 90 mm | 24 to 28 to 1 | 1 to 2 | 35 to 60 s |
| Large container configuration | 10 L to 20 L | Single station | 80 to 90 mm | 24 to 28 to 1 | 1 | 55 to 90 s |
Several characteristics of the series matter specifically to a first-time buyer. Parison wall thickness programming is central to the machine concept, and it is the single most valuable tool for reducing part weight without sacrificing top load or drop performance. Mold and voltage customization is standard practice, so machines are configured for the electrical supply and container program of the destination market rather than being adapted locally after arrival. And because the series spans 200 ML to 20 L with a common operating logic, an operator trained on one configuration transfers to another without relearning the machine.
Apollo processes PE, PP, PVC, PA, PC, ABS, PS, EVA, TPU and PETG across its machine range, which means the screw and barrel configuration can be matched to your intended material program at the order stage instead of being discovered as a limitation two years later. If your business plan starts with HDPE detergent bottles but includes clear PETG cosmetic containers in year two, state that during specification so the machine can be prepared for both.
Scale matters when you are buying your first machine from overseas, because it determines whether the supplier is still there when you need a spare part. Apollo operates from an 8,000 square meter plant in Zhangjiagang with more than twenty years of history in extrusion blow molding, an annual production capacity of about 100 machines, and more than 4,000 machines running in over 90 countries. That installed base is the practical reason the ABLB series is conservative where it should be conservative: the configurations that survive twenty years of field service are the ones that get repeated.
Apollo Fully Electric Series: When the Step Up Pays
The Apollo Fully Electric series covers the same 200 ML to 20 L container band as ABLB but replaces the hydraulic drive entirely with electric actuation. It is aimed at producers with high environmental or cleanliness requirements, at operations running long hours where energy dominates conversion cost, and at customers who need part weight to hold steady across a full shift.
Three benefits drive the decision. Energy consumption falls substantially because motion power is drawn only when an axis moves, rather than being circulated continuously through a hydraulic system. Contamination risk disappears together with the oil, which matters for pharmaceutical, medical and food contact production where oil mist near the mold area becomes an audit finding. And repeatability improves because servo axes do not drift with oil temperature, so the part weight validated in hour one is the part weight you still get in hour eight.
| Fully Electric Configuration Band | Container Volume | Typical Stations | Screw Diameter | Die Head Modules | Relative Energy Use | Best-Fit Sector |
|---|---|---|---|---|---|---|
| Compact clean configuration | 200 ML to 1 L | Double station | 50 to 65 mm | 2 to 6 | 45 to 60 versus hydraulic baseline 100 | Pharmaceutical, medical, cosmetics |
| Standard bottle configuration | 1 L to 5 L | Double station | 65 to 80 mm | 1 to 4 | 50 to 65 versus hydraulic baseline 100 | Food and beverage, daily chemical |
| Jerrican configuration | 5 L to 10 L | Single or double station | 70 to 90 mm | 1 to 2 | 55 to 70 versus hydraulic baseline 100 | Chemical industry, lubricants |
| Large container configuration | 10 L to 20 L | Single station | 80 to 90 mm | 1 | 55 to 70 versus hydraulic baseline 100 | Building material, agrochemicals |
When does the higher acquisition index make sense on a first machine? The pattern across the installed base is consistent. Fully electric pays back fastest where annual running hours are high, where electricity tariffs are high, and where the customer base includes buyers who audit the production environment. A single-shift operation in a low-tariff region making general-purpose containers is usually better served starting with the ABLB series and upgrading later as volume grows.
For producers whose growth path leads toward larger containers, the ABLD series extends from 20 L to 1500 L for heavy-duty applications. Most first-time buyers will not start there, but knowing the ladder exists is useful when planning a second machine, because staying within one machine family keeps operator training, spare parts and service relationships consolidated instead of fragmented across incompatible platforms.
Molds: The Component First-Time Buyers Underestimate
The mold determines part quality, cycle time and scrap rate more directly than any other single item in the line, yet it is the item new producers most often try to economize on. A cheap mold on a good machine produces mediocre containers slowly; a well-built mold on a modest machine produces good containers quickly. If the budget forces a compromise, protect the mold.
Blow molds are simpler than injection molds because there is no core, no runner and no ejection system, but they carry their own design discipline. Four elements decide whether a mold performs.
Cavity material and cooling
Most blow molds for polyolefin containers use high-conductivity aluminum alloy cavities, because heat extraction rate drives cycle time and aluminum conducts several times better than tool steel. Cooling channels should be 8 to 12 mm in diameter, positioned 15 to 25 mm from the cavity surface, and laid out to follow the container profile rather than drilled in convenient straight lines. Turbulent flow matters more than flow volume: water moving fast enough to break laminar flow removes far more heat than a larger, slower stream.
A practical benchmark: on a well-cooled 1 L HDPE bottle mold with correctly placed channels, cooling occupies roughly 55 to 65 percent of cycle time. On a poorly cooled mold of the same container, cooling can occupy 75 percent or more, which means a mold that cost less has permanently reduced your machine output by a fifth or more.
Pinch-off design
The pinch-off is where the mold halves cut and weld the parison. Pinch-off land width, angle and the flash relief pocket govern weld strength and how cleanly flash separates. Beryllium copper or hardened steel inserts are used at pinch-off edges because those edges take the wear. A weak bottom weld is the classic cause of leak failures in the field, and it usually traces back to pinch-off geometry or insufficient clamping force rather than to the resin.
Venting
Air trapped between the parison and the cavity wall shows up as poor surface definition, unclear embossed text and inconsistent wall contact. Venting is achieved with sandblasted cavity surfaces, vent slots at the parting line and vent pins in deep features. It costs almost nothing at the design stage and cannot be added easily later.
Neck and handle areas
Neck calibration determines whether closures seal reliably. If the container is a handled jerrican, the handle pinch area needs its own cooling and its own pinch-off treatment, since it is a thick, slow-cooling zone that often sets the whole cycle. Handled containers are also where deflashing complexity rises, because the handle pocket flash must be removed without damaging the container.
| Mold Element | Recommended Practice | Effect If Neglected | Priority for a First Mold |
|---|---|---|---|
| Cavity material | High-conductivity aluminum alloy for polyolefins | Longer cooling, lower output | Essential |
| Cooling channel diameter | 8 to 12 mm, profile-following layout | Uneven shrinkage, warpage | Essential |
| Channel distance from cavity | 15 to 25 mm | Hot spots, surface marking | Essential |
| Coolant flow regime | Turbulent, verified by flow rate check | Cycle time 10 to 25 percent longer | Essential |
| Pinch-off inserts | Beryllium copper or hardened steel | Weld failures, edge wear, leaks | Essential |
| Venting | Sandblasted surface plus parting line vents | Poor detail, trapped air marks | Essential |
| Neck calibration | Calibrated blow pin with sizing ring | Closure sealing failures | Essential for liquids |
| Handle pocket cooling | Dedicated circuit for handled containers | Cycle set by the slowest zone | Essential for jerricans |
| Date and cavity marking | Interchangeable inserts | Traceability gaps in complaints | Recommended |
| Quick-change mounting | Standardized clamping plates | Long changeovers, lost hours | Recommended |
Order molds with the machine wherever possible. When machine and mold come from the same engineering conversation, the mold mounting, cooling connections, blow pin geometry and clamping stroke are verified together during the acceptance run rather than negotiated between two parties after installation. Apollo supplies mold customization as part of standard machine customization, which is the practical reason first-time buyers avoid the classic mold-machine interface dispute.
Step 7: The Complete Auxiliary Equipment List
A blow molding machine on its own produces nothing. It requires cooling, compressed air, material handling and scrap recovery before it can run a single continuous shift, and those auxiliaries typically represent 25 to 45 percent of total line investment. New producers who budget only for the machine discover this at the worst possible time, usually the week the machine arrives.
Here is the complete minimum viable line, followed by the equipment that becomes necessary as you grow.
| Equipment | Function | Typical Entry Sizing | Necessity | Investment Index Share |
|---|---|---|---|---|
| Blow molds | Forms the container | 1 to 4 cavities per product | Essential | 12 to 25 points |
| Water chiller | Cools molds and hydraulic oil | 8 to 20 kW cooling capacity | Essential | 6 to 12 points |
| Cooling water pump and manifold | Distributes coolant to mold circuits | 2 to 6 m3/h, 0.25 to 0.4 MPa | Essential | 1 to 3 points |
| Air compressor | Supplies blowing and pneumatic air | 0.8 to 1.5 m3/min at 0.8 to 1.0 MPa | Essential | 5 to 10 points |
| Air dryer and filtration | Removes moisture and oil from blowing air | Matched to compressor flow | Essential | 1 to 3 points |
| Beside-the-press granulator | Regrinds flash for immediate reuse | 3 to 7.5 kW, 30 to 80 kg/h | Essential | 3 to 6 points |
| Vacuum hopper loader | Conveys resin and regrind to the hopper | 300 to 800 kg/h, 0.75 to 1.5 kW | Essential | 1 to 3 points |
| Regrind and virgin blending unit | Meters regrind ratio consistently | Volumetric or gravimetric | Strongly recommended | 2 to 4 points |
| Deflashing unit | Removes tail and pinch-off flash | Matched to container geometry | Recommended | 3 to 7 points |
| Leak tester | Detects pinholes and weak welds | In-line or offline, per cavity | Essential for liquids | 4 to 9 points |
| Dehumidifying dryer | Dries hygroscopic materials | Only for PETG, PC, PA | Material dependent | 3 to 6 points |
| Conveyor and collection table | Moves finished containers to packing | 2 to 4 m belt | Recommended | 1 to 2 points |
| Cooling tower | Rejects heat from the chiller loop | Sized to chiller capacity | Climate dependent | 2 to 4 points |
| Printing or labeling | Decorates the container | Screen printing or labeler | Market dependent | 4 to 12 points |
Two auxiliaries deserve special comment because they are where new producers most often cut and most often regret it.
The chiller. Undersizing the chiller is the most common auxiliary mistake in the industry. Calculate the load properly: cooling a polyolefin melt from roughly 190 degrees C to a demolding temperature near 40 degrees C requires removing on the order of 600 to 650 kJ per kilogram. At 60 kg/h of throughput that is roughly 10 to 11 kW of process cooling, before adding hydraulic oil cooling on a hydraulic machine, which can add 30 to 50 percent more. Add margin for ambient temperature in summer and specify accordingly. An undersized chiller does not fail visibly; it simply extends every cycle for the life of the line.
The granulator. Flash represents 15 to 35 percent of shot weight depending on container geometry, so scrap recovery is not optional housekeeping, it is core material economics. Place the granulator beside the machine, screen the regrind, and control the regrind ratio deliberately rather than dumping whatever comes back into the hopper. Uncontrolled regrind ratio produces drifting part weight, which then produces drifting wall thickness, which is then blamed on the machine.
Factory Planning: Power, Water, Air and Floor Space
The most avoidable delays in a first plastics project are civil and utility related, not mechanical. Machines arrive on schedule and then wait weeks for a transformer upgrade, a compressed air line or a floor that can carry the load. Plan utilities in parallel with the machine order, not after it.
Electrical supply
Most industrial machines are supplied for three-phase power, typically 380 V at 50 Hz or 220 V and 440 V variants at 60 Hz depending on the destination market. Confirm your local voltage, frequency and phase configuration at the order stage, because voltage customization is straightforward before the machine is built and awkward afterward. Size the supply at roughly 1.3 to 1.5 times total installed power to cover starting currents and future auxiliaries. For an entry line whose machine, chiller, compressor and auxiliaries total 55 to 80 kW installed, a supply capacity around 100 kVA is a sensible planning figure.
Cooling water
Plan 2 to 6 cubic meters per hour of circulating chilled water for an entry line, delivered at roughly 0.25 to 0.4 MPa. Mold water is usually run between 8 and 15 degrees C for polyolefins, low enough to remove heat quickly but not so low that condensation forms on mold surfaces in humid climates. Hydraulic oil cooling normally runs on a separate, warmer circuit. Water treatment matters: scale in mold channels reduces heat transfer permanently, and a mold with fouled cooling behaves like a mold that was designed badly.
Compressed air
Blowing air is normally supplied at 0.8 to 1.0 MPa. Estimate consumption from container volume: each blow consumes roughly the container volume multiplied by the absolute pressure ratio, plus purge and pneumatic actuation. A four-cavity line producing 900 one-liter bottles per hour typically needs on the order of 0.8 to 1.5 cubic meters per minute of free air delivery, which corresponds to a compressor in the 7.5 to 15 kW class. Air must be dried and filtered, because moisture in blowing air marks container interiors and corrodes pneumatic components.
Floor space, height and loading
An entry line for containers up to 5 L typically occupies 45 to 70 square meters including the machine, chiller, compressor, granulator, material storage at machine side and operator walkways. Allow a clear width of at least 1.2 meters around the machine for maintenance access and mold changes. Ceiling height of 4.0 to 4.5 meters is comfortable for machines in the ABLB class; accumulator machines and larger container machines need more headroom and, importantly, crane or forklift access for die head and mold handling.
Floor loading is rarely a problem for entry machines weighing 2.5 to 5 tons on a standard industrial slab, but confirm the slab thickness and flatness. Machines are leveled during installation, and a floor that flexes changes clamping alignment over time.
| Utility or Facility Item | Entry Line Planning Value | Notes |
|---|---|---|
| Total installed power | 35 to 80 kW | Machine plus chiller, compressor, granulator, loader |
| Recommended supply capacity | Approximately 100 kVA | 1.3 to 1.5 times installed power |
| Voltage and frequency | Confirmed at order stage | Three-phase, market specific |
| Chilled water flow | 2 to 6 m3/h | 0.25 to 0.4 MPa at the manifold |
| Mold water temperature | 8 to 15 C | Adjust upward in humid climates |
| Compressed air pressure | 0.8 to 1.0 MPa | Dried and filtered |
| Compressed air flow | 0.8 to 1.5 m3/min | Scales with cavity count and volume |
| Machine and auxiliary floor area | 45 to 70 m2 | Excludes storage |
| Raw material storage | 15 to 30 m2 | Two to four weeks of resin |
| Finished goods storage | 60 to 150 m2 | Blown containers are bulky, plan generously |
| Ceiling height | 4.0 to 4.5 m minimum | More for accumulator machines |
| Machine weight | 2.5 to 8 t | Confirm rigging and access route |
| Ambient workshop temperature | Below 35 C preferred | Affects chiller performance |
Finished goods storage is the item that surprises almost every new blow molding business. Containers are mostly air by volume. A four-cavity line producing 900 one-liter bottles per hour generates roughly 7,200 bottles per shift, and even nested or bulk-packed, that consumes several cubic meters of space per shift. If your customer collects weekly rather than daily, size the warehouse for a week of production, not a day.
Investment Planning Without Guesswork: An Index Method
Currency figures age badly and vary by market, configuration and specification, so the useful way to plan a first EBM investment is with an index. Set the total investment for a baseline entry-level single-station machine, including its basic auxiliaries and one single-cavity mold, at 100 points. Every other configuration can then be expressed relative to that baseline, and the comparison stays valid regardless of where and when you buy.
| Line Configuration | Machine Index | Molds and Tooling Index | Auxiliaries Index | Total Investment Index | Relative Output Capability |
|---|---|---|---|---|---|
| Baseline: entry single station, 1 cavity, up to 5 L | 62 | 16 | 22 | 100 | 1.0 |
| Entry double station, 2 cavities, up to 2 L | 85 | 24 | 26 | 135 | 1.9 to 2.2 |
| Mid-range double station, 4 cavities, servo drive | 118 | 36 | 31 | 185 | 3.4 to 4.0 |
| Fully electric double station, 4 cavities | 152 | 36 | 29 | 217 | 3.5 to 4.1 |
| Single station with accumulator head, up to 30 L | 140 | 34 | 38 | 212 | 0.8 to 1.1 |
| Double station, 6 cavities, with deflashing and leak testing | 135 | 52 | 45 | 232 | 5.0 to 5.8 |
Read the table with output capability alongside investment index, because that ratio is the actual decision. The entry double station costs 35 percent more than the baseline and produces roughly twice as much. The six-cavity line costs 132 percent more and produces five times as much. In index terms, capacity gets cheaper as you scale, which is precisely why the machine that looks affordable in isolation is often the most expensive way to buy capacity.
The counterweight is utilization. Capacity you do not sell is capacity you financed for nothing. This is why the correct first machine is the one that matches your confirmed order book with a modest growth allowance, not the one with the best capacity-to-index ratio on paper.
Where the operating cost actually goes
Understanding conversion cost structure prevents the most common planning error, which is optimizing the wrong variable. For a typical HDPE container operation, the approximate split of unit conversion cost looks like this:
| Cost Element | Typical Share of Unit Cost | Main Lever | Realistic Improvement Potential |
|---|---|---|---|
| Resin, net of regrind recovery | 58 to 72 percent | Part weight via parison programming | 5 to 15 percent weight reduction |
| Energy | 12 to 18 percent | Drive technology, chiller sizing, insulation | 25 to 50 percent with electric drive |
| Direct labor | 8 to 14 percent | Automation of deflashing and packing | 30 to 50 percent with in-line handling |
| Mold and tooling amortization | 3 to 6 percent | Mold life and cavity utilization | Modest |
| Maintenance and spare parts | 2 to 5 percent | Preventive maintenance discipline | Significant if currently reactive |
| Quality losses and rework | 1 to 4 percent | Leak testing, process stability | Large in the first six months |
The lesson is blunt: resin dominates. A 10 percent part weight reduction achieved through better parison programming and a well-cooled mold delivers more improvement than any plausible saving elsewhere. That is why programming resolution, mold cooling quality and weight consistency are the specifications worth defending during negotiation, and why cutting them to reduce the entry index is usually a false economy.
Payback expressed in months, not currency
Payback depends on utilization far more than on purchase index. The table below expresses realistic bands in months for a well-specified entry line supplying a stable customer base, assuming normal scrap rates and no extraordinary market disruption.
| Capacity Utilization | Shift Pattern | Typical Payback Band | Dominant Risk |
|---|---|---|---|
| 50 percent | One shift, irregular orders | 26 to 38 months | Order volatility, idle capacity |
| 70 percent | One to two shifts, stable orders | 14 to 22 months | Scrap rate, part weight drift |
| 85 percent | Two to three shifts, contracted volume | 11 to 17 months | Unplanned downtime, spare parts lead time |
| 85 percent with high scrap | Two to three shifts, unstable process | 18 to 28 months | Process control, operator training |
Notice the last row. A highly utilized line running an unstable process pays back more slowly than a moderately utilized line running a stable one. Process discipline is an investment variable, not a soft factor, and it is the one that a first-time producer controls most directly through training and measurement.
Applications and End Products You Can Realistically Sell
Extrusion blow molding serves a broad set of industries, and Apollo machines are running in food and beverage, daily chemical products, chemical industry, building material, medical and pharmaceutical, automobile production, transportation, and cultural and sports applications. For a first machine, the question is not which markets exist but which ones you can enter with one machine, one or two mold sets, and a small team.
| Industry | Typical End Products | Volume Range | Material | Entry Difficulty | Key Requirement |
|---|---|---|---|---|---|
| Daily chemical | Detergent bottles, shampoo bottles, disinfectant containers | 200 ml to 5 L | HDPE | Low | ESCR performance, consistent neck finish |
| Food and beverage | Edible oil bottles, sauce bottles, dairy containers | 250 ml to 5 L | HDPE, PP | Medium | Food contact compliance, hygiene control |
| Chemical industry | Jerricans, agrochemical containers, solvent bottles | 1 L to 30 L | HDPE, HMWHDPE | Medium | Wall uniformity, leak testing, packaging approvals |
| Building material | Adhesive containers, coating and additive packaging | 500 ml to 20 L | HDPE | Low to medium | Chemical resistance, stackability |
| Medical and pharmaceutical | Solution bottles, tablet containers, sanitizer packaging | 30 ml to 1 L | HDPE, PP, PETG | High | Clean production environment, documented process control |
| Automobile production | Air ducts, washer reservoirs, expansion tanks | 0.5 L to 8 L | HDPE, PP, PA | High | Dimensional stability, part-specific validation |
| Transportation and logistics | Handled containers, closed-head packaging | 5 L to 30 L | HMWHDPE | Medium to high | Drop performance, top load strength |
| Cultural and sports | Hollow toys, sports bottles, leisure articles | 200 ml to 20 L | HDPE, PP, PVC | Low | Surface finish, color consistency |
For most first machines the realistic entry sequence runs daily chemical first, then building material and chemical industry packaging, then food contact packaging once hygiene and documentation are established, and only then medical or automotive work, which require validation discipline that a new operation typically does not yet have. That sequence is not about capability of the machine; it is about the maturity of the quality system around it.
One practical commercial note. Local blow molding has a structural advantage in every market, because shipping empty containers means shipping air. A container producer within delivery distance of a filler is competing against long-distance logistics economics that strongly favor local supply. That is the underlying reason a single-machine operation can be viable in a market that already has larger producers: the freight radius, not the factory, defines the competitive territory.
Requirement-to-Model Selection Guide
This table translates the decision chain into concrete recommendations from the Apollo lineup. Use it to shortlist a configuration, then confirm with a full specification review based on your drawing, your resin grade and your target cycle.
| Your Requirement | Container and Material | Output Target | Recommended Apollo Configuration | Suggested Cavities | Why |
|---|---|---|---|---|---|
| Starting a cosmetic and personal care bottle business | 100 ml to 500 ml, HDPE or PP | 1,500 to 3,000 pcs/h | ABLB series, small container configuration, double station | 4 to 6 | Short cycles and multi-cavity heads convert a modest screw into high piece output |
| Supplying a local detergent filler | 500 ml to 2 L, HDPE | 600 to 1,200 pcs/h | ABLB series, double station | 2 to 4 | Best balance of output, mold cost and changeover simplicity |
| Edible oil packaging for a regional brand | 1 L to 5 L, HDPE or PP | 400 to 900 pcs/h | ABLB 55 or mid container configuration, double station | 1 to 4 | Covers the entire commercial oil bottle range on one machine |
| Lubricant and agrochemical jerricans | 4 L to 10 L, HDPE | 150 to 350 pcs/h | ABLB series, jerrican configuration, single station | 1 to 2 | Longer parison and stroke, handled geometry support |
| Chemical containers up to 20 L | 10 L to 20 L, HMWHDPE | 60 to 150 pcs/h | ABLB series, large container configuration, single station | 1 | Heavier parison, higher clamping class, thick-wall capability |
| Pharmaceutical and medical containers | 30 ml to 1 L, HDPE, PP or PETG | 1,200 to 2,500 pcs/h | Fully Electric series, compact clean configuration | 4 to 6 | No hydraulic oil near product, tight weight repeatability |
| Two-shift or three-shift continuous production | 1 L to 5 L, HDPE | 700 to 1,400 pcs/h | Fully Electric series, standard bottle configuration | 2 to 4 | Energy savings compound with running hours |
| Clear cosmetic containers | 100 ml to 1 L, PETG or PVC | 800 to 1,800 pcs/h | ABLB or Fully Electric with material-specific screw | 2 to 6 | Screw geometry and temperature control matched to the resin |
| Technical and automotive hollow parts | 0.5 L to 8 L, HDPE, PP or PA | 80 to 300 pcs/h | ABLB series with high-resolution parison programming | 1 to 2 | Wall distribution control on complex geometry |
| Planned growth into large containers | 20 L and above | Project specific | ABLD series as a second machine | 1 | Keeps operator training and service within one platform |
If your requirement does not appear in this table, it usually means one of two things: either the container sits at a boundary between two configurations, or the output target and container size are mismatched. Both cases are resolved quickly by an engineering review of the container drawing and the target cycle rather than by choosing from a catalog.
Twelve Mistakes First-Time EBM Buyers Make
The failure modes in first EBM projects are remarkably consistent across markets and container types. Every one of the twelve below is avoidable at the specification stage, and most become expensive or impossible to fix after installation.
| Mistake | What Happens | Correct Approach | When It Must Be Fixed |
|---|---|---|---|
| 1. Too few parison programming points | Wall thickness cannot be tuned, part weight stays high permanently | Specify 64 to 100 points for anything beyond simple round bottles | At order |
| 2. Economizing on mold cooling design | Cycle time 15 to 25 percent longer for the life of the mold | Profile-following channels, verified turbulent flow | At mold design |
| 3. No in-line leak testing for liquid packaging | Field failures, customer claims, lost contracts | Budget leak testing as essential, not optional | Before first shipment |
| 4. Screw compression ratio mismatched to material | Poor melt quality, degradation, surface defects | Match screw design to the actual resin program | At order |
| 5. Ignoring ESCR for chemical contact | Containers crack weeks after filling | Specify documented ESCR grades and validate | At material selection |
| 6. Undersizing the chiller | Every cycle is longer, output permanently reduced | Calculate melt heat load plus oil cooling with margin | At line planning |
| 7. Uncontrolled regrind ratio | Part weight and wall thickness drift shift to shift | Meter regrind deliberately, screen and keep clean | At commissioning |
| 8. Sizing the machine only to the current order | Second purchase needed within 18 months | Specify stroke and die head with growth headroom | At order |
| 9. Confusing clamping force with clamping stroke | Container physically cannot be molded | Check both against container diameter and height | At order |
| 10. Ignoring finished goods storage | Production stops because there is nowhere to put output | Plan storage for a full delivery cycle | At factory planning |
| 11. No operator training plan | Scrap stays high, process never stabilizes | Train during installation and again after one month | At commissioning |
| 12. No spare parts on hand | A minor failure becomes a multi-week stoppage | Stock wear items and heaters from day one | With the machine order |
Three of these deserve expansion, because they cause the largest cumulative losses.
Programming resolution. Wall thickness programming is the mechanism by which you remove material from where the container does not need it. With 24 points on a container that has a shoulder, a label panel, a base and a handle, you cannot address each zone independently. With 100 points you can. Since resin is roughly 60 to 72 percent of unit cost, the programmer is not a convenience feature, it is the primary cost control tool on the machine.
Leak testing. Blow molded containers fail at the pinch-off weld, and a weld defect is often invisible. Producers who ship liquid packaging without leak testing eventually ship a defective batch, and in packaging, one leaking batch can end a customer relationship that took two years to build. Per-cavity leak testing also gives you diagnostic data, since failures concentrated in one cavity point directly at a specific pinch-off or cooling problem.
Spare parts. Machines fail on small parts: heater bands, thermocouples, seals, proximity switches, filters. Air freighting a heater band across the world costs many times the part value and still takes days. This is why Apollo includes USD 500 free parts per year in its service policy, and why a first-time producer should treat that allocation as a starting stock rather than an insurance policy to be claimed later.
Service, Spare Parts and Commissioning Support
For a first machine bought internationally, service structure is as important as the specification, because a new operation has no internal experience to fall back on when something behaves unexpectedly in week three. The support package should cover the machine from factory testing through installation to the first stable production month.
Apollo, a Wanplas factory, provides the following as part of its standard service commitment:
- Machine inspection at the factory. The machine is tested before shipment. Insist that the acceptance run uses your resin and your mold where possible, and that cycle time, part weight, weight variation and reject count are recorded.
- Machine customization. Molds and voltage are configured to your market and container program, so the machine arrives ready for your supply conditions rather than requiring local modification.
- Engineers on-site installation. Installation and commissioning support at your plant, which for a first-time producer is also the most valuable training window your operators will get.
- USD 500 free parts per year. An annual spare parts allocation that covers routine wear items. Use it to build a standing stock of heater bands, thermocouples and seals rather than waiting for a failure.
- Usage tracking and follow-up visits. Ongoing monitoring of machine usage status and periodic customer visits, which catches maintenance drift before it becomes downtime.
- Transportation guarantee. Coverage of the machine in transit, which matters when your first machine crosses an ocean and several handling points.
- Production capacity guarantee. A commitment that the delivered machine meets the agreed output for the agreed container, which converts a sales claim into a contractual specification.
- Quality standards guarantee. If quality standards are not met, the policy provides for refund plus 10 percent compensation, which aligns supplier risk with buyer risk.
- Open factory visits. Buyers are welcome at the Zhangjiagang plant to witness machine assembly and testing before shipment, which is the most direct form of due diligence available.
Beyond the formal policy, three practical habits separate operations that stabilize quickly from those that struggle. First, record process parameters for every product as a written setup sheet, so a good run can be reproduced rather than rediscovered. Second, weigh parts every shift and chart the results, because weight drift is the earliest warning of almost every process problem. Third, keep a maintenance log from day one; the machine will tell you what it needs, but only if someone is writing it down.
Wanplas, as the parent brand, extends this support model across its factory network under the commitment to warm global customers with China plastic machinery. For a producer whose plans later include upstream compounding, downstream filling or material recycling, matched equipment can be sourced within the Wanplas group so the production chain stays technically consistent and commercially coordinated.
Your Startup Checklist From Inquiry to First Shipment
The checklist below is the sequence used on well-run first projects. Work through it in order; each item unlocks the next, and skipping ahead is what creates the delays described earlier in this guide.
| Phase | Action Item | Output or Decision | Owner |
|---|---|---|---|
| Define | Confirm target container drawing, brimful volume, neck finish, target weight | Product envelope document | Buyer |
| Define | Confirm monthly order quantity and convert to pieces per hour at 0.70 to 0.80 effectiveness | Realistic output target | Buyer |
| Define | Select resin grade and confirm MFR, density and ESCR requirements | Material specification | Buyer with supplier |
| Specify | Choose station count, extrusion type and drive technology | Machine architecture | Joint review |
| Specify | Set cavity count against required throughput and screw capacity | Die head configuration | Joint review |
| Specify | Fix parison programming points, clamping force and stroke | Core specification | Joint review |
| Specify | Confirm voltage, frequency and phase for the destination | Electrical configuration | Buyer |
| Tooling | Approve mold design including cooling layout and pinch-off inserts | Mold drawing sign-off | Joint review |
| Plan | Size chiller, compressor, granulator, loader and leak tester | Auxiliary list | Buyer |
| Plan | Arrange power supply capacity, water loop and air line | Utility readiness date | Buyer |
| Plan | Confirm floor area, ceiling height, access route and rigging | Installation plan | Buyer |
| Plan | Reserve raw material and finished goods storage space | Warehouse layout | Buyer |
| Verify | Attend or receive documented factory acceptance run | Recorded cycle, weight, reject data | Joint |
| Verify | Agree spare parts list and initial stock | Spare parts package | Joint |
| Install | Position, level, connect utilities, commission with engineer support | Machine running | Joint |
| Install | Train operators on setup, parison programming and safety | Trained shift team | Joint |
| Stabilize | Run continuous production and chart part weight and reject rate | Stable process window | Buyer |
| Stabilize | Set preventive maintenance schedule and setup sheets | Maintenance system | Buyer |
A realistic expectation for the stabilization phase: the first week produces containers, the first month produces consistent containers, and the second month produces consistent containers at target weight and target cycle. Businesses that plan for that curve succeed. Businesses that promise a customer full contract volume in week two create a crisis that has nothing to do with the equipment.
Frequently Asked Questions
What is the best first EBM machine for a startup?
For most first-time producers the best starting point is a double-station continuous extrusion blow molding machine with a 55 mm to 65 mm screw, an L/D ratio of 24 to 28 to 1, clamping force in the 3 to 12 ton class and a two-cavity or four-cavity die head. That configuration covers containers from roughly 100 ml to 5 L, which is where the widest range of first orders sits. Within the Apollo lineup this maps to the ABLB series small container and ABLB 55 configurations. Buy the architecture that matches your confirmed order, then keep die head capacity in reserve for growth.
Should a beginner buy a single-station or double-station EBM machine?
Choose a double station when the container is under about 10 L and the cycle is short, because the second clamping station keeps the extruder producing parison while the first station cools, typically lifting output by 60 to 90 percent versus a single station with the same screw. Choose a single station when the container is large, when the parison is long and heavy, or when you need an accumulator head for thick-wall drums. Order structure matters too: many short runs across many variants favor the simpler single station.
How much floor space does a first blow molding line need?
Plan roughly 45 to 70 square meters for the machine, chiller, air compressor, granulator, side-of-machine material and operator walkways on an entry line making containers up to 5 L. Then add 15 to 30 square meters of resin storage and 60 to 150 square meters of finished goods storage. Finished goods space is what startups underestimate, because blown containers are mostly air and a single shift of four-cavity output fills several cubic meters of racking.
What material should I start with on a new EBM machine?
Blow molding grade HDPE with a melt flow rate of roughly 0.3 to 1.0 g/10 min at 190 degrees C and 2.16 kg is the standard learning material. It has a wide process window, good melt strength, strong environmental stress crack resistance in the right grades and forgiving parison behavior. Move to PP, PETG or PVC only after your team has stabilized wall thickness distribution and scrap rate on HDPE, and remember that PVC requires a dedicated low-shear screw.
How many wall thickness control points do I need on the parison programmer?
For simple cylindrical bottles under 2 L, 24 to 32 programming points are workable. For handled containers, oval sections, jerricans and technical parts, specify 64 to 100 points, because each geometry transition needs its own thickness value. Under-specifying programming points is one of the least reversible mistakes on a first machine, since it directly caps how much resin you can remove from the part, and resin is the majority of your unit cost.
How long does it take to recover the investment in a first EBM line?
Expressed in months rather than currency, a realistic band for a well-loaded entry line is 14 to 22 months at 70 percent capacity utilization with a stable customer base. At 50 percent utilization the same line typically stretches to 26 to 38 months, and at 85 percent utilization it can compress to 11 to 17 months. A line running at high utilization but with an unstable process and elevated scrap performs worse than a moderately loaded line running well, which is why operator training belongs in the investment plan.
Is a fully electric EBM machine worth it as a first purchase?
A fully electric machine typically consumes 35 to 55 percent less energy than a comparable conventional hydraulic machine, runs quieter, eliminates hydraulic oil contamination risk and holds part weight repeatability tighter across a shift. It carries a higher acquisition index, so it pays back fastest on two-shift or three-shift operation, in regions with high electricity tariffs, or when supplying pharmaceutical, medical or clean daily-chemical customers who audit the workshop. For single-shift general packaging in a low-tariff region, the ABLB series is usually the better first step.
What auxiliary equipment must I buy with the blow molding machine?
The minimum viable set is molds, a water chiller sized for melt cooling plus hydraulic oil cooling, an air compressor delivering 0.8 to 1.0 MPa with drying and filtration, a beside-the-press granulator for flash recovery, a vacuum hopper loader, and a leak tester if you sell liquid packaging. Deflashing units, conveyors, blending units and printing follow as volume grows. Auxiliaries typically account for 25 to 45 percent of total line investment, so budget them as part of the line from the beginning.
Can one EBM machine make several different container sizes?
Yes, within the machine volume envelope and clamping stroke. A machine specified for 200 ML to 5 L can run most sizes in that band by changing molds, die and mandrel sets and adjusting the parison program. Volume steps that cross the clamping force or die head capacity, such as jumping from 5 L to 30 L, require a different machine class rather than a tooling change. This is why the specification review should include not only your first container but the two you expect to add next.
How much scrap should a new blow molding operation expect?
Process flash from pinch-off and tail typically represents 15 to 35 percent of shot weight depending on container geometry, and it is normally reground and returned in-line, so it is recovered material rather than lost material. Reject rate from defects should settle below 2 to 3 percent after commissioning and operator training. If reject rate stays above 5 percent after the first month, investigate mold cooling, parison programming, regrind consistency and material drying before concluding that the machine is at fault.
Do I need a leak tester from day one?
If you sell containers for liquids, yes. Pinch-off weld defects are frequently invisible to the eye, and a leaking batch delivered to a filler causes downtime and product loss at the customer, which is a far more serious commercial event than an internal reject. Per-cavity leak testing also functions as a diagnostic tool, since a failure pattern concentrated in one cavity points directly at a specific mold or cooling problem.
What certifications should I plan for as a container producer?
It depends on your end market. Food contact packaging generally requires resin and article compliance under frameworks such as FDA 21 CFR 177.1520 for polyolefins, EU 10/2011 for the European market or the GB 4806 series, together with documented hygiene controls in your workshop. Chemical and dangerous goods packaging brings additional performance testing on the finished container. Machine-side, confirm the electrical and safety configuration required for your destination market at the order stage, since configuration is far easier before the machine is built.
Conclusion: Buy the Machine That Fits Your First Order
Choosing your first EBM machine comes down to a disciplined sequence rather than a clever purchase. Define the container precisely, choose the resin before the machine, pick the architecture that matches your realistic hourly output, size the screw and clamping to that architecture, specify programming resolution generously, protect the mold budget, plan the auxiliaries as part of the line, and prepare power, water, air and space in parallel with the machine order. Producers who follow that order start production on schedule; producers who start from a catalog usually do not.
The specifications that matter most are also the ones easiest to cut during negotiation, and that is not a coincidence. Parison programming points, mold cooling quality, chiller capacity and leak testing all reduce the entry index when removed and all reduce your competitiveness permanently. Resin is roughly 60 to 72 percent of unit conversion cost, so anything that lets you make a lighter, consistent, leak-free container pays back continuously for the life of the line.
Apollo, a Wanplas factory in Zhangjiagang, has spent more than twenty years building automatic extrusion blow molding machines from an 8,000 square meter plant, with ten series and over eighty models, more than 4,000 machines in service across over 90 countries, and a service package that includes factory testing, on-site installation by engineers, usage tracking, transportation and production capacity guarantees, a quality guarantee backed by refund plus 10 percent compensation, and USD 500 free parts per year. For a first machine, the ABLB series covering 200 ML to 20 L is the standard entry point; the Fully Electric series serves producers with higher cleanliness or energy priorities; and the ABLD series is there when growth takes you toward larger containers.
If you are planning your first line, send your container drawing, target volume, resin grade, required output and the voltage of your local supply. Apollo engineers will return a configuration proposal with machine architecture, screw and clamping selection, cavity count, mold concept, auxiliary list and utility requirements, so you can compare on engineering terms. Sample trial runs with your material and a witnessed acceptance run before shipment are both available, and buyers are welcome to visit the Zhangjiagang factory to see machine assembly and testing before making a decision.